How to Paint a Popcorn Ceiling Without Removal
Painting a popcorn ceiling without removal: prime it, spray or thick-nap roll one slow pass, and keep the texture intact. The mistakes that knock it loose, fixed.


Popcorn ceilings have a bad reputation, and most of it is earned. They collect dust, they yellow, and they fall apart if you look at them wrong. But ripping one out is a filthy, expensive, sometimes hazardous job. Painting it is the cheap fix that buys you another decade.
Here’s the rule that matters most. Don’t soak it, and don’t work it. Popcorn texture is glued to the drywall with a thin skin of joint compound or spray adhesive, and that skin softens the second it gets wet. Push a loaded roller back and forth over a wet patch and you’ll peel the texture off in clumps. One slow pass. That’s the whole game.
TL;DR
- Spot-prime stains only. Water rings and smoke yellowing get a shellac or oil blocker (Zinsser BIN). Water-based primer reactivates old stains and they bleed back through.
- Spray it if you can, roll it if you can’t. A sprayer never touches the texture, so nothing drags loose. If you roll, use a 3/4-inch to 1-inch nap and go light.
- One coat, one direction, one pass. Don’t rework a wet section. That’s what knocks the popcorn down.
- Buy more paint than the math says. Popcorn has 30 to 50 percent more surface area than smooth. A 12-by-12 ceiling wants 2 to 3 gallons.
- Suspect asbestos? Paint, don’t scrape. Pre-1980 texture may contain it. Painting locks it in. Disturbing it is the hazard.
What You’ll Get
A bright, clean ceiling with the popcorn texture still intact and not a flake on your floor. It won’t look new, because popcorn never looks new. It’ll look fresh and even, and the water stains will be gone for good.
Honest Take on Difficulty and Time
This is a medium job, not an easy one, and the reason is the overhead work. Painting a ceiling is hard on your neck and shoulders, and a popcorn ceiling adds spatter and the constant worry of dragging texture loose. A standard 12-by-12 bedroom is a full day with a roller, less if you spray. Add a day of dry time before you do a second coat, if you even need one.
If anyone tells you popcorn takes two coats automatically, ignore them. One slow coat covers most ceilings. You add a second only where the first looks thin, and you check that under raking light, not from the doorway.
What You’ll Need
Paint and Primer
Flat ceiling paint, nothing else. Flat hides the unevenness in old popcorn the way a sheen never will, and a ceiling doesn’t get touched, so you don’t need the scrubbability. The sheen guide covers why flat belongs on a ceiling and nowhere a hand reaches. For the specific cans I reach for, see the best ceiling paint round-up.
Primer is spot-use only. If the ceiling has water rings or that brown-yellow smoke film, you need a shellac-based blocker like Zinsser BIN or an oil blocker like KILZ Original on those areas first. Here’s the part people get wrong: a water-based primer over a water stain pulls the stain right back up into the new paint. So does water-based topcoat. Use shellac or oil on stains, full stop. The deeper version of that fight lives in the guide to ceiling water stains.
Tools
A sprayer is the right tool for popcorn. It lays paint on without touching the surface, so the texture never gets dragged. Rent an airless for a weekend if you’ve got more than one room or a tall ceiling.
For a single room, a 9-inch roller on an extension pole works, but the nap matters. Use a 3/4-inch or 1-inch nap so the fibers reach down into the valleys between the bumps. A 3/8-inch nap rides the tips and leaves the bottoms bare. The roller round-up has the thick-nap picks. You also want a dust mask, safety glasses, plenty of plastic and canvas, and a headlamp for checking your work.
Step 1 — Clear the Room, Cover Everything, Dust the Ceiling
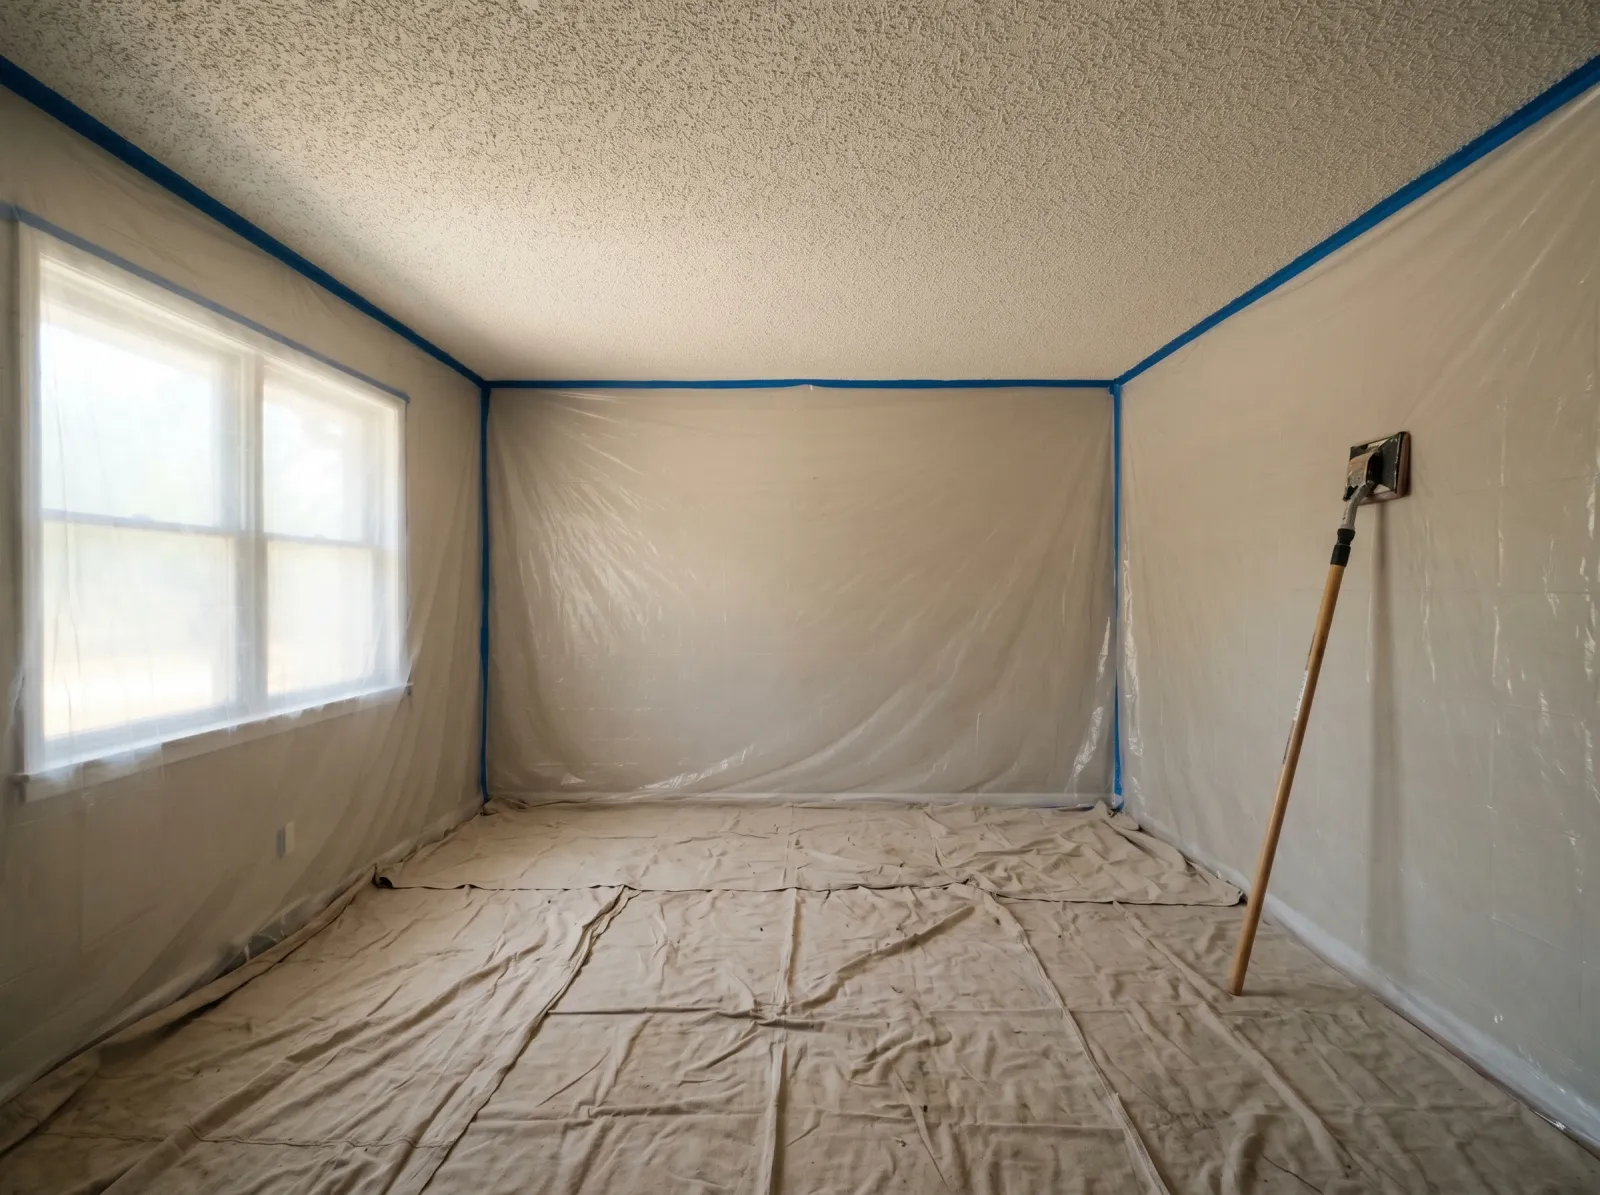
Furniture out or centered under plastic, floor and walls sheeted, the popcorn brushed free of cobwebs and dust.
Get furniture out if you can. What stays goes to the center under plastic. Popcorn spatters worse than a smooth ceiling because every bump flings a droplet, so cover the floor in canvas and drape the walls in plastic taped at the ceiling line.
Now dust the ceiling. Years of dust and cobwebs sit in that texture, and paint won’t bond to a dusty surface. Run a soft broom or a pole duster across it gently. Gently is the word. A stiff brush scrapes popcorn off.
Watch out for dusting too hard near old stains or patches. If the texture is already loose, even a broom will take it down. Light passes only.
Step 2 — Spot-Prime the Stains
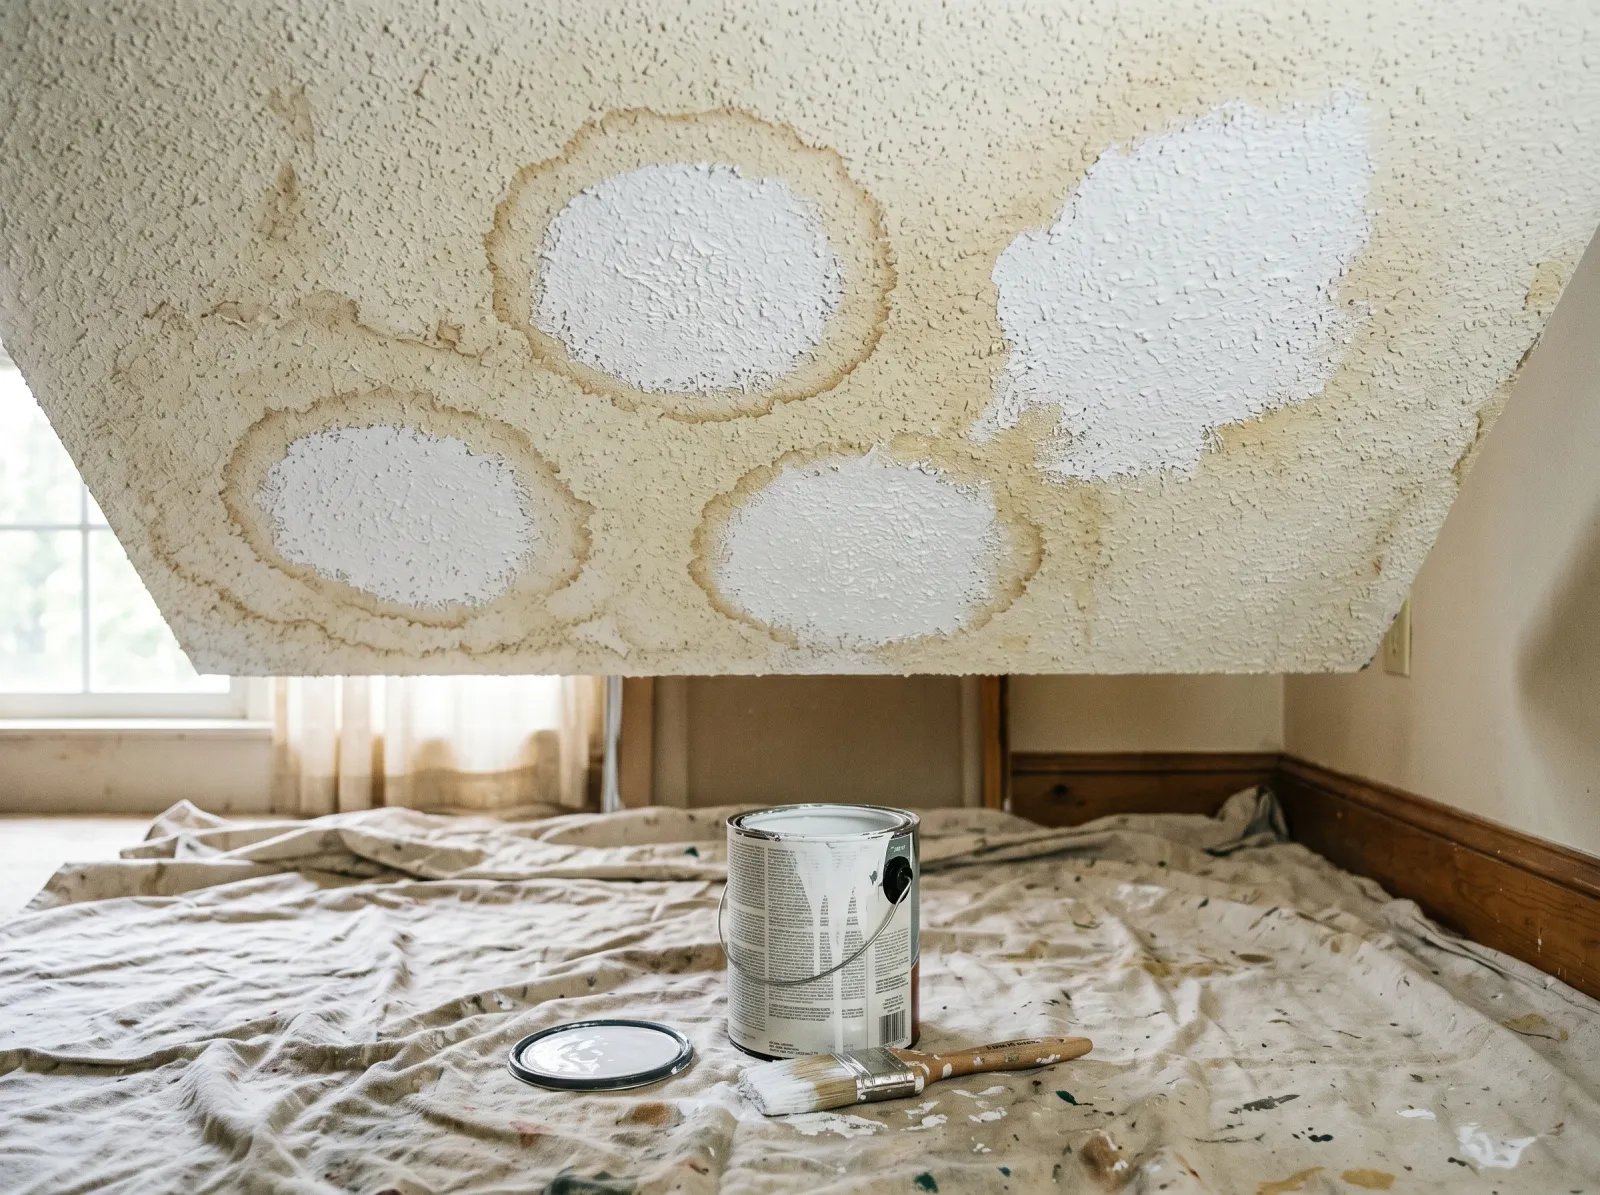
Water rings and yellow patches hit with stain-blocking primer before any finish goes up.
Find every water ring, every yellow smoke patch, every spot where you’ve patched bare drywall. Dab shellac-based BIN or oil-based KILZ on just those areas with a brush or a spray can. Don’t prime the whole ceiling. You don’t need to, and shellac primer over a whole ceiling is a fume nightmare.
Let the blocker dry per the can, usually under an hour for shellac. If a stain still ghosts through after one coat, hit it again. A water ring that wasn’t fully blocked will bleed through your finish coat in a week and you’ll be back up the ladder.
Watch out for skipping the blocker and going straight to ceiling paint over a water stain. It looks fine wet. Then the tannin creeps up through the flat paint as it dries and the ring reappears. Block it first or do the whole thing twice.
Step 3 — Cut in the Wall Line
Tape the top of the wall if your walls are a different color, then cut in a 2-inch band around the whole ceiling perimeter with the 2.5-inch angled brush. Stipple the brush into the texture at the edge rather than dragging it. Dragging pulls popcorn loose right where it shows most, at the wall line.
Get this band done before you load the roller or sprayer. Cutting in after the field coat is dry leaves a visible halo at the edge.
Step 4 — Lay the One Coat

One slow pass with a thick-nap roller or a sprayer, the texture filling in white without dragging loose.
This is where ceilings get wrecked, so go slow.
If you’re spraying, hold the gun 12 to 18 inches off the ceiling, keep it moving at a steady walking pace, and overlap each pass by half. Don’t hover. A sprayer parked over one spot floods it and the texture sags.
If you’re rolling, load the thick-nap sleeve until it’s full but not dripping. Roll one strip across the ceiling in a single direction, lift the roller, reload, and lay the next strip beside it with a slight overlap. The key word is once. Roll a strip one time and leave it. Going back over a wet strip to even it out is exactly what saturates the adhesive and brings the popcorn down. Let it look a little uneven while it’s wet. Flat paint levels as it dries.
Watch out for the back-and-forth instinct. Everybody wants to work a roller like they’re scrubbing a wall. On popcorn, that’s the move that fills your hair with little white flakes.
Step 5 — Dry, Then Check Under Raking Light
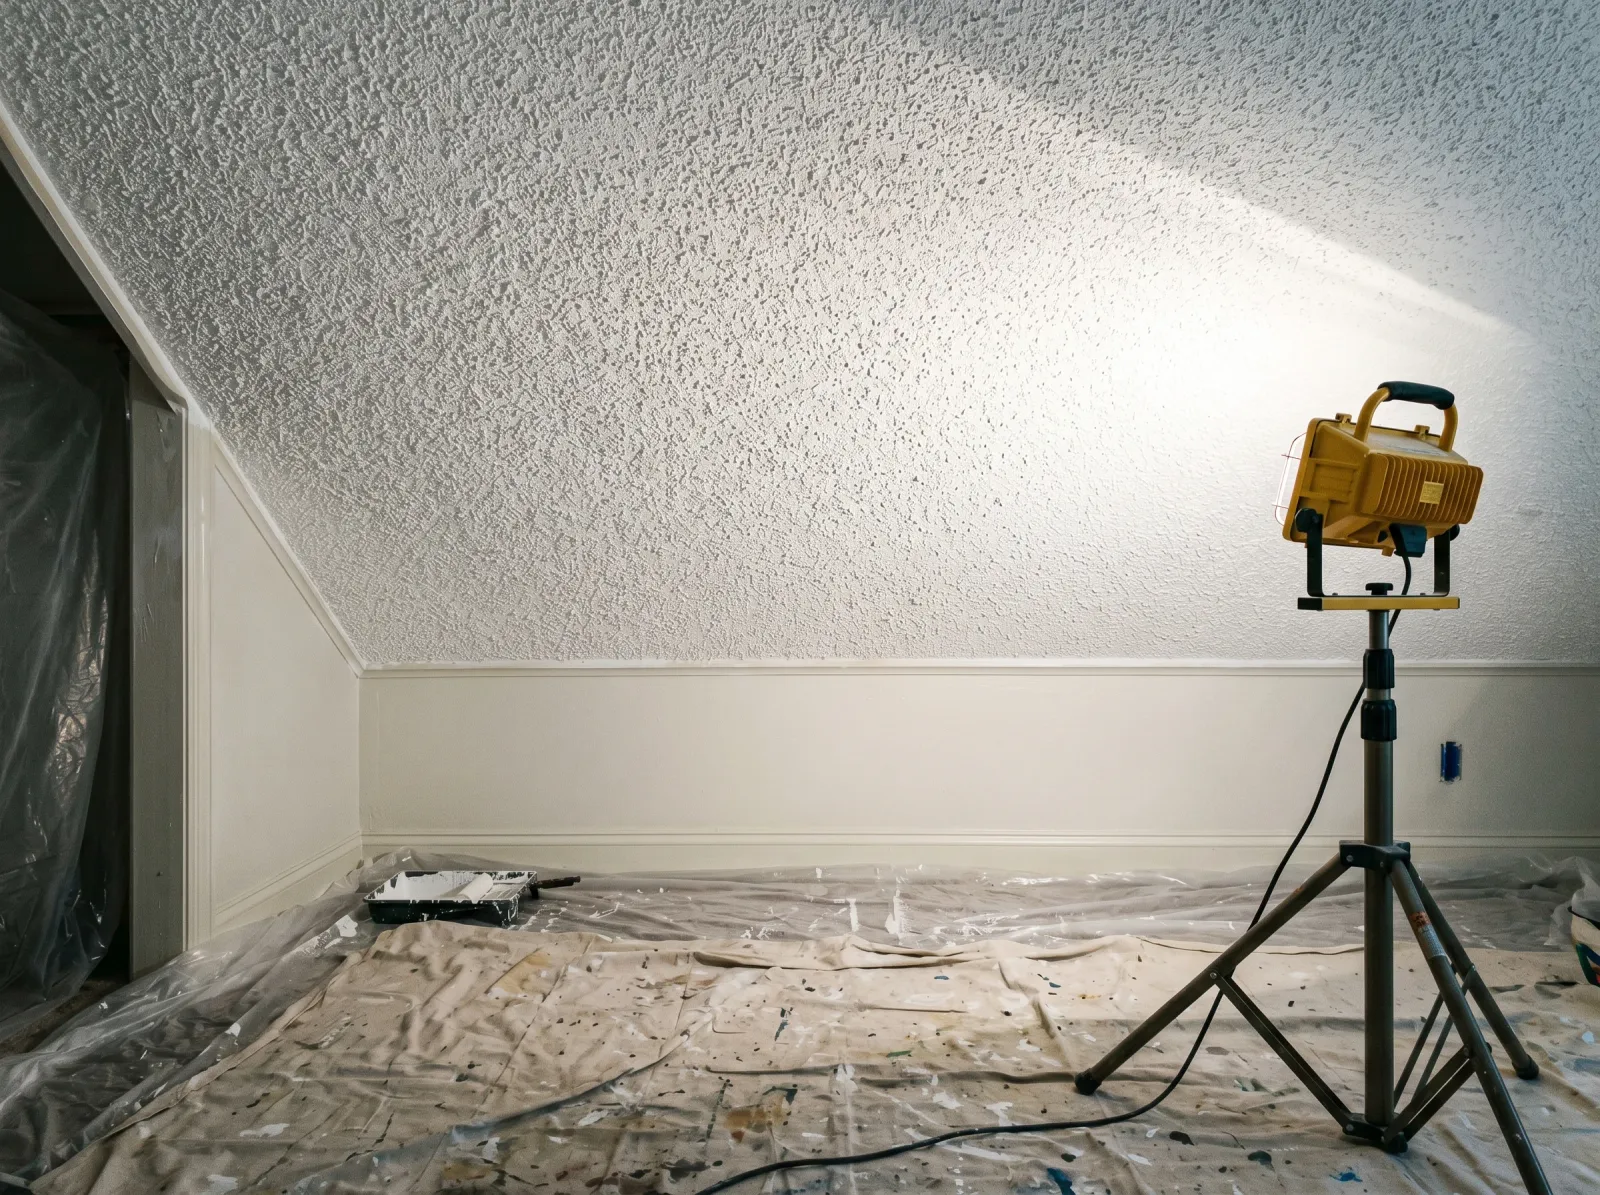
The coat dried flat and uniform, checked under a sidelight for holidays and thin spots.
Let the coat dry the full recoat window on the can, usually 2 to 4 hours for water-based, then take a work light or a headlamp and rake it sideways across the ceiling. Looking straight up hides thin spots. Light coming across the surface at a low angle shows every holiday, the gaps where the paint missed the valleys between bumps.
Touch up the misses with a light pass. If big areas read thin, the popcorn drank the first coat and you need a full second one. Lay it the same way as the first: one direction, one pass, no rework.
Common Mistakes
- Soaking the texture. A dripping roller worked back and forth saturates the adhesive and the popcorn lets go in clumps. One light pass per strip, lift, reload, move on.
- Water-based primer over water stains. It reactivates the stain and pulls it up into your finish. Use a shellac (Zinsser BIN) or oil (KILZ Original) blocker on rings, never a water-based primer.
- Thin-nap roller. A 3/8-inch sleeve rides the tips and leaves the valleys bare, so the ceiling looks streaky in raking light. Run a 3/4-inch to 1-inch nap that reaches the bottoms.
- Skipping the dust. Cobwebs and dust in the texture wreck adhesion. Paint over them and it flakes within a year. Knock the dust off gently first.
- Scraping a ceiling that might have asbestos. Pre-1980 texture can contain it, and scraping releases fibers. If you’re unsure, don’t disturb it. Paint locks it in place. Test a sealed sample if you need to be sure.
Cure Schedule
| Time after the final coat | What’s safe |
|---|---|
| 1 hour | Pull the wall tape |
| 2–4 hours | Touch dry; check for thin spots; recoat if needed |
| 24 hours | Furniture back, plastic down |
| 7 days | Ceiling fully usable |
| 30 days | Full cure |
Maintenance and Touch-Ups
A painted popcorn ceiling holds up 10 to 15 years before it dulls or yellows again, longer in a room with no smoking and no moisture. A bathroom or kitchen popcorn ceiling goes faster because steam works on it.
Touch-ups are easy on a ceiling because nobody inspects it from a foot away. Keep a quart of the flat ceiling paint labeled with the room name. For a new water stain, fix the leak first, then spot-prime with BIN and dab flat paint over it with a small piece of roller, not a brush. A brush lays a different texture and you’ll see the patch.
Cost Breakdown
| Item | $ |
|---|---|
| Flat ceiling paint, 2–3 gallons | $50–$90 |
| Stain-blocking primer (spot use) | $12–$20 |
| Plastic sheeting, tape, drop cloth | $20–$30 |
| Thick-nap roller sleeve + pole | $20 |
| Total (roller method) | $100–$160 |
Spraying adds a sprayer rental, roughly $40 to $80 for a weekend, but it saves the texture and a lot of neck strain on bigger jobs.
FAQ
Can you paint a popcorn ceiling without it falling off? Yes, if you don’t soak it and don’t drag a wet roller back and forth. The texture is held on with a thin layer of joint compound or spray adhesive that softens when it gets wet. Roll one strip in a single direction, lift, reload, lay the next beside it. Working a wet section over and over is what peels the popcorn off in clumps.
Do I need to prime a popcorn ceiling before painting? Only the problem spots. A sound, dingy ceiling takes two coats of flat ceiling paint straight on. Water rings, smoke yellowing, or fresh drywall patches need a shellac blocker like Zinsser BIN first. Water-based primer reactivates old water stains and they bleed back through.
Should I spray or roll a popcorn ceiling? Spray for more than a couple of rooms or a tall ceiling. A sprayer never touches the texture and it’s faster. For one room, a thick-nap roller on an extension pole works if you go slow. Use a 3/4-inch or 1-inch nap so the fibers reach into the valleys.
How much paint does a popcorn ceiling need? More than the square footage says. Popcorn has 30 to 50 percent more surface area than smooth, so it drinks paint. A 12-by-12 ceiling needs closer to a gallon and a half per coat. Buy 2 to 3 gallons for a bedroom.
Why is my popcorn ceiling coming off when I paint it? You’re getting it too wet or working it too long. Stop, let it dry, and switch to a sprayer or a lighter roller touch. Once a patch falls, scrape it flat, prime, and re-texture from a spray can or skim it smooth.
Can I paint a popcorn ceiling that might contain asbestos? Painting it is the safest thing you can do. Pre-1980 popcorn may contain asbestos, and scraping it is the hazard, not painting. Paint locks it in. Don’t sand it, don’t scrape it. A lab test on a sealed sample runs $30 to $60 if you need to be sure.
Related
- Best ceiling paint
- How to fix water stains on a ceiling
- Painting drywall
- Best paint rollers
- Sheen guide: matte to gloss
The thing that’ll bite you in two years isn’t the paint. It’s the leak you painted over. A water ring means water got in somewhere, and flat ceiling paint doesn’t fix a roof or a bathroom drain upstairs. Block the stain, paint the ceiling, then go find where the water came from. Otherwise the ring’s back by next winter and the popcorn around it lets go.