How to Paint Garage Cabinets
Painting garage cabinets the right way: degrease, dull the gloss, bonding primer, and an enamel that survives oil, gas, and a dropped wrench. Metal and particleboard both covered.

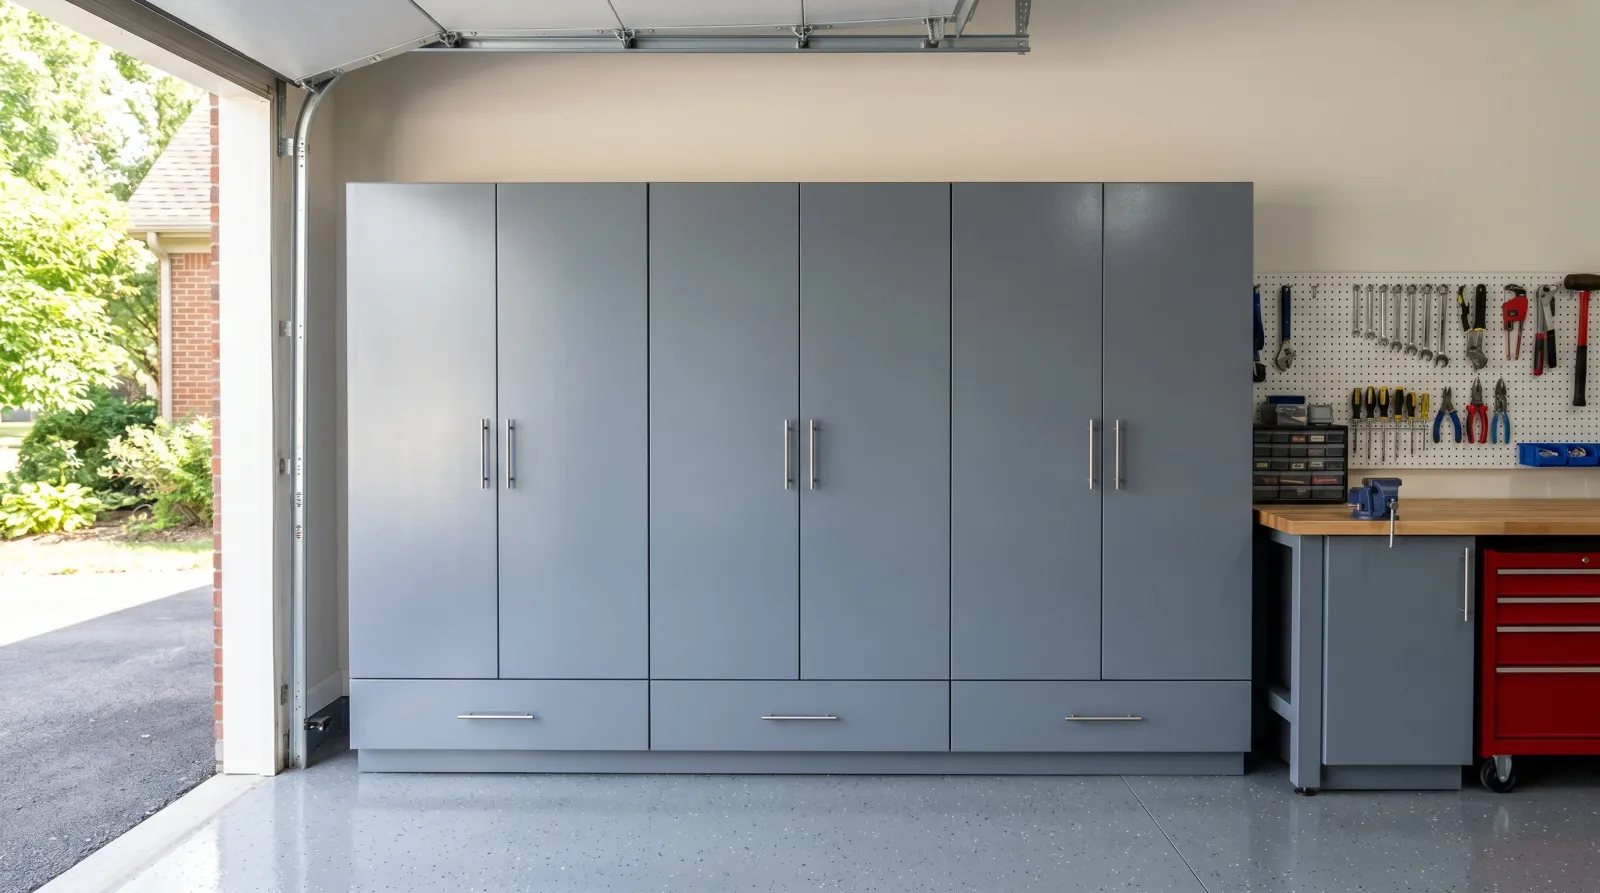
Garage cabinets take more abuse than anything in your house. Oil drips, gas fumes, a wrench dropped from the top shelf, a season of heat and a season of cold. Most of them came as raw steel or coated particleboard, and they look it. You can repaint them. The job that fails is the one where somebody rolled wall paint over a greasy slick door and called it done. That paint peels off in sheets by spring.
Prep is the whole game here. Get the prep right and the finish lasts a decade.
TL;DR
- Take the doors off. Paint them flat on sawhorses. Vertical doors run; flat doors self-level.
- Degrease twice. Garage grime is oil-based and paint won’t bond to it. This is the step that bites you in two years if you skip it.
- Dull the gloss, then bonding primer. Scuff with 220, then INSL-X Stix or Zinsser 1-2-3 Plus over the slick steel or melamine. Self-priming enamel alone won’t hold on a factory finish.
- Treat rust first on steel cabinets with a rust-inhibiting metal primer, or it spreads under your paint.
- Use a cabinet enamel, not wall paint. BM Advance, SW Emerald Urethane, or INSL-X Cabinet Coat in satin. Two thin coats.
- Wait the cure. Light items after a week, heavy tools after 30 days.
What You’ll Get
A bank of cabinets that looks like shop furniture instead of clearance-aisle steel. A weekend of work, a week before you reload them. Figure $60 to $140 in materials over cabinets that would cost three or four hundred to replace, and the replacements would be the same cheap melamine.
Honest Take on Difficulty and Time
This is a medium job, not a hard one. No ladder, no ceiling. The work is in the prep and the patience between coats, same as any cabinet repaint.
The garage adds two wrinkles a kitchen doesn’t. Grease and grime are heavier, so the degrease step matters more. And the surface is usually slick steel or melamine, not wood, so bonding primer isn’t optional.
| Cabinet type | Active time | Total elapsed | Skill |
|---|---|---|---|
| Particleboard / melamine, doors off | 5-7 hrs | 1 weekend + 1 week cure | Medium |
| Steel, no rust, doors off | 5-7 hrs | 1 weekend + 1 week cure | Medium |
| Steel with rust to treat | 7-9 hrs | 2 weekends + cure | Medium |
| In-place, doors on (the lazy path) | 3-4 hrs | 1 weekend | Easy, looks it |
Take the doors off. Painting them in place saves an hour and costs you every drip and brush mark on the box edges. Flat doors self-level. Vertical doors run.
What You’ll Need
Paint and Primer
A bonding primer for the slick factory surface. INSL-X Stix or Zinsser Bulls Eye 1-2-3 Plus, one quart covers a typical bank of cabinets. This is the layer that grabs steel and melamine. For what it actually does and why standard primer won’t, see what bonding primer is for.
If you find rust on a steel cabinet, you need a rust-inhibiting metal primer first (Rust-Oleum Clean Metal Primer) on the bare spots before the bonding coat goes over everything.
For the finish, a waterborne alkyd cabinet enamel: BM Advance, SW Emerald Urethane, or INSL-X Cabinet Coat. Same product that goes on kitchen cabinets, and for the same reason — it cures hard and wipes clean. A quart does a small bank, a gallon does a wall of them. Satin or semi-gloss. Skip flat; flat in a garage holds dirt and you can’t scrub it off. Picks live in the cabinet and spray paint round-up.
Tools
A foam-mini roller for the flats, a 2.5-inch angled brush for the edges and any routed detail. A foam roller leaves the smoothest finish on enamel; nap leaves stipple. The foam roller picks are worth the few dollars over a hardware-store sleeve.
Plus a 220-grit sanding sponge, tack cloth, a degreaser, painter’s tape, a drop cloth, sawhorses, and a baggie with a Sharpie for the hardware.
Step 1: Pull the Doors and Bag the Hardware
Unscrew every door and drawer. Take the hinges and pulls off too. Drop the screws in a labeled baggie so they don’t roll under the workbench, because they will. Number the back of each door with painter’s tape and a marker so the right one goes back in the right hole.
Set the doors flat on sawhorses. Paint flat, dry flat, no runs.
Watch out for adjustable shelves and hardware you can’t reach with a door in the way. Pull those too. A cabinet you paint half-disassembled looks half-painted.
Step 2: Degrease, Then Degrease Again
This is the step the garage punishes you for skipping. A garage cabinet wears a film of oil mist, road grime, and dust that you can’t always see. Paint won’t bond to grease.
Wipe every face with a degreaser — Krud Kutter or a TSP substitute. Let it sit a minute, then wipe with a clean wet rag and let it dry. On a cabinet that lived over a workbench or near the car, do it twice. Run a bare hand across it after; if it feels slick or your hand comes away dirty, you’re not done.
Watch out for the inside top edges and the underside of shelves. That’s where oil mist settles thickest, and it’s the spot everyone misses.
Step 3: Dull the Gloss and Treat Any Rust
Scuff every face with a 220-grit sponge. You’re not stripping the factory coat, just knocking the shine off so the primer has a tooth to bite. A slick surface is the number-one reason garage cabinet paint fails. Vacuum the dust, then tack-cloth it clean.
Steel cabinets, check for rust now. Light surface rust sands off with the 220. Anything pitted gets a wire brush and a coat of rust-inhibiting metal primer on the bare metal before you move on. Paint over active rust and it keeps spreading underneath, lifting your finish from below.
Melamine and particleboard, watch the edges. If the laminate is chipped or swollen from moisture, that spot won’t hold paint. Sand it flush, prime it heavy, and accept it’ll never look factory-new.
For the deep version on the slick-surface problem, the melamine and laminate guide covers prep that’s specific to that material.
Step 4: One Coat of Bonding Primer
Bonding primer over everything: doors, drawer fronts, and the cabinet boxes. One full thin coat. Roll the flats with the foam-mini, cut the edges and any routed detail with the angled brush. Stix grabs steel and melamine that nothing else will stick to.
Let it dry overnight. Scuff lightly with 220 to knock down any nibs, tack-cloth again.
Watch out for going thick to “cover better.” Primer isn’t paint. A thick coat dries soft and gummy and your enamel sits on a weak layer. Thin and even.
Step 5: Two Coats of Cabinet Enamel
Paint flat on the sawhorses. Foam-mini roller on the flats, angled brush on the edges, back-roll the brushed areas while they’re still wet to even the texture out. Floetrol at about 5 percent (roughly 6 ounces a gallon) stretches the wet edge and erases brush marks on the enamel.
Two thin coats beat one thick coat every time. Thick enamel sags, dries unevenly, and never cures as hard. Let the first coat dry the time on the can — BM Advance wants 16 hours, Cabinet Coat less. Read the label and don’t rush it.
Watch out for the over-loaded roller. A drip on a flat door dries as a bump you can’t sand out without going back to primer. Load light, work fast, leave it alone once it starts to skin.
The same flat-and-two-coats method runs the kitchen cabinet project if you want the longer walk-through on door painting.
Step 6: Rehang and Reload
Reinstall the hinges and pulls after the enamel has set up, not while it’s tacky. Rehang the doors, slide the drawers back, set the adjustable shelves. Hardware goes on last so you’re not screwing into soft paint.
Then give it the cure time before you load it back up. A garage cabinet’s whole job is holding weight, and weight on soft enamel leaves a mark.
Common Mistakes
- Skipping the degrease. Garage grime is oil-based. Paint won’t bond to it, and the finish lets go in sheets within a season. Two passes with a degreaser, then check with a bare hand.
- No bonding primer on steel or melamine. Standard primer and self-priming enamel both fail on a slick factory surface. Stix or 1-2-3 Plus is the only layer that grabs it.
- Painting over rust. Rust keeps growing under the paint and lifts it from below. Wire-brush it and spot-prime with rust-inhibiting metal primer first.
- Rolling wall paint or cheap latex. It stays soft, picks up fingerprints, and won’t survive a solvent splash. Use a cabinet enamel that cures hard.
- Loading the shelves too soon. Heavy tool boxes on week-old enamel leave a permanent imprint. Wait the full cure before the heavy stuff goes back.
Cure Schedule
| Time after final coat | What’s safe |
|---|---|
| 4 hours | Touch dry; don’t touch |
| 24 hours | Rehang doors, reinstall hardware |
| 7 days | Light items back on shelves |
| 30 days | Full cure; heavy tools, scrubbing, solvent wipes |
Maintenance
A cabinet enamel finish on garage cabinets runs 8 to 12 years before it needs a refresh, longer than that if the garage isn’t a working shop. The enamel wipes clean with mild soap once it’s cured. Oil splash, wipe it off; it won’t soak in.
For a chip, dab the leftover enamel on with a small artist’s brush. Don’t feather a whole panel — the touch-up reads slightly different from the cured paint and you’ll see the seam. Keep the leftover quart labeled on a shelf.
Cost Breakdown
| Item | $ |
|---|---|
| Cabinet enamel (1 qt-1 gal) | $25-$70 |
| Bonding primer (1 quart) | $18 |
| Metal primer (if rust) | $12 |
| Foam-mini roller + sleeves | $15 |
| Angled brush | $15 |
| Degreaser, sponges, tack cloth, Floetrol | $25 |
| Total | $70-$140 |
A new bank of melamine garage cabinets runs $300 to $700 and shows up as the same cheap board you’re painting over.
A Specific Recommendation
Steel or melamine cabinets, no serious rust: degrease twice, scuff with 220, one coat of INSL-X Stix, two coats of INSL-X Cabinet Coat in satin. Pull the doors Friday night, prime Saturday, two coats Sunday, rehang the following weekend after a cure. Foam roller on the flats, Floetrol in the enamel, and leave each coat alone once it skins.
What’ll bite you in two years is the corner you cut on the degrease. The paint looks fine going on. Then a film of grease you couldn’t see lets the whole panel release the first hot summer, and you’re back to bare steel wondering what went wrong. Wash it twice. That’s the job.