How to Paint Beadboard
Painting beadboard without gunking up the grooves: clean it, prime it, and pull paint out of the grooves with a brush before you roll the flats.

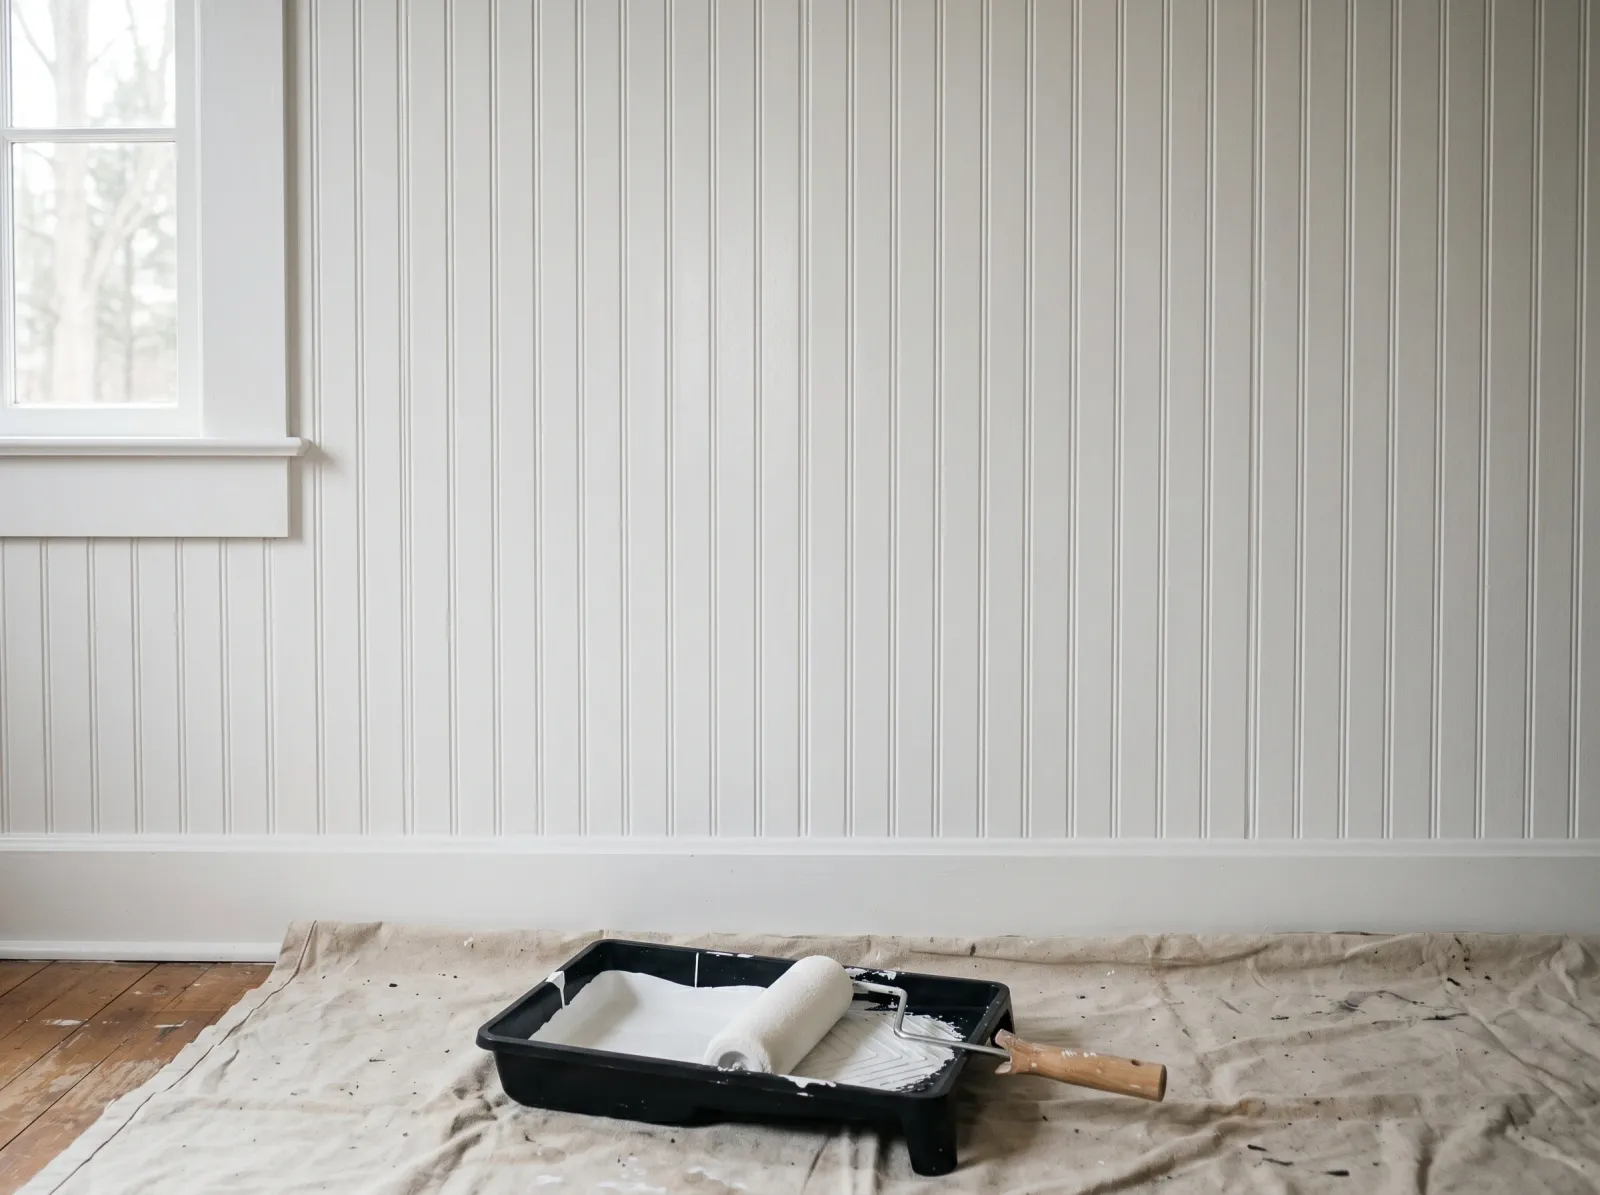
Okay, so you’re looking at a wall of beadboard and you’ve already spotted the problem: all those grooves. You’re picturing paint pooling in every channel and drying as a row of glossy ridges. Here’s the thing about painting beadboard. The grooves are the whole job, and once you know the trick for them, the rest is just painting a flat panel. The trick is to brush the grooves first and roll the flats second, before the brushwork dries.
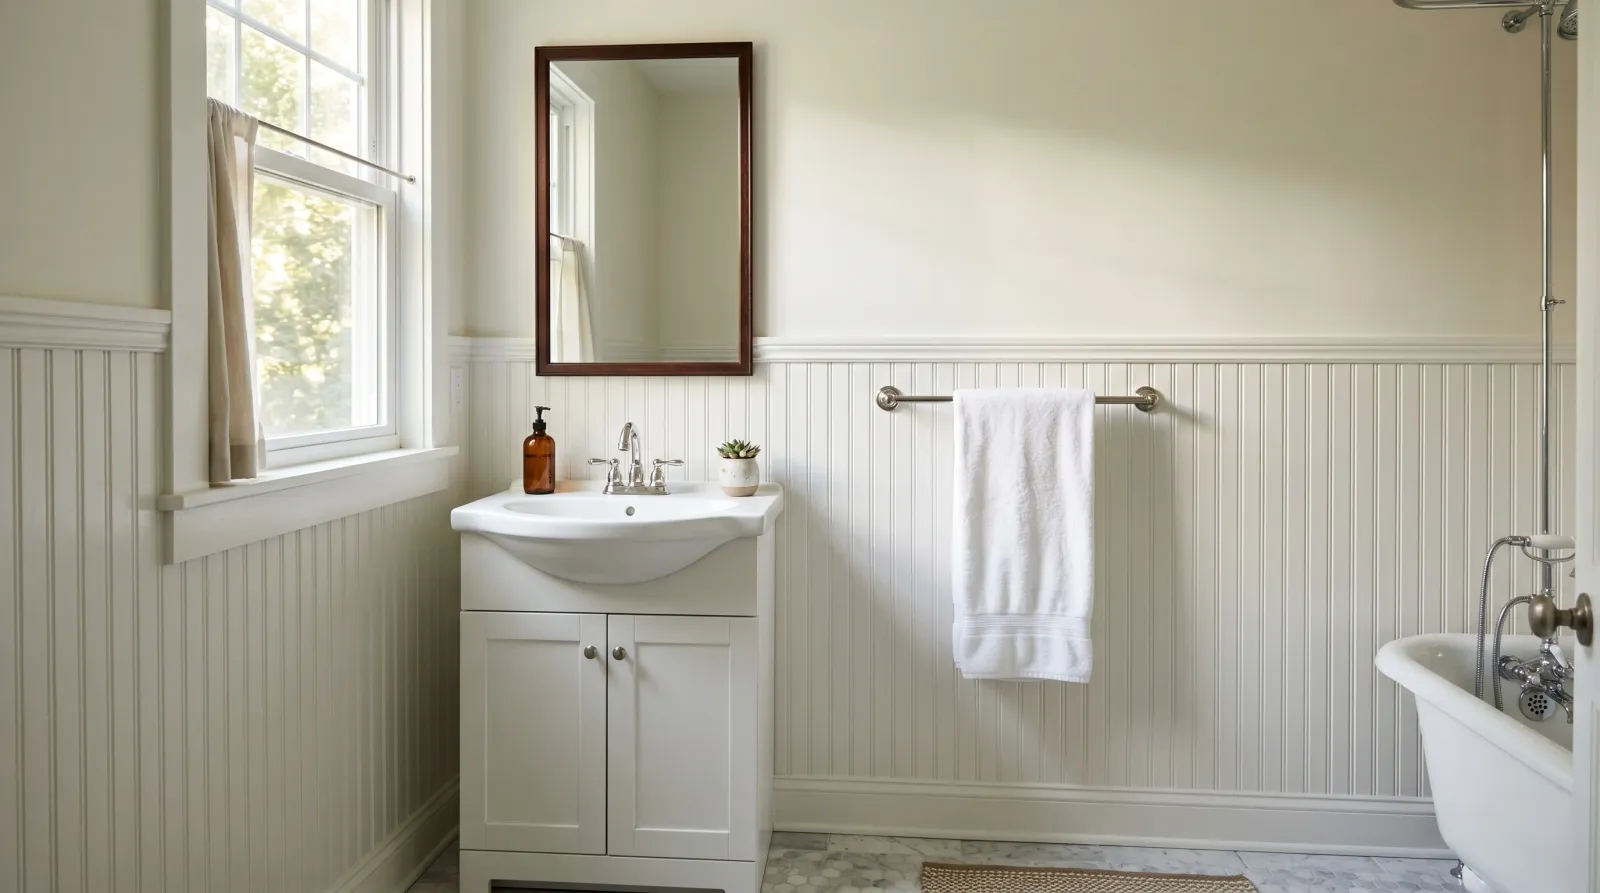
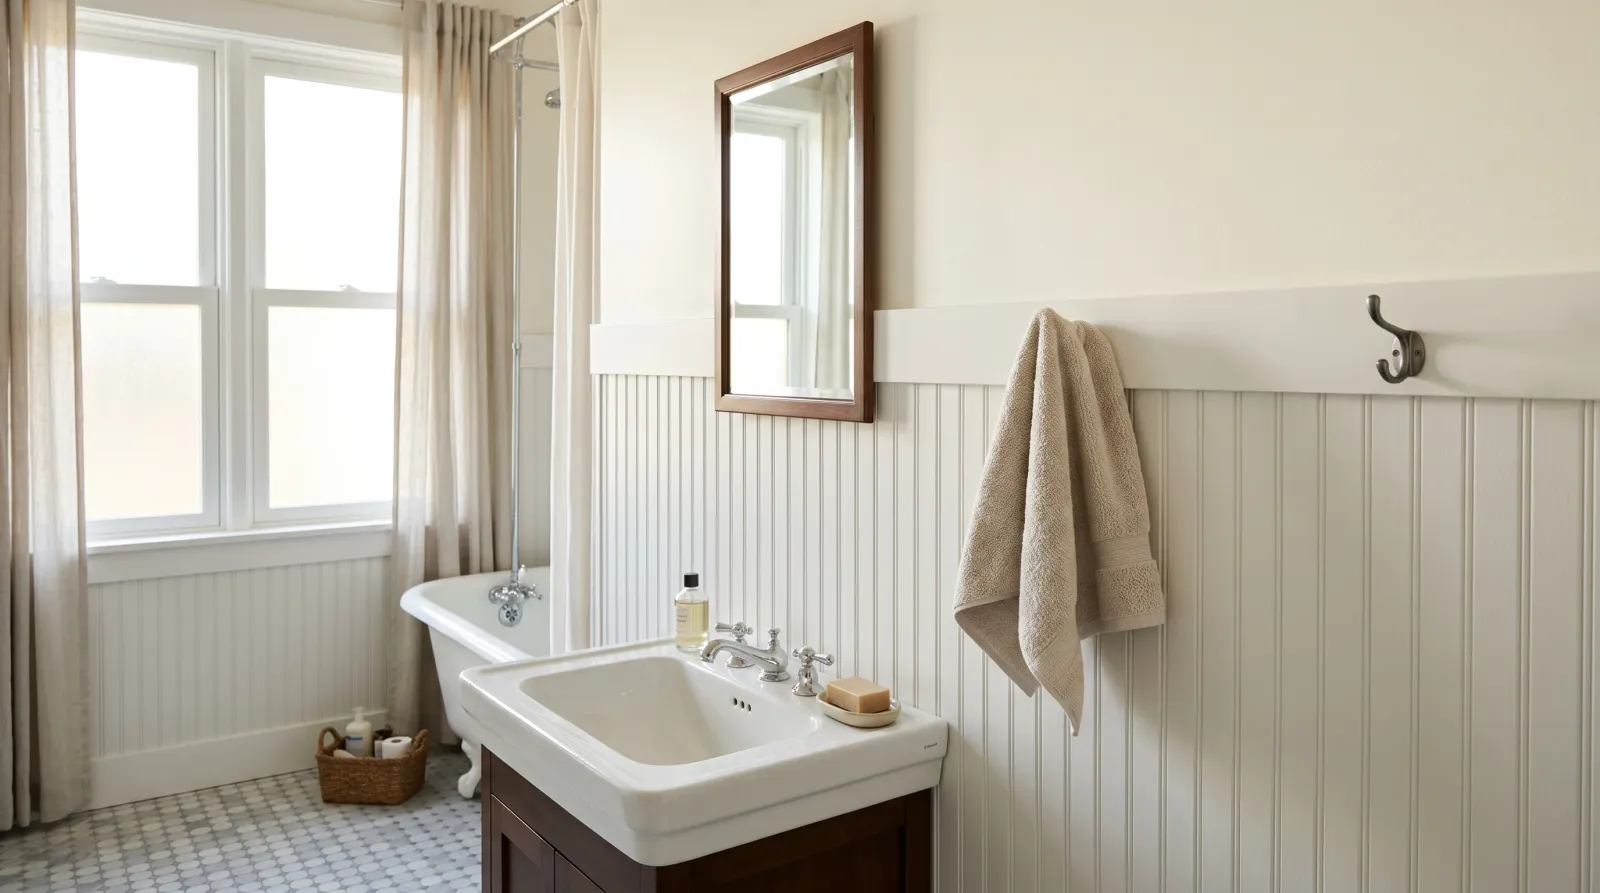
Beadboard is paneling with evenly spaced vertical grooves (the “beads” are the rounded ridges between them). You find it as wainscoting in bathrooms and mudrooms, on ceilings, and sometimes as a full accent wall. It paints up beautifully when you respect the grooves and badly when you ignore them.
What You’ll Get
Clean, evenly coated beadboard with crisp shadow lines in the grooves and smooth flat faces, in a hard finish that wipes clean. No pooling, no bare channels, no brush marks across the panel.
Honest Take on Difficulty and Time
This sits one step above painting a plain wall. The grooves slow you down and they’re easy to mess up, so it earns a medium rating. A small bathroom wainscot is a relaxed weekend: prep and prime on Saturday, two coats on Sunday with dry time between. A full-height accent wall is the same process, just more of it.
Most of the clock is dry time, not work time. If someone tells you it’s a two-hour job, they’re skipping the prep, and the prep is where beadboard either looks great or looks gummed up.
What You’ll Need
Paint and Primer
A quart of trim or cabinet enamel in satin or semi-gloss covers a small wainscot in two coats. Beadboard lives where things get bumped and wiped, so it wants a hard, washable finish (the same enamels you’d use on baseboards and trim). Skip flat or matte. It scuffs fast and holds grime down in the grooves where you can’t scrub it out.
Primer is almost always yes. Pre-finished beadboard has a slick factory coat that new paint won’t grip without a bonding primer (Zinsser Bulls Eye 1-2-3 or KILZ Adhesion). Raw unfinished beadboard wants a wood primer instead, because bare wood drinks paint unevenly. The only time you skip primer is going from one sound satin color to a similar one, and even then you scuff-sand first.
For the difference between satin and semi-gloss, see the sheen guide.
Tools
A 2-inch angled sash brush is the tool that does the grooves. The angle lets you drag paint down a channel in one pass. A foam roller handles the flat faces; foam lays down smoother on flat panel than a nap sleeve and won’t leave the slight texture nap leaves behind.
You’ll also want painter’s tape, a sanding sponge, a putty knife, spackle or paintable caulk, a tack cloth, a drop cloth, and a step stool. The brush is where you don’t cheap out. A cheap brush sheds bristles into the wet groove and you’ll be picking them out. Picks live in the best paint brushes round-up.
Step 1 — Clean, Sand, and Tape
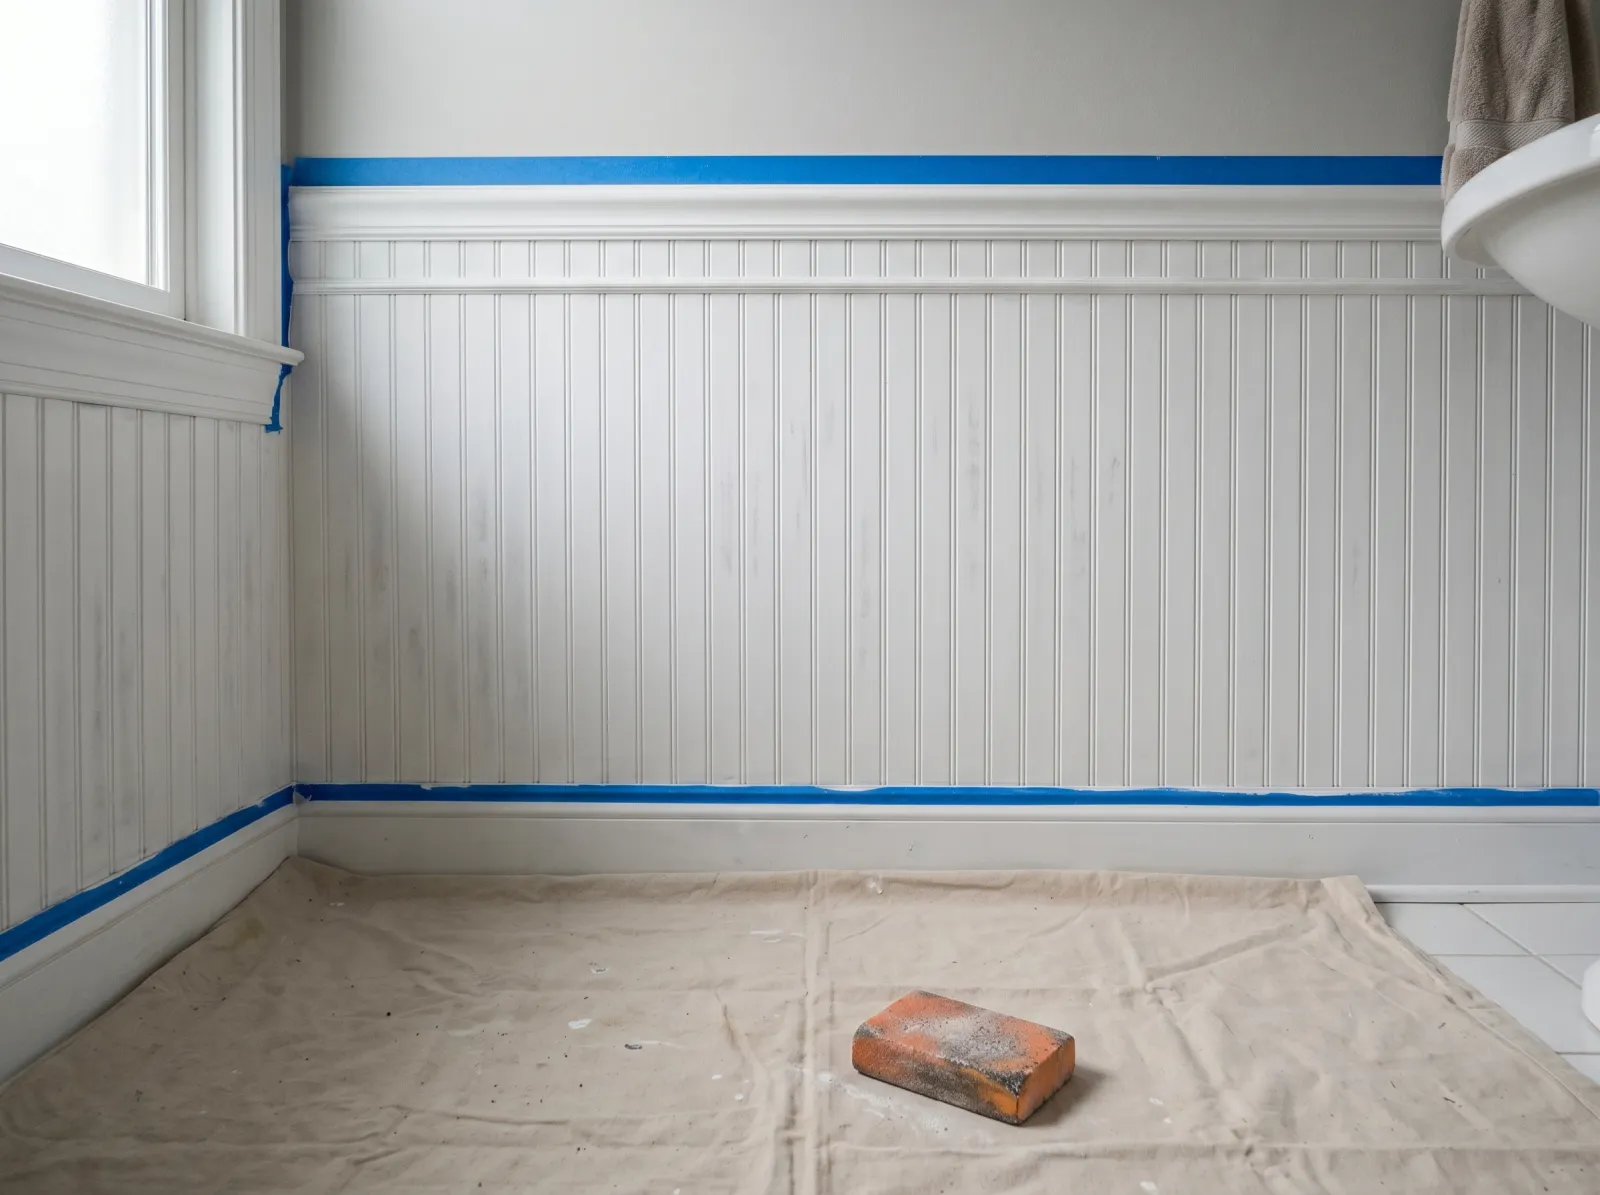
Beadboard wiped down, glossy spots scuff-sanded, painter’s tape along the top rail and baseboard.
Wipe the whole panel down first. Beadboard in a bathroom or kitchen carries a film of soap residue or cooking grease, and paint won’t stick to it. Use a degreaser like Krud Kutter or a TSP substitute, then wipe with clean water and let it dry.
Scuff-sand any glossy or varnished surface with the 220-grit sponge until the shine goes dull. You’re not stripping it, just roughing it so the primer can bite. Get into the grooves with the corner of the sponge; that’s where old gloss hides. Wipe off the dust with a tack cloth.
Tape along the top rail, the baseboard below, and any trim where the beadboard meets the wall. Press the edge down hard with your thumbnail so paint can’t sneak under it.
Watch out for the gap behind a toilet or vanity if you’re doing a bathroom. That strip never gets cleaned and the grease film there is the thickest. Reach back and wipe it.
Step 2 — Caulk the Top Rail and Patch Dings
Run a thin bead of paintable caulk along the top rail where the beadboard meets the wall, and along any seam that’s opened up. Smooth it with a wet fingertip. Caulk closes the shadow gaps that make finished beadboard look unfinished.
Press spackle into nail holes and dings, scrape flush, let it dry, then sand smooth. Don’t caulk inside the vertical grooves themselves; those are supposed to be there.
Watch out for over-caulking. A fat bead at the top rail looks lumpy once it’s painted. Thin and wiped is the goal.
Step 3 — Prime
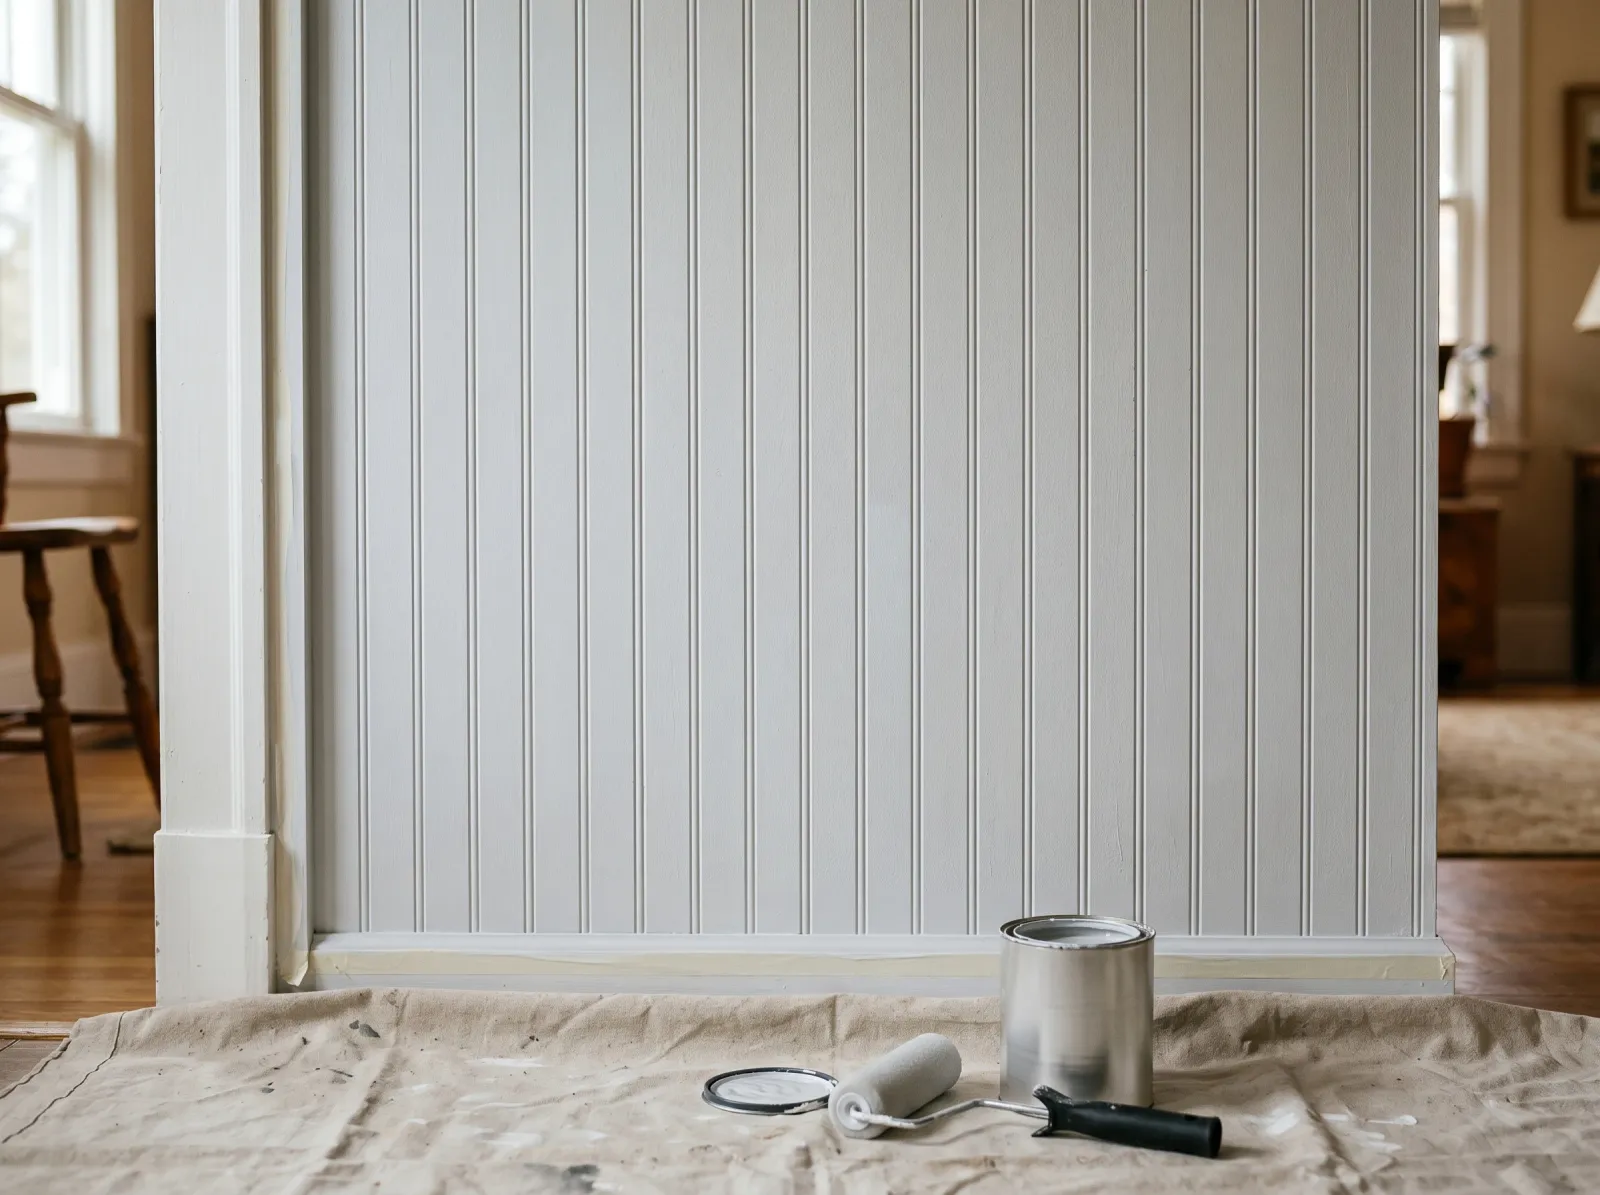
One coat of bonding primer brushed into the grooves and rolled across the flats. No pooling in the channels.
Prime the same way you’ll paint: grooves first with the brush, then flats with the foam roller. Load the brush a third of the way, run it down each groove in one pass, and look back to tip out any bead of primer sitting at the bottom of a channel.
Then roll the flat faces. The foam roller rides over the surface and won’t push primer into the grooves you just brushed, so the channels stay clean. One coat of primer is enough.
Let the primer dry the full time on the can before the first finish coat. Bonding primers usually want at least an hour, sometimes longer in a humid bathroom.
Step 4 — First Coat: Grooves First, Then Flats
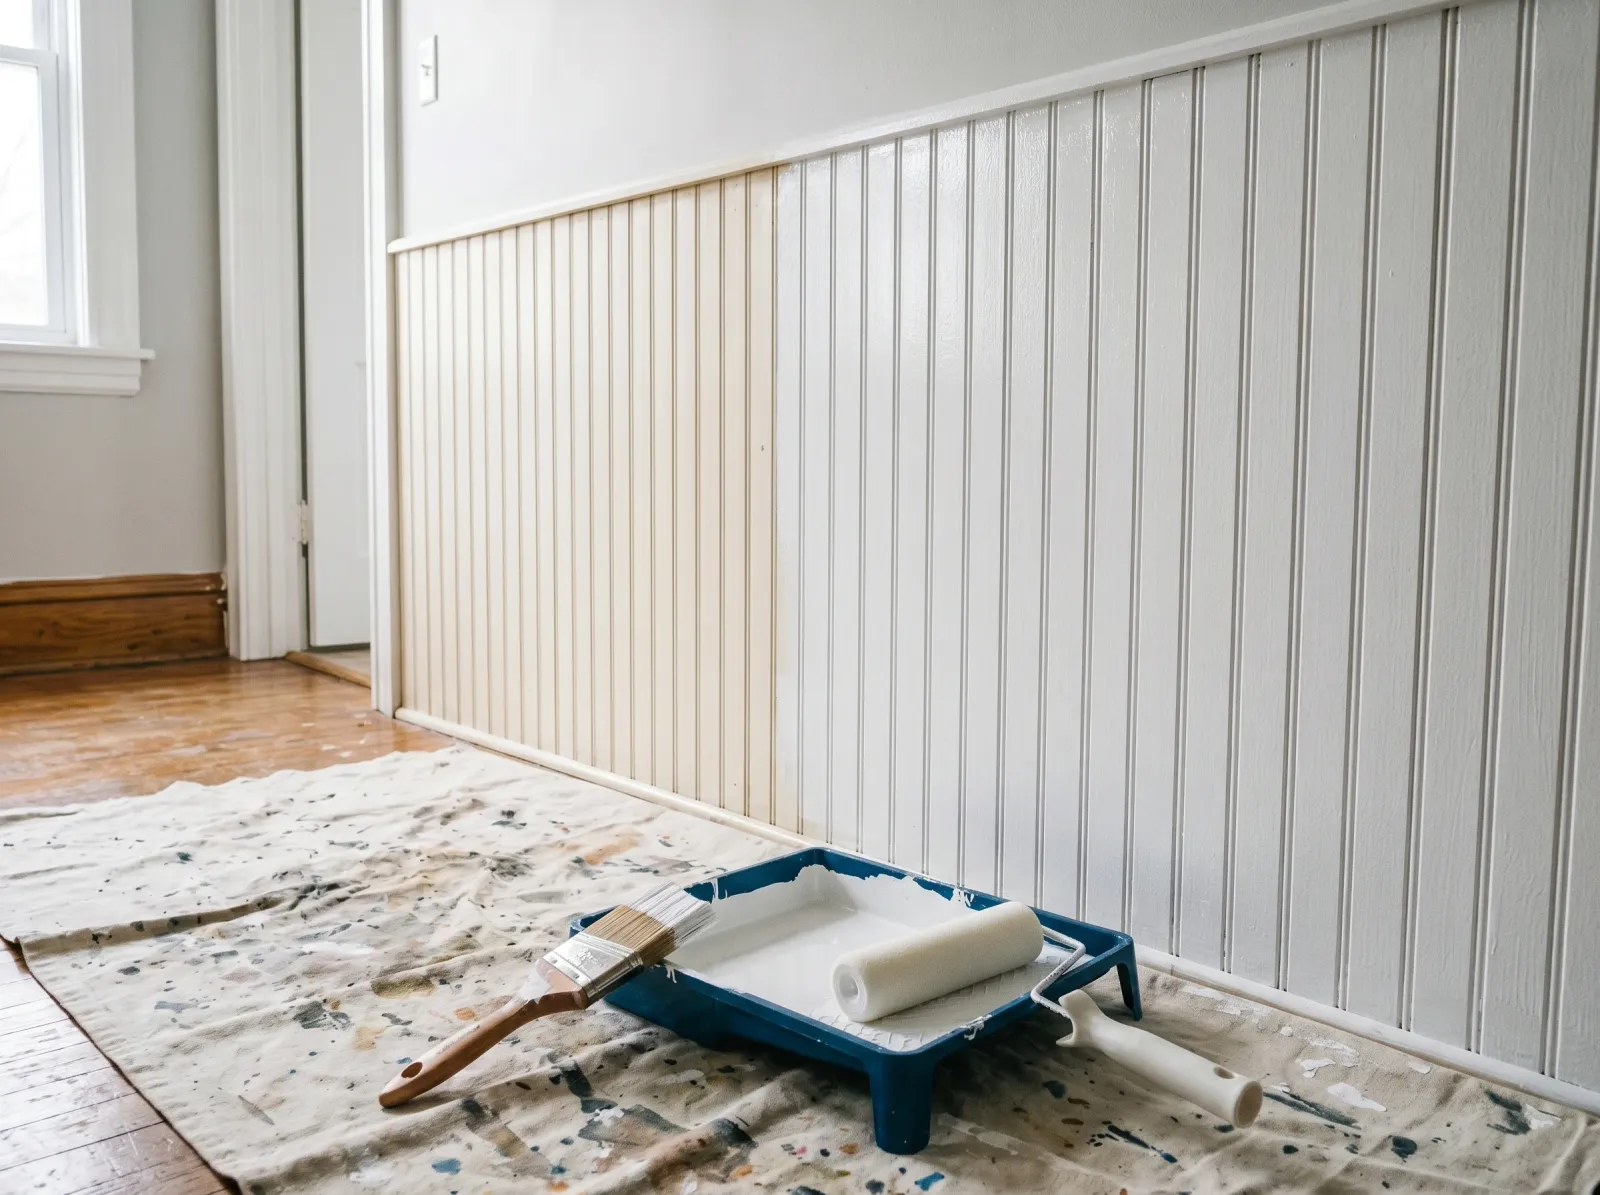
Brush the paint into each groove first, then roll the flat faces before the brushwork dries.
This is the move that makes or breaks the whole project. Work a section about three feet wide at a time so the brushwork stays wet.
Brush the paint into every groove first. Dip a third of the way in, drag the brush down the channel in one stroke, and tip out any pooled paint at the bottom. Don’t scrub the groove back and forth. One pass down, look, fix, move on.
Then grab the foam roller and roll the flat faces of that same section while the groove paint is still wet. The wet brushwork blends into the rolled flats and you get one continuous film with no line where brush meets roller.
Watch out for paint bridging across the top of a groove. If the roller leaves a skin over a channel without filling it, the groove dries hollow underneath and cracks later. Catch it while wet and pull the bead out with the brush tip.
The first coat will look thin and a little patchy. That’s normal. The grooves cast shadows that exaggerate any thin spot, so don’t panic. The second coat fixes it.
Step 5 — Second Coat
Second coat down once the first cured. The grooves read crisp, the flats read smooth.
Wait the recoat window on the can, usually 4 hours for a water-based enamel and longer for an alkyd. Touch a flat face with a knuckle; if it’s dry and not tacky, you’re clear.
Second coat goes down exactly like the first: grooves with the brush, flats with the roller, three-foot sections, keep a wet edge. The color fills in and the sheen evens out. You’ll know it when you see it; the panel goes from patchy to uniform on this pass.
Step 6 — Pull the Tape and Reset
Tape peeled at an angle, baseboard and top rail crisp, the room back together.
Pull the tape while the second coat is still slightly tacky, about 30 to 60 minutes after you finish. Pull slow, at a 45-degree angle, in one continuous strip. Wait until it’s bone dry and the cured film tears at the tape edge, leaving a ragged line you’ll have to touch up.
Wash the brush and foam sleeves under warm water until it runs clear. Put towels, mirrors, and fixtures back the next day.
Common Mistakes
- Rolling without brushing the grooves first. The roller skips over the channels and leaves them bare. From the doorway it looks fine; in raking light the grooves show as unpainted shadow lines. Brush every groove first, every coat.
- Overloading the brush in the grooves. Heavy paint pools at the bottom of the channel and dries as a hard glossy ridge that never levels. Dip a third of the way, one pass, tip out the bead.
- Skipping primer on slick pre-finished panel. Factory-finished beadboard has a slick coat new paint won’t grip. Skip the bonding primer and the finish peels off in sheets within a year. Scuff-sand and prime.
- Using flat paint. Flat looks soft for a month, then grime settles into the grooves where you can’t scrub it out without burnishing the finish. Satin minimum.
- One coat to save time. The grooves hide thin spots until light rakes across the panel. Two coats over primer. Always two coats.
Cure Schedule
| Time after the second coat | What’s safe |
|---|---|
| 30–60 min | Pull the painter’s tape |
| 4 hours | Touch dry; don’t bump it |
| 24 hours | Hang towels and put fixtures back |
| 7 days | Wipe scuffs with a damp cloth |
| 30 days | Full cure, scrubbable, washable |
Alkyd enamels (BM Advance and the like) cure harder but slower. Add a day to each window if you used one.
Maintenance and Touch-Ups
Painted beadboard in a satin or semi-gloss enamel holds up for 8 to 12 years before it needs a refresh, longer if it’s not in a high-traffic spot. Bathroom beadboard takes the most abuse from steam and splashes.
Wipe scuffs with a damp microfiber cloth first; most marks are dirt, not damage. For a real chip, dab leftover paint into just the spot with the brush tip, working it into the groove if that’s where the chip is. Don’t repaint a whole panel for one chip. Keep a labeled quart in the closet.
Cost Breakdown
| Item | $ |
|---|---|
| Enamel, 1 quart satin | $25 |
| Bonding primer, 1 quart | $18 |
| Foam roller + sleeves | $12 |
| 2-inch angled brush | $14 |
| Tape, caulk, sanding sponge | $20 |
| Total | $89 |
That’s a small bathroom wainscot with mid-tier paint. A full accent wall runs closer to $140 because you’ll buy gallons instead of quarts.
What to Do If It Goes Wrong
A groove dried with a glossy ridge of pooled paint. Sand it flat with the corner of the 220-grit sponge once it’s cured, wipe the dust, and brush a thin coat back into just that groove. From three feet away the repair vanishes.
The paint peeled off a slick spot. You missed scuff-sanding there. Scrape the loose paint, sand the edges and the bare spot dull, wipe, spot-prime with the bonding primer, and recoat.
You can see brush marks on the flat faces. You brushed the flats instead of rolling them. Wait until it’s dry, sand lightly, and roll the flats with the foam roller this time. Foam leaves no stroke marks.