What Is Flashing in Paint?
Flashing is uneven sheen across a wall caused by uneven substrate absorption while the latex film forms. Here is the chemistry, the three common variants, and the fix.

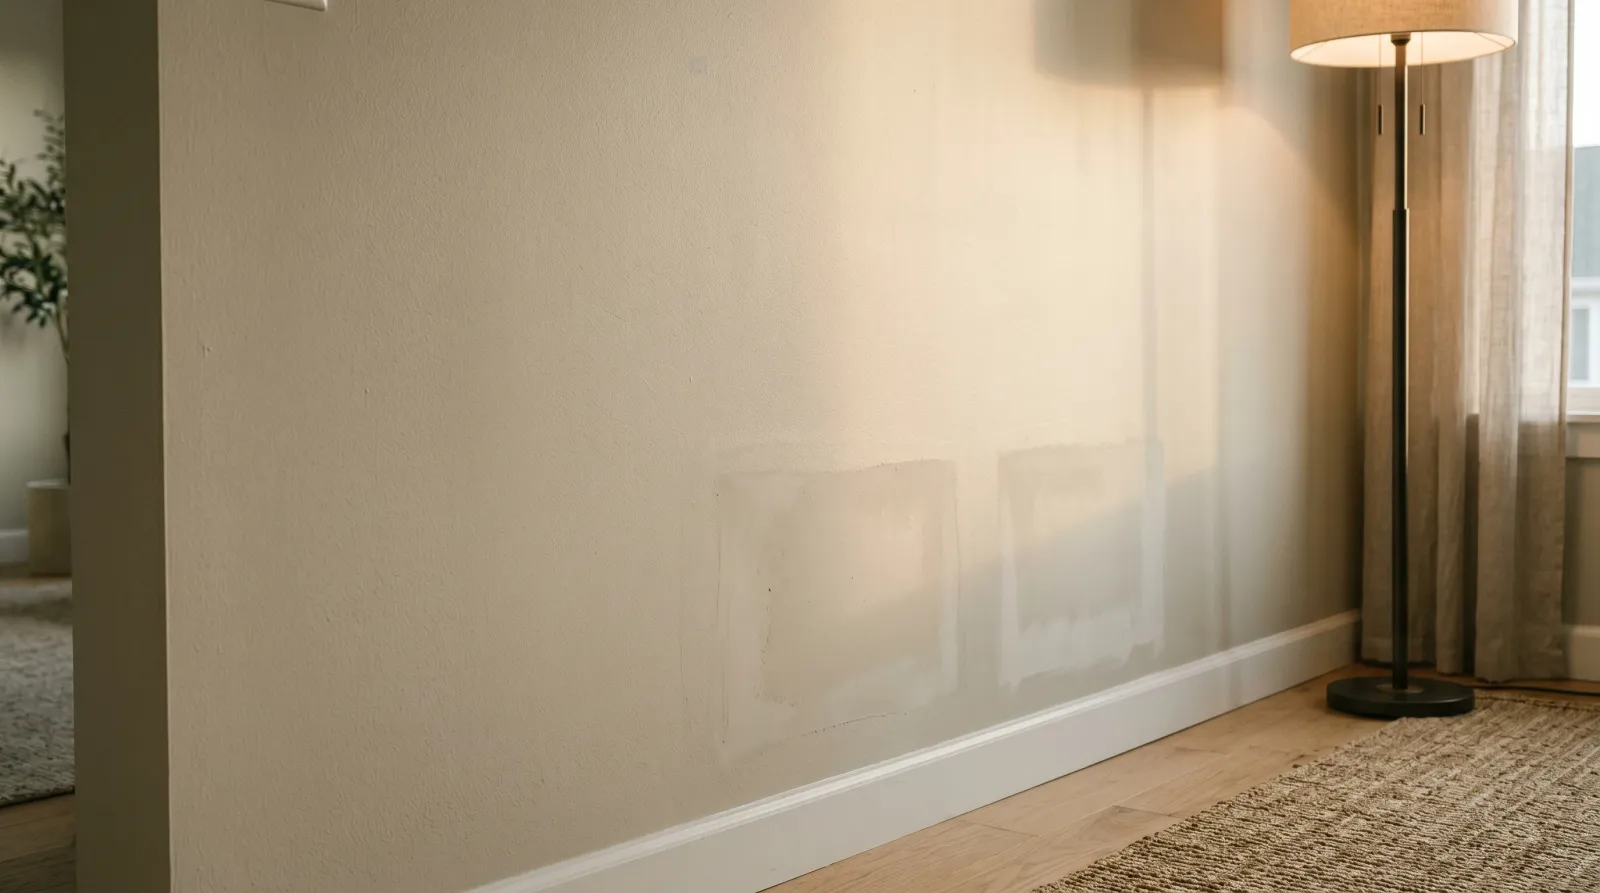
Most people notice it without naming it. You finish a wall, the room looks fine, then a floor lamp goes on at night and three duller rectangles stare back at you from a few feet away. That is flashing, and it is almost always a story about the substrate, not the paint. The technical definition is short: flashing is uneven sheen across a continuous painted surface caused by uneven absorption during film formation. A latex film loses about 60% of its water in the first hour. Where the wall drinks faster, the binder gets less time to coalesce, and the dry film reflects light differently from the rest.
The key thing to hold onto is that the paint above the flashed area and the paint above the rest of the wall are chemically identical. Same can, same roller, same color reading on a spectrophotometer. What differs is the optics of the cured film — micron-scale roughness from binder particles that did not fully fuse, scattering light at a different angle than the smoother film next to it. That is why flashing always shows up under raking light and disappears under flat overhead light. You are seeing surface texture, not pigment.
Why It Happens, in One Paragraph of Chemistry
Modern wall paint is a waterborne dispersion. Pigment, binder (usually an acrylic or vinyl-acrylic emulsion), extenders, and water. When you roll it on, two things happen in sequence: the water evaporates, and then the binder particles, now packed close together, soften and fuse into a continuous film. That second step is called coalescence, and it needs both time and a controlled drying rate. Pull the water out too fast and the binder particles freeze in place before they have flowed together. The film is still there. It is still the same color. But the surface is microscopically rougher, and rougher surfaces read duller. A porous patch in the wall is a sponge for that water. So the film over the patch coalesces less, and the sheen reads lower. That is the whole mechanism.
The Three Variants You Will Actually See
Flashing has the same chemistry every time, but it shows up in three flavors depending on what made the substrate non-uniform.
Primer flashing. The original sin. Someone spot-primed three drywall repairs instead of priming the whole wall, and the patched areas now read duller than the field. Joint compound is far more absorbent than aged painted drywall, so the topcoat dries unevenly across the seam. This is the most common variant on a repaint and the easiest to predict — anywhere fresh mud meets old paint without a unified primer underneath, you will see it.
Patch flashing. Adjacent to primer flashing but a step worse. The repair itself was primed, but the primer chosen was the wrong porosity match. A high-build drywall primer over old eggshell, or a thin sealer over fresh mud, still leaves a porosity gradient that the topcoat exposes. The substrate looks ready. It is not.
Water-stain flashing. Different mechanism, same outcome. A water stain, a degreaser ring around a switch, or a nicotine band along the ceiling line dissolves into the wet topcoat. The pigment in the stain migrates up through the film as it dries and re-deposits at the surface, where it scatters light differently than the unstained zone next to it. The paint coalesces normally. The optical surface is just contaminated. People often diagnose this as flashing and then add a second coat of finish paint, which makes it worse, because more solvent means more dissolution. The fix is a shellac or oil-based stain-blocker between the wall and the topcoat.
Why Sheen Makes It Louder
Flat paint hides most flashing because flat paint is already scattering light in every direction. There is no gloss differential to catch. Eggshell shows it. Satin shows it more. Semi-gloss and gloss show every patch, every repair, every cut-in line. The mathematics of specular reflection are unforgiving — small sheen differences read as obvious sheen differences when the baseline gloss is high. If you are working in a bathroom or kitchen with eggshell or higher, the substrate prep budget needs to go up to match.
The Fix, in Plain Terms
Prime uniformly. That is the entire takeaway, and it is the thing that gets skipped on almost every flashing call.
If you are repainting a room with skim-coat repairs, do not spot-prime. Prime the whole wall, edge to edge, with a single product at a single porosity. Zinsser 1-2-3 over drywall and old paint will give you a unified substrate the topcoat can land on without negotiating. If the wall has stain history, spot-prime the stained zones with BIN shellac first, then roll the wall in 1-2-3 over the top so the porosity matches everywhere. Then a full topcoat in one wet pass, corner to corner, no spot-touching halfway through.
For the symptom-side decision tree — what to do when you already have flashing on a wall — see how to fix flashing on walls. For the chemistry of why primer matters at all, the primer explainer is the next read. The shortest version of all of this is one sentence. Flashing is not a paint problem. It is the wall asking you to give the film something uniform to form on.