Flashing on Walls — Why Patches Look Duller and How to Fix It
Paint flashing is dull or shiny spots where the wall absorbed coats unevenly. Re-prime the patched areas, run a full second coat, and the sheen reads flat.

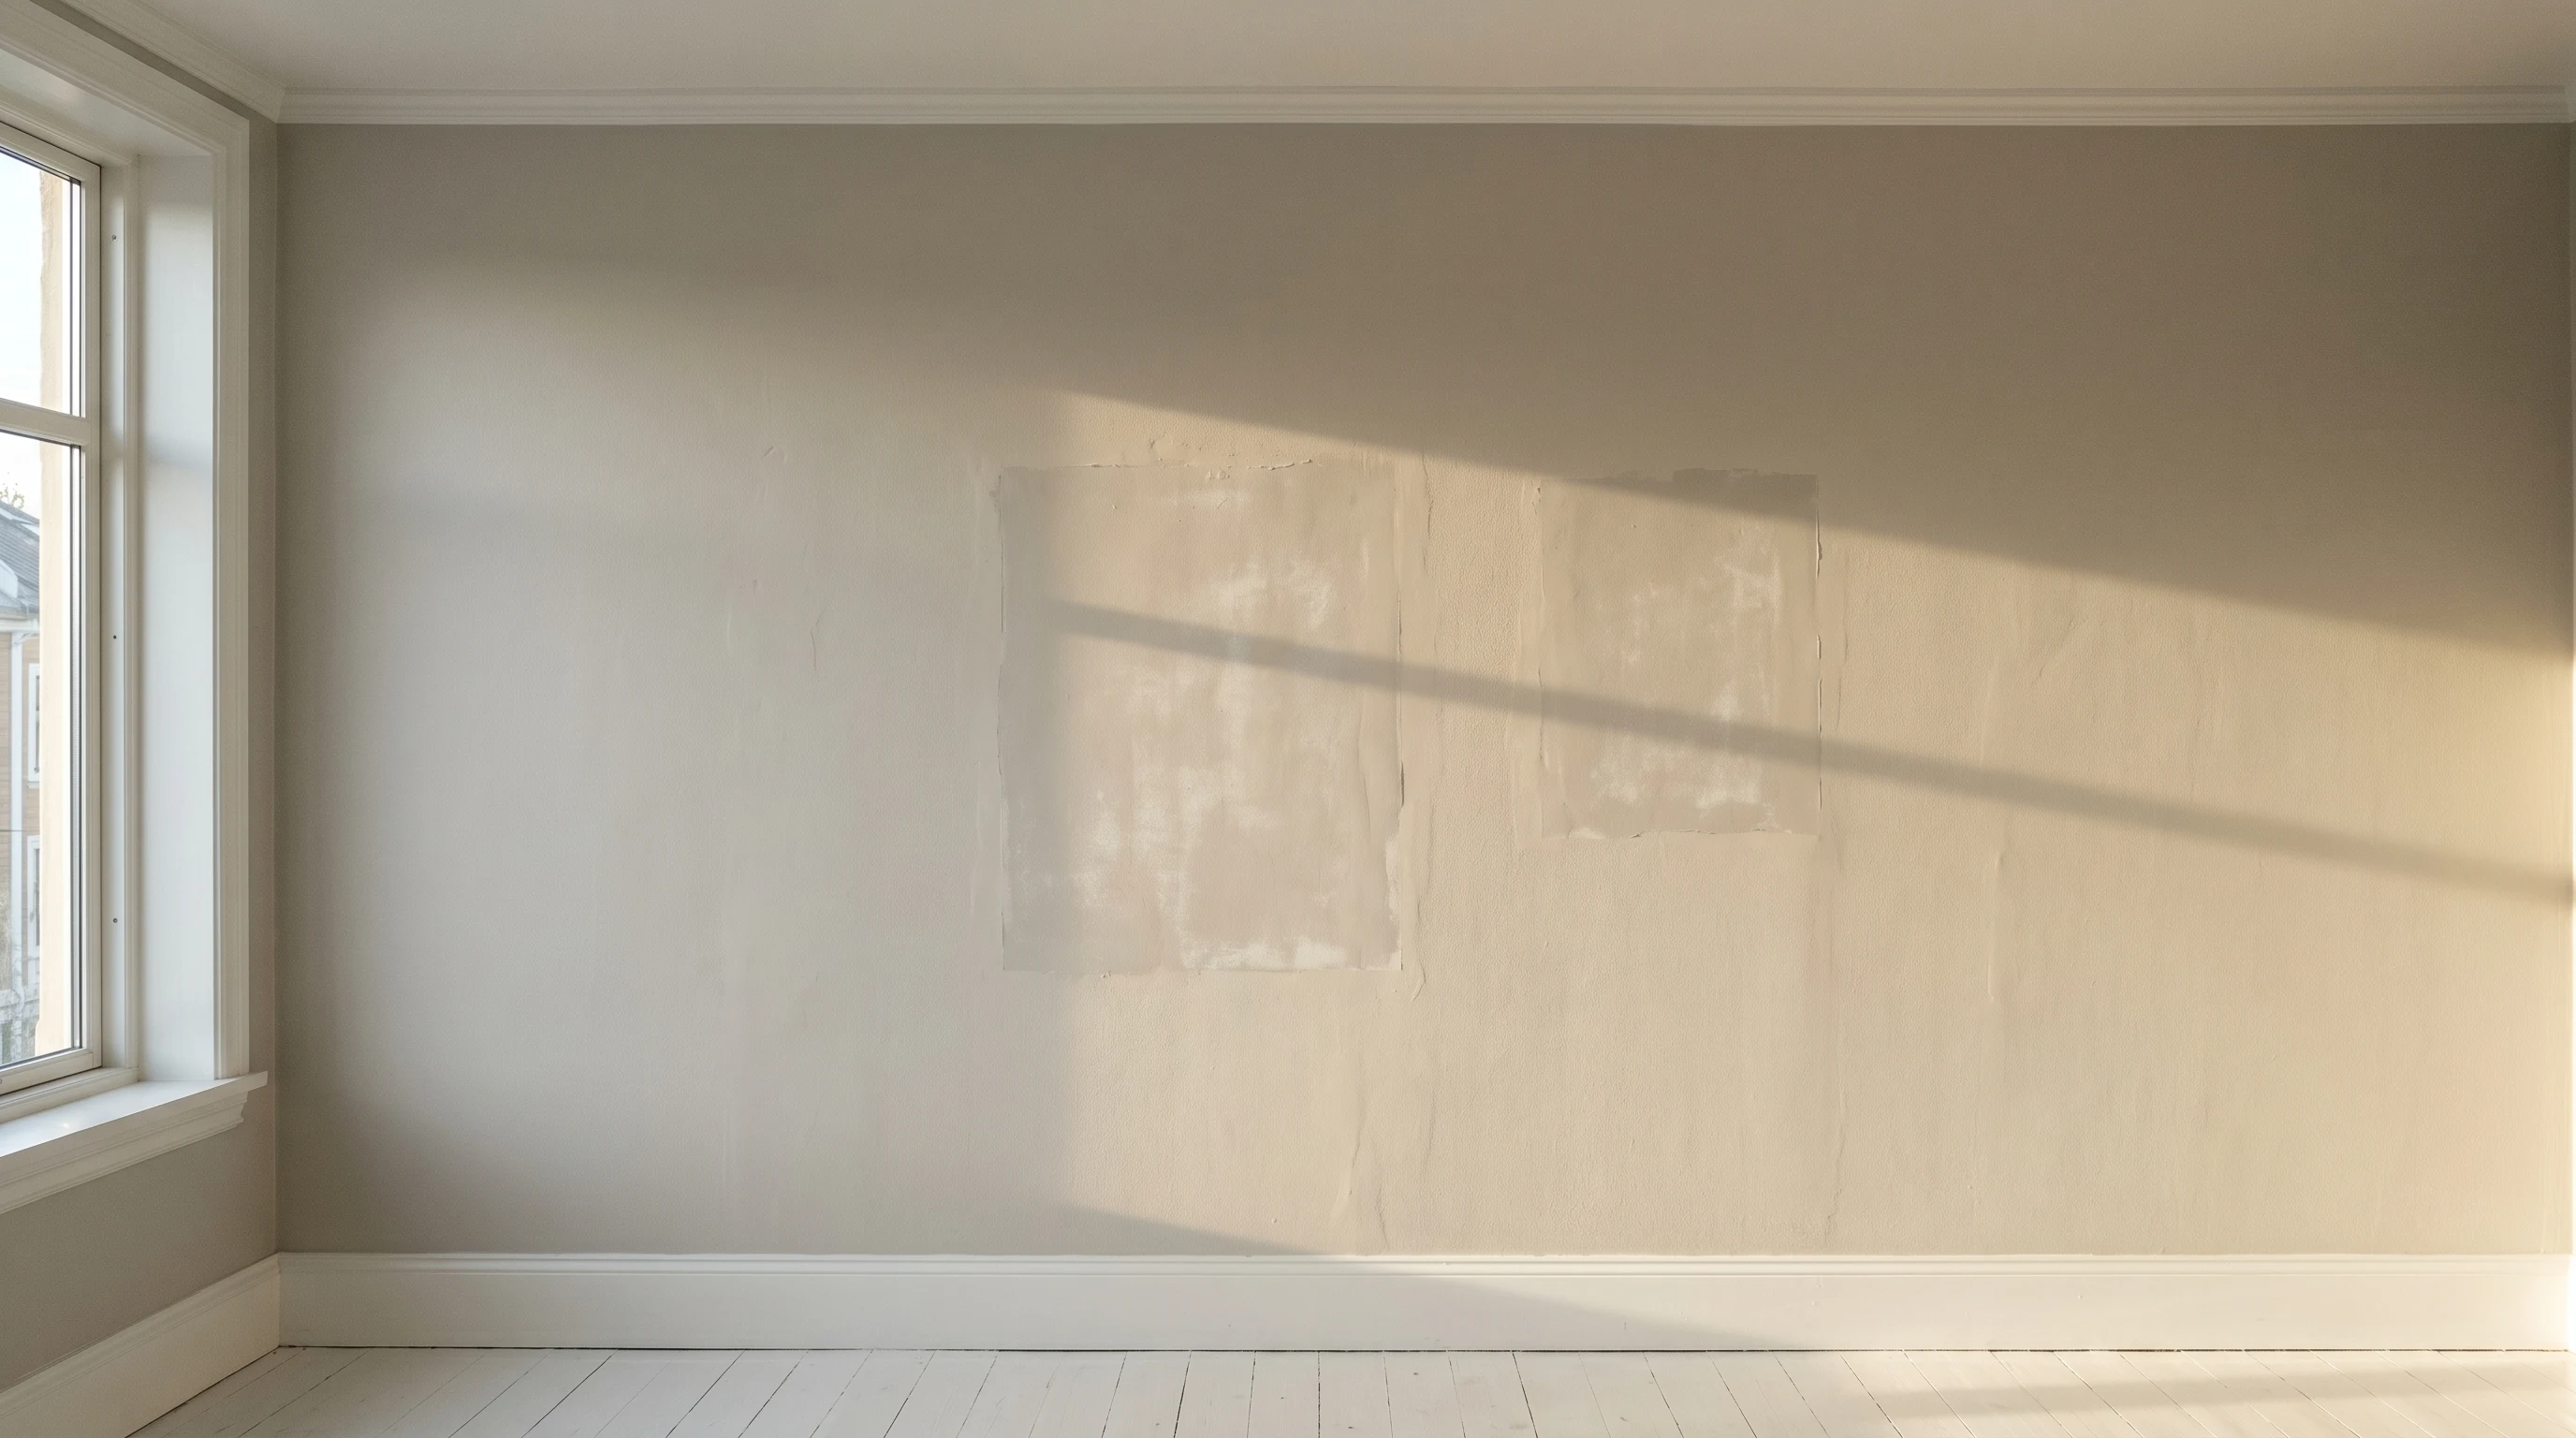
Flashing isn’t a paint defect. It’s the wall telling you the surface underneath isn’t uniform. You spot-primed three drywall patches, painted the room, and three duller rectangles are staring at you from the long wall the next morning. Re-prime the patches edge-to-edge with the surrounding wall, run a full second coat, and the sheen reads flat.
Does This Match What You’re Seeing?
Rake a floor lamp sideways across the wall. You’ll see one of these.
- Rectangular duller patches where you skim-coated. Spot-primed drywall repair absorbed differently than the rest of the wall.
- Duller bands along the corners and ceiling line. Cut-in dried at a different rate than the rolled field.
- A duller zone near a sink, switch, or thermostat. Degreaser soaked into the old paint and made that area more absorbent.
- Shinier streaks running with the roller direction. Heavier film off a fresh roller, glossier than the rest.
- Whole-wall mottling every couple of feet. Substrate inconsistent across the whole surface. Needs a full primer coat, no spot fix.
If you see vertical bands every 3 to 4 feet instead, that’s a wet-edge problem, not flashing. Read the lap marks fix instead.
How Serious Is This
Cosmetic. The film is bonded, the wall is sealed. Nothing fails. What you can’t do is stop noticing the duller patches the second light comes through the window.
The fix takes one afternoon. Prime the absorbent zones, recoat the whole wall, done. Touching up just the dull spots makes it worse. Whole wall, corner to corner.
Why Flashing Happens (root Cause)
Flashing is a porosity problem. The substrate under your topcoat isn’t uniform, and the topcoat reads that as a sheen difference once it dries.
Three causes account for almost every set of flashed patches I’ve seen.
1. Patches were spot-primed but the rest of the wall wasn’t. Drywall repair: joint compound, sanded smooth, quick brush of primer on the patch, paint the wall. The patch is sealed. The surrounding paint is sealed. But the boundary between them sits on top of old paint that’s a slightly different porosity than the fresh compound. Topcoat goes on, binder coalesces unevenly across that boundary, and you see the patch outline.
2. Bare joint compound got no primer at all. Compound is a sponge. It drinks a full coat of finish paint and still feels thirsty. The binder gets pulled into the substrate before it can level. Duller, chalky-looking patch right where the repair sits.
3. The wall was spot-cleaned with degreaser. Kitchen grease, soap scum, marker stains. Somebody scrubbed one zone with TSP and rinsed the rest with water. The cleaned zone is more absorbent than the rest. New paint flashes off it.
A fourth cause shows up on older homes. Patches of old oil-based paint mixed with patches of latex. Latex over oil and latex over latex coalesce differently. Looks like flashing, behaves like a compatibility problem. Same fix: prime the whole wall with a bonding primer.
From the Chemist — Why Uneven Absorption Flashes Off
Most homeowners notice this without naming it. You finish a wall, step back, and certain patches look duller than the rest. The reason for that is almost always a story about the substrate, not the paint.
Here’s what’s happening at the film level. A latex paint film forms in two stages. First, the water phase evaporates out of the wet coat. Then, with the water gone and the resin particles pressed together, the binder particles fuse into a continuous, optically uniform film. That second step is coalescence, and it’s what gives you a smooth, even sheen across the whole wall.
Coalescence needs time. If part of your wall is more porous than the rest (a patched area, an unprimed repair, a zone someone spot-cleaned with degreaser) the porous zone pulls water out of the wet paint faster than the surrounding sealed areas. The binder over that patch doesn’t get the same window to fuse evenly. The film cures, but the surface ends up with a different micro-texture: rougher, less coalesced, and optically duller. The chemistry of the paint is identical across the wall. The geometry of the cured film is not.
The fix is to equalize the substrate, not chase the symptom with more paint. A primer levels the absorbency. Once both the patch and the surrounding paint pull water at the same rate, the topcoat coalesces uniformly and the sheen reads flat. That’s why we say prime to equalize. It isn’t about color or coverage. It’s about giving the binder a fair shot at forming the same film everywhere.
— David Chen, Formulation Lead
The Fix for Existing Flashing
Same fix regardless of which cause started it.
Step 1. Sand the Boundaries Flat
Use 220 grit on a sanding sponge. Light pressure on the edges of each spot-primed or patched area. You’re not removing paint. You’re knocking down the feathered ridge where the old primer stopped and the surrounding paint started. Your fingertip shouldn’t catch a transition. Wipe with a tack cloth or damp microfiber and let it dry 20 minutes.
Step 2. Re-Prime the Absorbent Areas
Roll Zinsser Bulls Eye 1-2-3 over every patch, every spot-cleaned zone, and a 6-inch halo around each one. The halo overlap is the point. Primer should feather into the surrounding paint, not stop hard at the patch edge. One hour to recoat. If oil-paint zones are bleeding through, switch to Zinsser BIN shellac primer instead.
Step 3. Prime the Whole Wall If You Have More Than Three Patches
Three or fewer, halo-prime them as in Step 2. Four or more, roll a full wall coat of primer. Cheaper in time than chasing spots. Zinsser 1-2-3 rolls like paint, dries in an hour, gives you uniform porosity corner to corner.
Step 4. Recoat the Entire Wall, Not the Flash Zone
Roll corner to corner, top to bottom, in one session. Cut in fresh edges with the finish paint, roll into the wet cut-in, don’t stop mid-wall. Same direction across the whole field. If the room is over 70°F or the wall is over 12 feet wide, add half a cup of Floetrol per gallon to keep the wet edge workable.
Spot-coating dull patches without addressing the substrate is the trap. You’ll create a thicker, glossier patch where the duller one was, and the next morning’s light will find it.
Safety
Cross-ventilate while priming and painting. Never mix bleach with vinegar, ammonia, or hydrogen peroxide cleaners on the wall before painting. The combination produces chlorine and chloramine gas. If the wall was cleaned with any of those, rinse with clean water and dry 24 hours before primer. Eye pro for sanding overhead, dust mask if you’re sanding more than a small patch.
Common DIY Mistakes
- Spot-priming a patch with no halo overlap. The primer edge becomes the new flash boundary. Feather 6 inches past the repair into surrounding paint.
- Skipping primer because the paint is “self-priming.” Self-priming means it forms a film on a uniform substrate. Joint compound is not a uniform substrate. Bare patches still need primer.
- Hitting just the dull spots with topcoat. Creates a thicker, glossier zone right where the dull zone was. Whole wall, every time.
- Choosing eggshell or satin over a half-primed wall. Higher sheen reveals every patch. If the wall isn’t primed wall-to-wall, drop to matte. Better to prime and use the sheen you wanted.
- Painting over fresh joint compound the same day it’s sanded. Compound dust keeps primer from contacting the substrate. Wipe it down. Vacuum first if it’s heavy.
- Mixing primer brands across the same wall. Different primers seal at different rates. One brand, whole wall.
Recommended Product
Zinsser Bulls Eye 1-2-3 earns the shelf space here. Water-based, sticks to almost any interior substrate, sands clean, recoats in an hour, rolls like paint. Half a gallon does most walls. Around $25 a gallon, treats one to two rooms. Doesn’t smell like a chemistry set, which matters if you’re priming a kid’s room.
Buy Zinsser Bulls Eye 1-2-3 on Amazon
For walls with stubborn oil-based paint, smoke staining, or heavy water rings, step up to Zinsser BIN shellac primer. Stronger seal, 15-minute dry. Smells worse, so ventilate hard.
Prevention
- Prime any wall with more than two drywall repairs. Faster to roll the whole wall than halo-prime each patch and clean a brush every time.
- Halo-prime every patch by 6 inches. Hard primer edges become flash boundaries.
- Two coats. Always two coats. One coat of finish over a primed wall is asking for a sheen variation the morning light will find. Two coats give the binder a uniform film thickness to coalesce in.
- Use matte or flat in problem rooms. Bathrooms and kitchens want eggshell for washability, but over heavy repairs drop one step in sheen. Bedrooms in matte hide most flashing entirely.
- Stir the primer hard, then stir again ten minutes in. Settled primer goes on thin at the top of the can, thick at the bottom, and the porosity it seals reads as a soft band.
- Don’t spot-clean walls with TSP or degreaser without rinsing the WHOLE wall. Cleaned zones become absorbent zones.
When to Call a Pro
- Skim-coated walls in heritage homes where sanding risks pulling more compound. A pro floats, primes, and finishes in one workflow.
- Vaulted ceilings or stairwell walls over 12 feet where back-rolling primer needs scaffolding. A pro with a sprayer does it in half a day.
- Pre-1978 homes where any sanding is a lead test first. The RRP rules apply the moment sandpaper touches paint that old.
- Wallpaper-removal jobs where residual paste reads as flashing under any finish coat. Pro strip-and-seal beats two rounds of primer hoping the paste lets go.
- Whole-room flashing across every wall in a kitchen or bath, where the underlying issue is moisture or grease that’s already changed the existing paint. Diagnose the moisture first, paint second.
What’ll Bite You in Two Years
Cover flashing with one coat now and the patches telegraph back through the next time you repaint. Topcoats don’t seal porosity. Primers do. Skip the primer and hit the flashed wall with a second finish coat: the sheen difference reduces but doesn’t go away. Two years out, the next coat goes on and the patches come right back. Prime wall-to-wall once and the wall is done. Skip it and you’ve made the same mistake twice in the same film.
Related
Frequently asked questions
Why does my flashing only show up in certain light?+
Can I just paint over the flashed spots?+
Do I really need to prime patches if the paint says self-priming?+
Does the sheen of my finish paint affect flashing?+
Will Floetrol help with flashing?+
- How to fix lap marks
- How to fix roller marks
- Best interior trim paint
- Best primer for drywall
- How to paint drywall