How to Test for Lead Paint Before Painting
How to test for lead paint before you repaint a pre-1978 home. What the swab tests catch, where they fail, and when a 0.5 mg per square centimeter result means stop.

Most people skip this step and never know whether it mattered. You buy a house built in the 1950s, the bedroom trim is chipping, and the obvious move is to sand it smooth and roll on something fresh. The problem isn’t the paint you’re adding. It’s the paint already there, and what a sander does to it. If that trim was painted before 1978, there’s a real chance it contains lead, and the dust from sanding it is the hazard, not the chip itself.
Lead went into paint as a pigment and drying agent for decades because it worked. White lead gave excellent hide and a hard, durable film. The U.S. banned it from consumer paint in 1978, so the dividing line is simple: homes built before 1978 may have lead paint, homes built after almost certainly don’t. The older the home, the higher the odds and the higher the lead concentration in the early layers.
TL;DR
- Built before 1978 and planning to sand, scrape, or heat-strip? Test first.
- A chemical swab kit (LeadCheck, D-Lead) costs $10–30 and gives a yes or no in minutes.
- Swabs read only the surface they touch. Notch down through every layer and swab the exposed edge.
- The federal hazard line is 1.0 mg per square centimeter, or 0.5% by lab weight. Swabs trip around 0.5 mg per square centimeter.
- A positive result means stop dry-sanding: leave the paint intact and paint over it, use wet methods, or hire an EPA RRP-certified pro.
- Disturbing more than 6 square feet inside or 20 square feet outside is regulated work in a pre-1978 home.
Why Testing Matters Before You Sand
Intact lead paint on a wall isn’t, by itself, poisoning anyone. The lead is locked in a cured film. The danger shows up when you break that film into particles small enough to inhale or to settle as dust on floors where kids crawl and hands go to mouths.
Here’s the mechanism. Sanding shears the film into fine particulate, and much of that dust is under 10 microns, small enough to stay airborne and bypass the upper airway. Heat-stripping is worse: lead fumes at temperatures a heat gun easily reaches, and the vapor condenses into ultrafine particles you can’t see. Lead doesn’t break down in the body the way a solvent does. It deposits in bone and soft tissue and accumulates, and no exposure level has been shown safe for a child’s developing nervous system.
Testing comes before prep because prep is the exposure event. Once you’ve sanded, the dust is already in the air. Testing afterward tells you what you already breathed.
When to Test (and When You Can Skip It)
Test before you start if:
- The home was built before 1978 and you’ll sand, scrape, grind, or heat-strip any painted surface.
- You’re working on high-friction surfaces: windows, doors, jambs, railings, baseboards. These shed lead dust as they rub and slam, and they hold the oldest paint.
- The paint is already chipping, chalking, or peeling. Deteriorating lead paint is the most common source of childhood exposure.
- Young children or someone pregnant will use the space.
You can reasonably skip the test if:
- The home was built in 1978 or later. Consumer lead paint was already banned.
- You’re not disturbing the existing film at all. A clean, intact surface that you scuff lightly by hand and paint over does not release the lead.
- You’re working on a substrate that was never painted, like new drywall or bare wood.
Even when you plan to paint over intact lead paint, the surface has to actually be sound. If it’s flaking, you can’t just bury it. See the guide to fixing peeling paint for why a failing film has to be addressed before it gets a topcoat.
How a Lead Test Kit Works
Home kits use a color-change reaction. The widely sold 3M LeadCheck uses a sodium rhodizonate swab that turns pink or red on contact with lead above roughly 0.5 mg per square centimeter; the D-Lead kit uses the same chemistry. You crush the swab to release the reagent, rub it on the surface for about 30 seconds, and read the color.
A swab is a threshold test, not a measurement: “above about 0.5 mg/cm²” or “below,” no number. The federal hazard standard is 1.0 mg/cm² by XRF analyzer or 0.5% (5,000 ppm) by lab weight, so a swab tripping at 0.5 mg/cm² is conservative on purpose. That’s what you want from a screening tool.
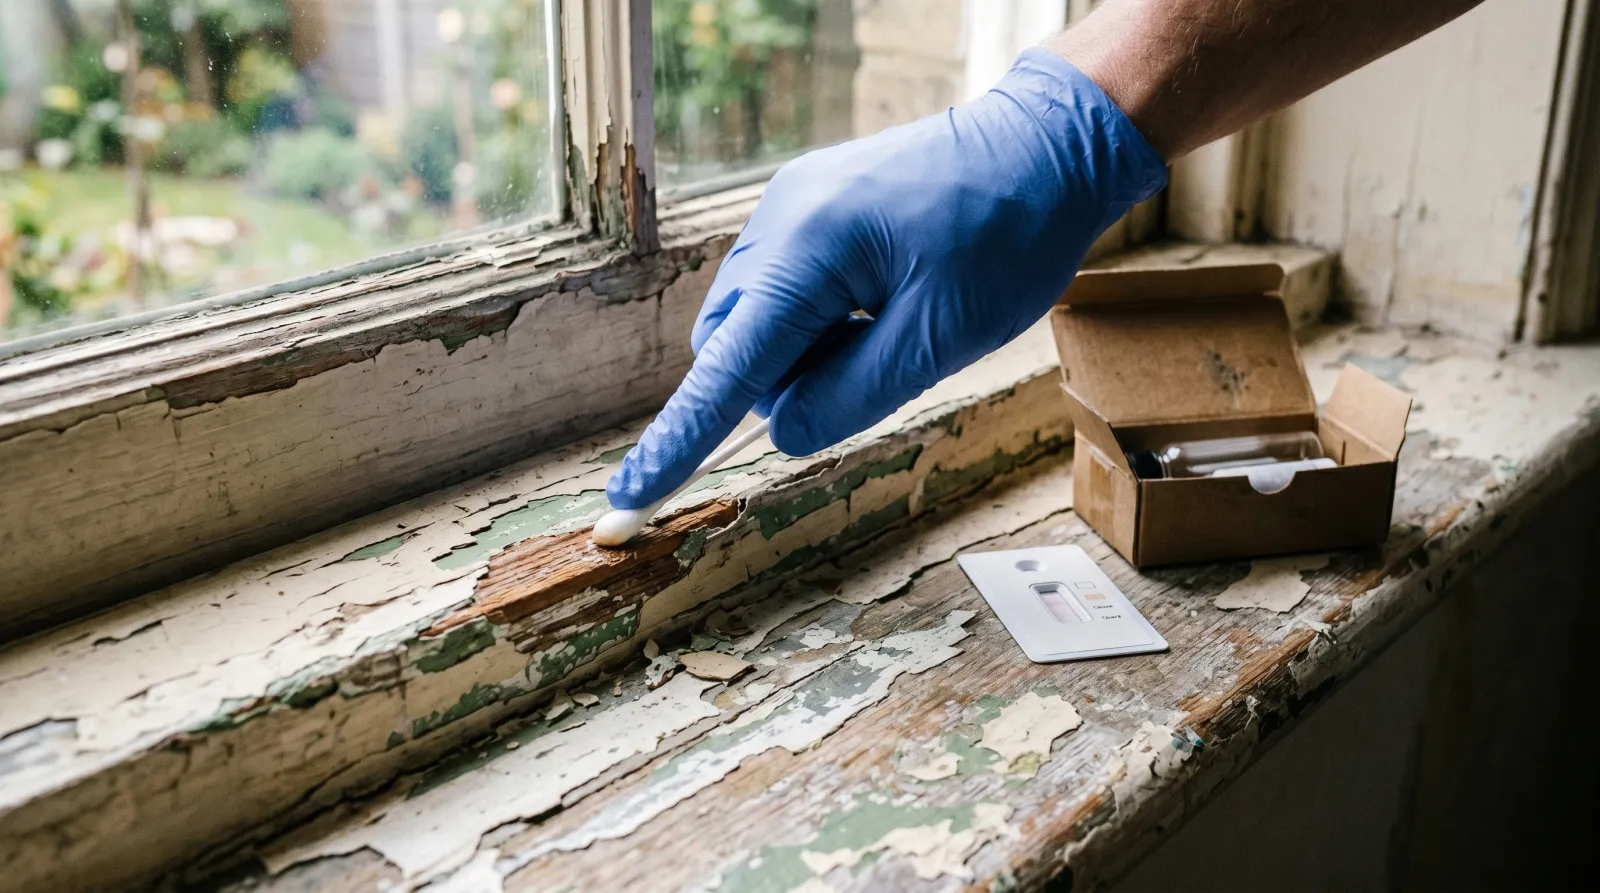
To use a swab correctly:
- Confirm the kit with the included verification card first. If the card doesn’t read positive, the swab is dead and so is your result.
- Notch a small groove down through all the layers to expose every edge, including the bottom one against the substrate. The oldest, leadiest layer is usually on the bottom.
- Swab the cut edge, not just the top. Testing only the top reads the most recent coat, the layer least likely to contain lead.
- Test each surface separately. Window trim, door, and wall can have different paint histories in the same room.
Where Swab Kits Fail
A swab is a screen, not a verdict, and it fails in two predictable directions.
False negatives happen when you test the wrong layer. If a 1955 lead coat was painted over in 1992, the swab touches the 1992 acrylic and reads clean while the lead sits a millimeter below. This is why the notch-down step is not optional. The endpoint also gets hard to read on dark surfaces.
False positives are the more common failure with rhodizonate kits. The same chemistry that flags lead reacts with certain other metals, and red or pink substrate colors can mask or mimic the endpoint. A positive over a bright red painted surface deserves a confirmatory lab test before you spend money on abatement.
| Method | Cost | Gives a number? | Best for |
|---|---|---|---|
| Home swab kit (LeadCheck, D-Lead) | $10–30 | No (threshold only) | Quick DIY screen before prep |
| Mail-in lab paint chip test | $25–50 per sample | Yes (% by weight) | Confirming a swab result |
| Certified XRF inspection | $300–600 per visit | Yes (mg/cm²) | Whole-house, real estate, regulated jobs |
For a single questionable doorframe, a swab plus a mail-in chip test is enough. For a whole pre-1978 house you’re about to renovate, pay for an XRF inspection by a certified risk assessor; it covers every surface in one visit.
What to Do If the Test Is Positive
A positive result narrows your options to three honest paths.
Leave it intact and paint over it. If the film is sound and well-bonded, the cleanest answer is often to not disturb it. Wash with a TSP substitute, scuff lightly by hand, and prime before your topcoat. No power sanding. A bonding primer lets fresh paint grip a glossy old surface without the abrasion you’re trying to avoid.
Use wet, low-dust methods yourself, within the limits. Wet-sanding and chemical strippers keep lead bound in slurry instead of airborne dust. Federal rules let a homeowner do limited work on their own residence, but the practical safety line is the one the EPA RRP rule draws for contractors: disturbing more than 6 square feet inside a room or 20 square feet outside needs containment, HEPA cleanup, and dust-wipe clearance. Dry sanding and open-flame burning of lead paint are prohibited regardless of who does the work.
Hire an EPA RRP-certified contractor. For anything beyond those square-footage limits, or any job in a home with young children, this is the move. RRP (Renovation, Repair, and Painting) certification means the crew is trained in containment, HEPA filtration, and cleanup verification. Ask to see the firm’s certification number.
The prep is what changes here, not the paint choice. Once the surface is stable and sealed, the whole-room painting workflow applies like it would on any other repaint.
Common Mistakes
- Testing only the top coat. The swab reads what it touches. Notch through every layer or your clean result is meaningless.
- Dry-sanding to “just smooth it out.” The most common way lead dust gets into a home. Even a quick palm-sander pass aerosolizes lead. Go wet or don’t go.
- Trusting a swab over a bright red surface. Rhodizonate reacts with the surface color. Confirm with a lab chip when the substrate could fool the endpoint.
- Skipping the verification card. A dead reagent reads negative on everything, including lead.
- Vacuuming lead dust with a household vacuum. It exhausts the fine particles back into the room. Wet-wipe, then HEPA-vacuum.
Where to Buy a Test
Lead swab kits are stocked at most hardware stores. Look for “EPA recognized” on the box; the 3M LeadCheck and D-Lead kits both carry it for specific surfaces. A two-swab kit runs about $10, a multi-pack closer to $30. For lab confirmation, environmental labs sell mail-in paint chip kits for $25–50 a sample.
If your test comes back clean and you’re moving on to prep, match your abrasive to the job instead of reaching for the coarsest paper. The sandpaper grit guide covers which grits belong on trim versus walls.