How to Paint Plastisol-Coated Metal Cladding
Painting plastisol cladding the right way: how to spot a failing coating, the adhesion test that saves you, the bonding primer that grips PVC, and what topcoat lasts.

Plastisol fails from the top down. By the time you’re thinking about painting it, the coating is chalky, faded, and starting to craze. The new paint won’t stick to it the way it sticks to drywall. The whole job is adhesion, and adhesion starts with a wash and a scuff, not a can of paint.
TL;DR
- Wait for the right moment: paint only faded, chalking plastisol. Fresh glossy plastisol is too slick to hold paint
- Wash hard: detergent wash, full rinse, no chalk left. The cloth test tells you when it’s clean
- Test adhesion: cross-hatch test in a hidden corner before you trust the whole wall
- Scuff dull: abrade the sheen off with a maroon pad or 220-grit so the primer can bite
- Primer: a bonding primer made for plastics (Bulls Eye 1-2-3, INSL-X Stix, or a solvent-borne PVC bonder)
- Spot-prime bare steel: rust-inhibitive metal primer on anything exposed by flaking
- Paint: 100% acrylic exterior or DTM acrylic, two coats, back-rolled into the profile
- Skill: hard. The adhesion call is the whole job
What Plastisol-Coated Metal Cladding Is
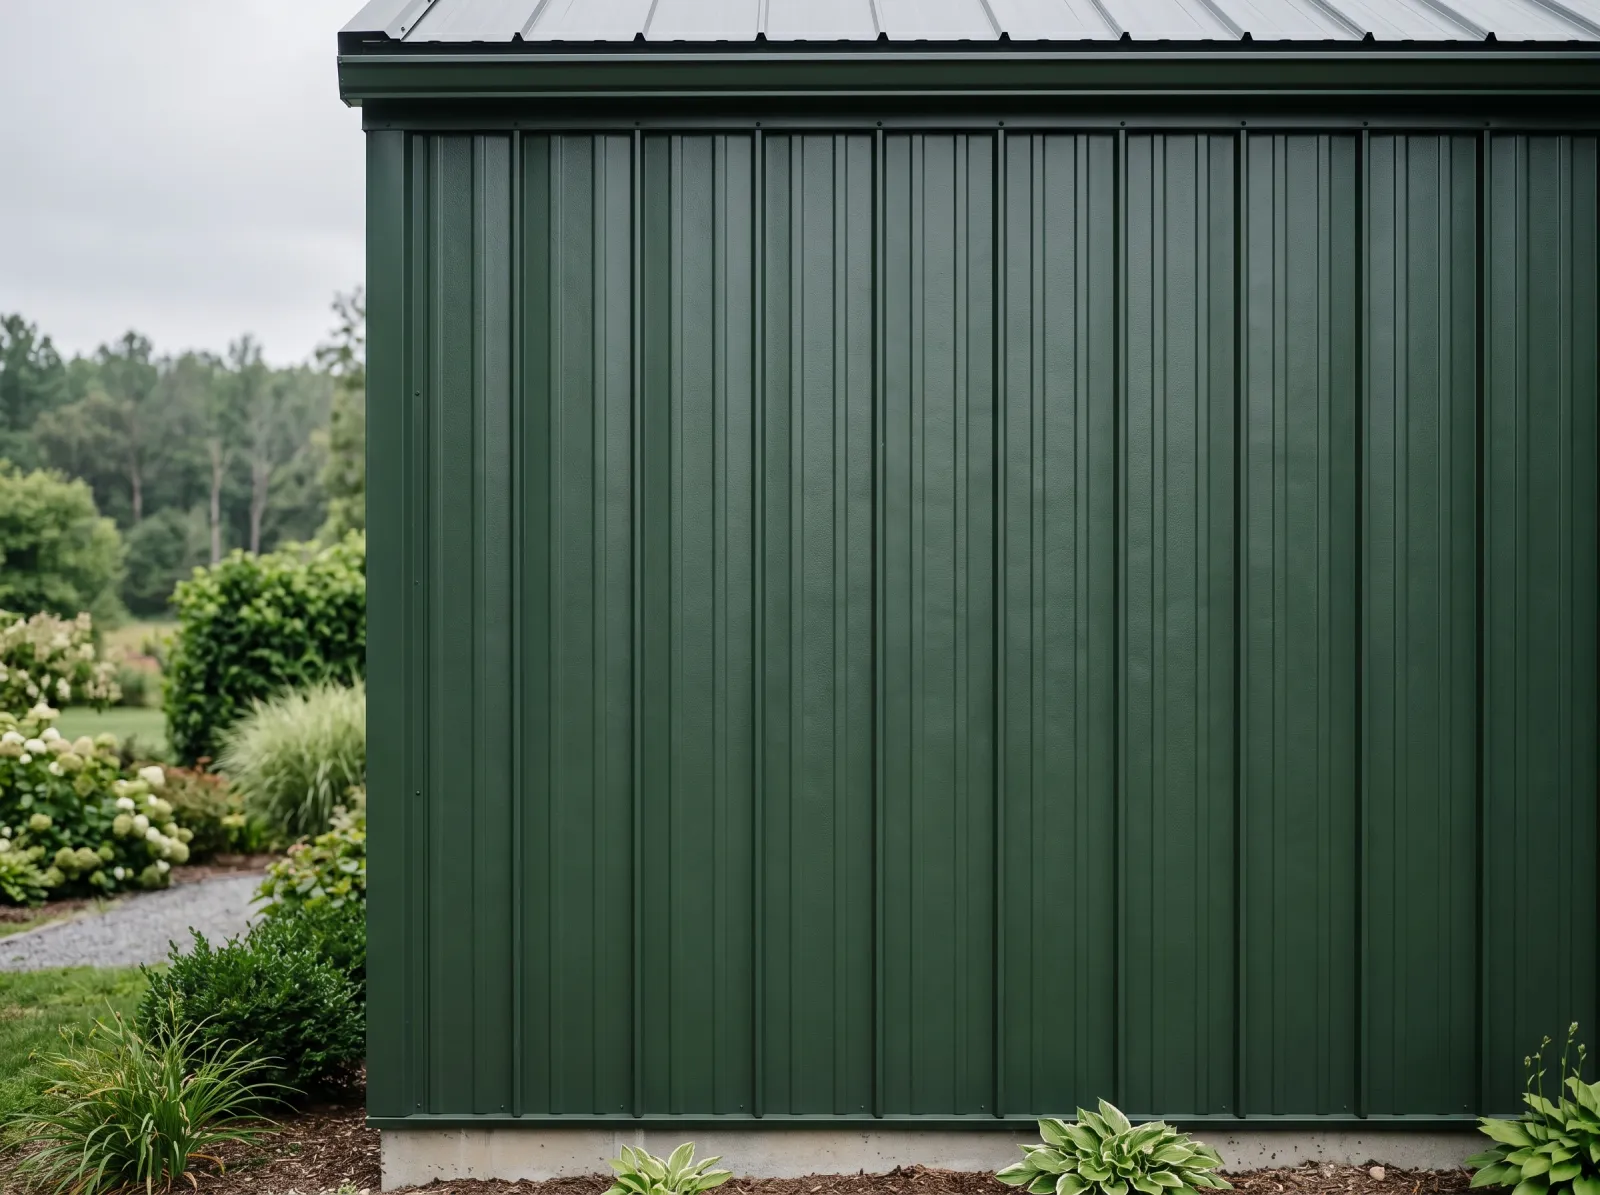
Plastisol is a thick PVC coating, somewhere around 200 microns, baked onto galvanized or galvalume steel at the mill. The metal goes through the coil-coating line, gets the plastisol applied wet, then cures in an oven. The result is the leather-grain siding you see on farm buildings, warehouses, garages, and a lot of light-commercial sheds across the country.
The texture is intentional. That fine pebbled grain hides minor dings and holds color. The coating is tough when it’s new, which is the problem for anyone trying to repaint it.
Why Plastisol Is Different From Other Metal
Most painted metal is a thin factory coating you scuff and recoat. Plastisol is different on two counts.
It’s PVC, not paint. A normal acrylic primer doesn’t bond to vinyl chloride any better than it bonds to a plastic bucket. You need a primer built to grip plastics, and you need the surface scuffed first.
And it ages in a specific way. Plastisol doesn’t peel the way old wood paint peels. It chalks, then crazes into a fine cracked pattern like dried mud, then sheds in flakes. The galvanized steel under it starts showing through. That’s your timing signal. New plastisol is too glossy and slick to paint at all. Aged, chalking plastisol is rough enough that a bonding primer can hold, provided you wash off the chalk first.
Two failure points to keep straight. The plastisol-to-steel bond, which is usually still strong even when the surface looks rough. And the new-paint-to-plastisol bond, which is the one you control and the one that fails when people skip the scuff.
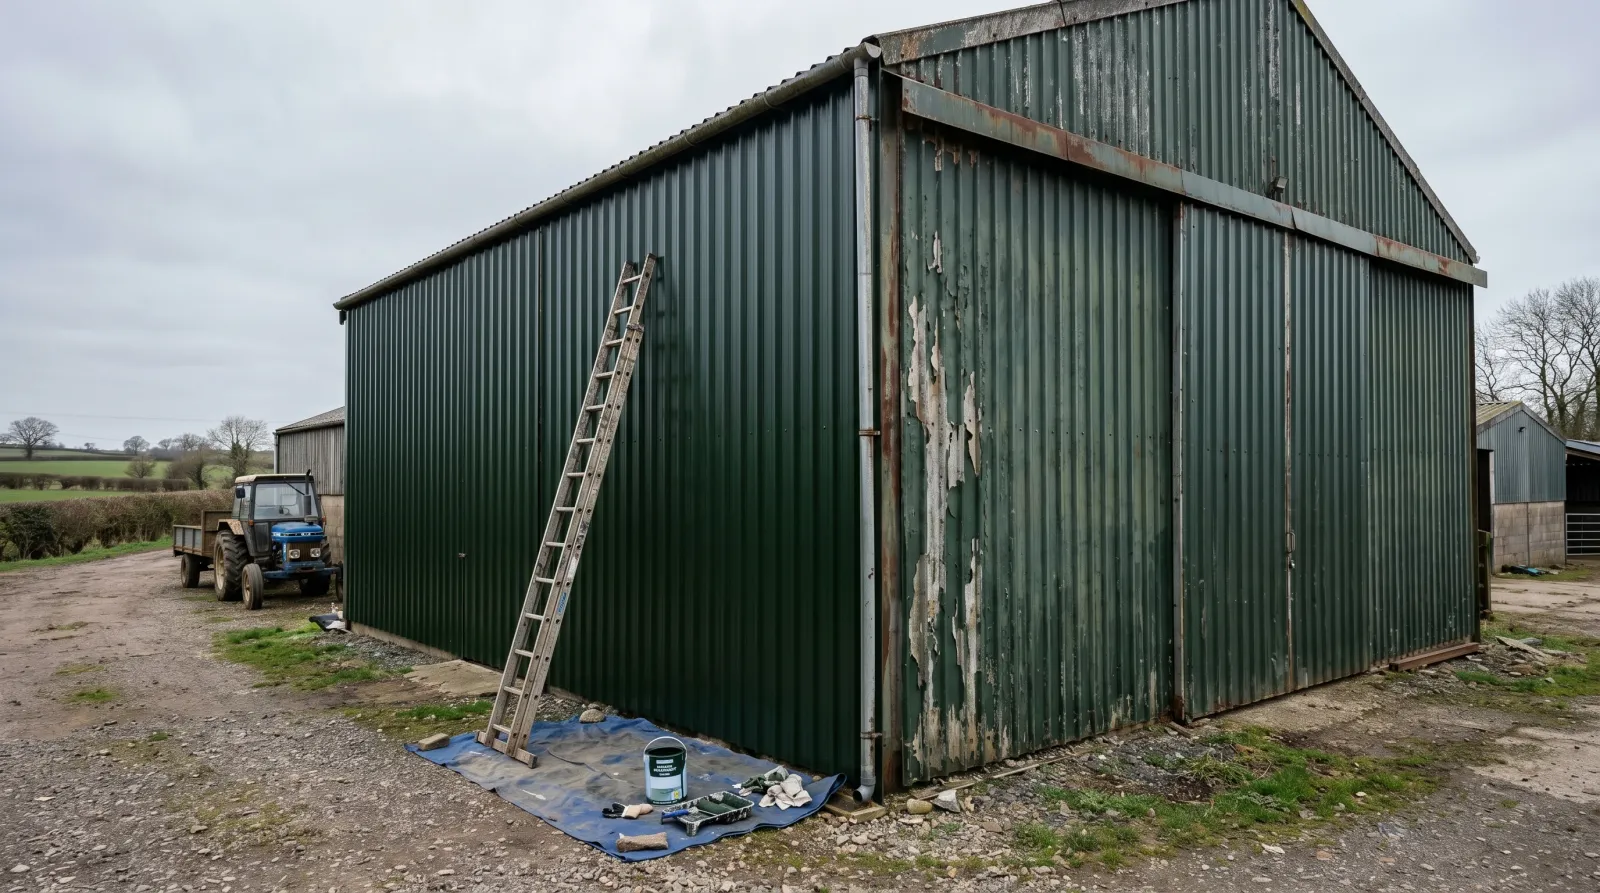
Step 1: Read the Coating Before You Buy Anything
Walk the wall first. What you find decides whether this is a paint job or a panel-replacement job.
Sound but faded and chalking. Best case. The plastisol is intact, the surface is dull, the chalk wipes off. This takes a topcoat well after a wash and scuff.
Crazing in patches. The coating has cracked into that dried-mud pattern in spots, usually on south and west walls that took the most sun. Still paintable, but you have to feather every crazed edge and accept that those areas will fail again first.
Flaking to bare steel. The plastisol is letting go of the metal in sheets. Where it’s gone, you’ve got exposed galvanized steel that needs its own primer. Where it’s loose, it has to come off back to a sound edge. If more than a third of a wall is flaking, price out new panels before you commit to paint.
Still glossy. Too new. Don’t paint it. Nothing you put down will hold on slick, un-weathered plastisol. Wait until it dulls and chalks, which on most installs is 12 to 20 years in.
Step 2: Wash It Like You Mean It
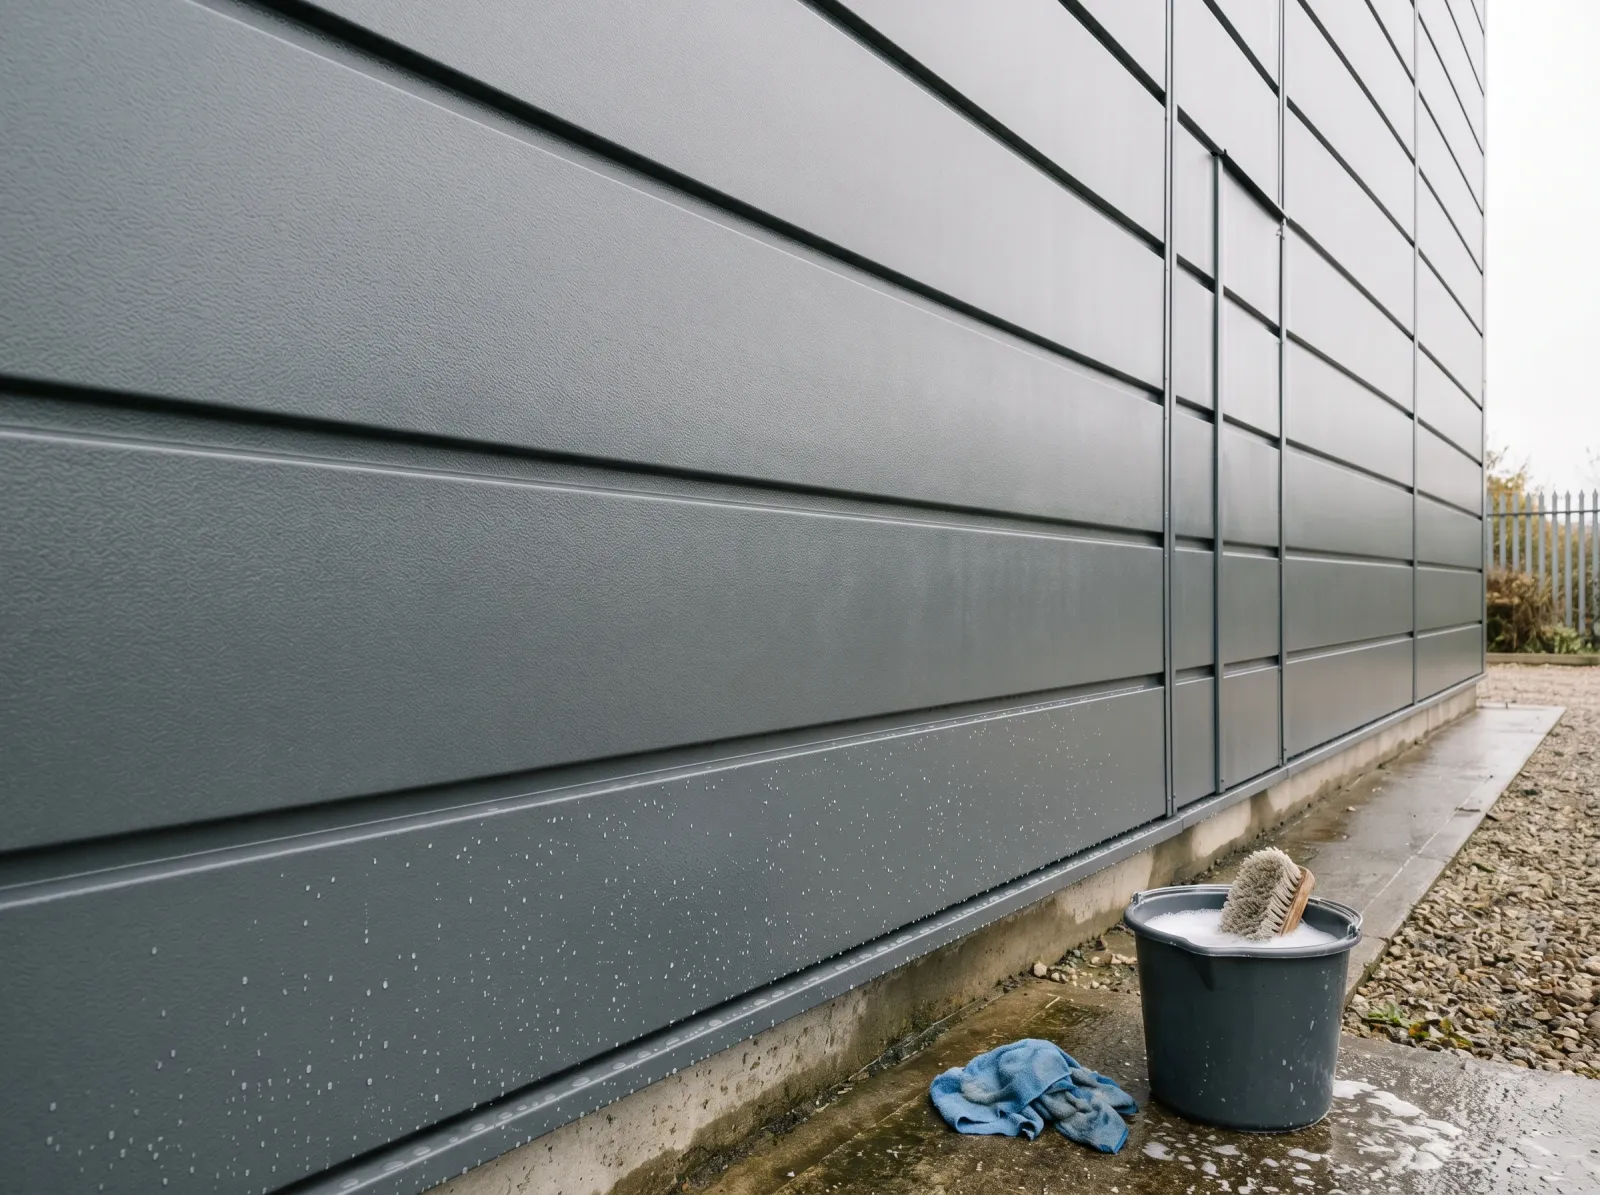
Detergent wash and a full rinse. Run a dark cloth across the dry panel. No chalk pulls off, or you wash again.
Chalk is the enemy here. Chalking is the coating’s surface breaking down into a fine powder, and any paint you put over chalk bonds to the powder, not the panel. The powder lets go, the paint goes with it.
Mix an industrial detergent or a TSP substitute per the label. Scrub the wall with a soft pole brush, working top down so the dirty runoff doesn’t streak the part you just cleaned. For mildew, brush on a 3:1 water-to-bleach mix, dwell 15 minutes, rinse. Plastisol on a north wall in a damp climate grows mildew in the texture grain, and the topcoat traps it if you don’t kill it first.
Rinse with a pressure washer at a moderate setting, 25-degree tip, or a garden hose with real volume. Then the cloth test. Once the wall is dry, drag a dark dry rag across a panel. If it comes back coated in chalk, you wash again. Keep washing until the cloth stays clean. This is the step everyone shortcuts, and it’s the one that decides whether the job holds.
Let the wall dry a full day in warm weather before you go further.
Step 3: Test Adhesion, Then Scuff
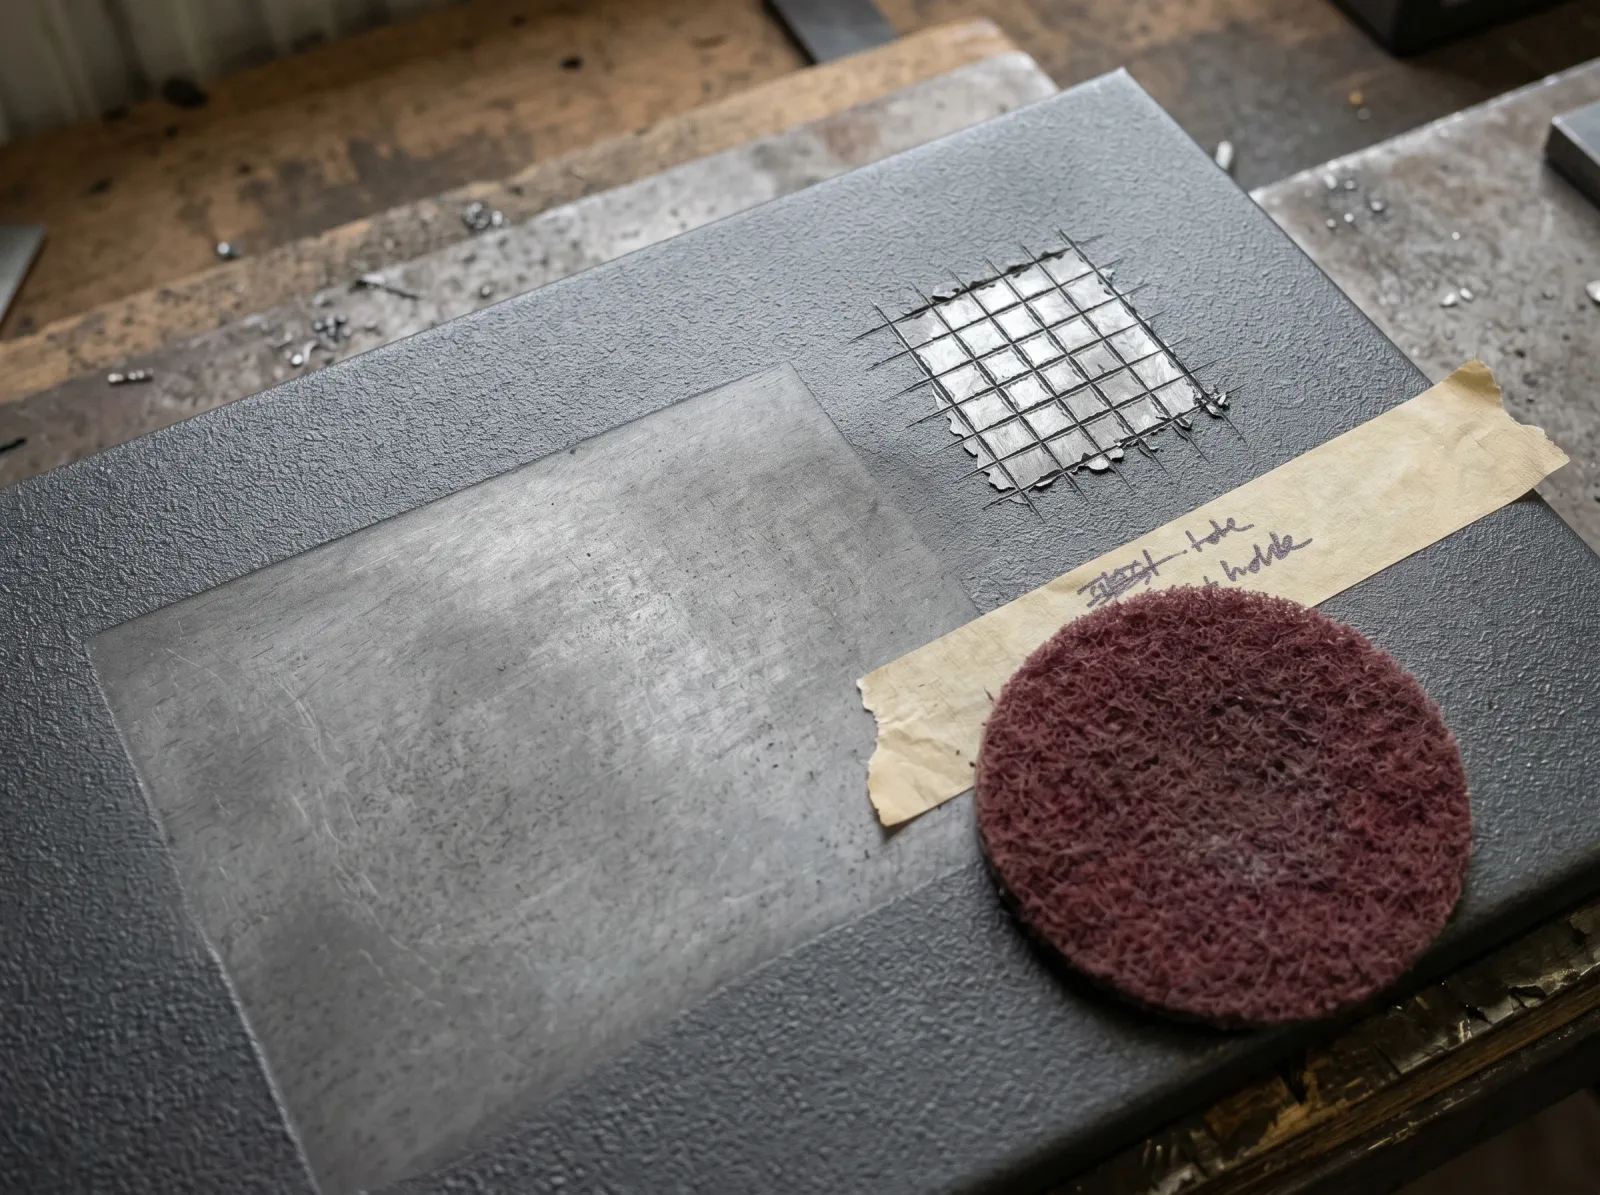
A cross-hatch test square in the corner and a section abraded matte. Glossy plastisol gives a primer nothing to grab.
Before you commit a whole wall, prove the system works on a hidden patch. Wash, scuff, and prime a square foot in a corner. Let it cure two days. Then cut a cross-hatch grid through the primer with a sharp knife, press tape over it, and rip the tape off fast. If the primer lifts off the plastisol, your prep wasn’t enough. More scuffing, or a more aggressive solvent-borne bonding primer.
The scuff is non-negotiable on any section that still has sheen. You’re not removing the plastisol. You’re knocking the gloss off so the primer has tooth. A maroon Scotch-Brite pad or 220-grit by hand, worked over the whole field until the surface reads uniformly matte. Profiled panels mean working the flats and the ribs both. Don’t skip the ribs because they’re awkward. That’s where water sits and where peeling starts.
Feather every crazed or flaking edge with the same abrasive until it sits flush. A sharp ledge of old coating telegraphs through two finish coats as a visible line.
Vacuum or blow the dust, then wipe the wall down once more. Scuff dust is just more chalk if you leave it.
Safety note. Plastisol is PVC. Sanding it dry kicks up vinyl chloride dust you don’t want in your lungs. Wear an N95 minimum, eye protection, and gloves. Work outdoors with airflow, which farm and shed cladding usually gives you anyway.
Step 4: Prime for Adhesion
A thin even coat of solvent-borne bonding primer. Panel laps and cut edges brushed before the field gets rolled.
This is where the wrong product wastes your whole weekend. Standard latex exterior primer does not bond to PVC. It dries, it looks fine, and it sheets off in the first hard freeze-thaw.
Use a bonding primer built for slick surfaces. Zinsser Bulls Eye 1-2-3 grips scuffed plastisol. INSL-X Stix grips harder and is my default on anything I’m worried about. On panels that are still on the glossy side, a solvent-borne PVC bonding primer outperforms both, at the cost of fumes and mineral-spirit cleanup. The cross-hatch test from Step 3 tells you which one you actually need.
Anywhere bare galvanized steel shows through old flaking, that spot gets a different primer first. Galvanized is its own adhesion problem because the zinc surface rejects most coatings. A rust-inhibitive metal primer or a galvanized-rated bonding primer handles it. The full walkthrough on that substrate lives in the galvanized steel guide. Where the steel has gone to actual rust, see the rusted metal guide before you prime. Rust under fresh paint bleeds through inside a year.
Cut in the panel laps and edges with a 2.5-inch brush, then roll the field thin and even. Laps drink first and they’re where water collects, so they get the brush before the roller touches the flat. One coat of bonding primer is enough if the scuff was right.
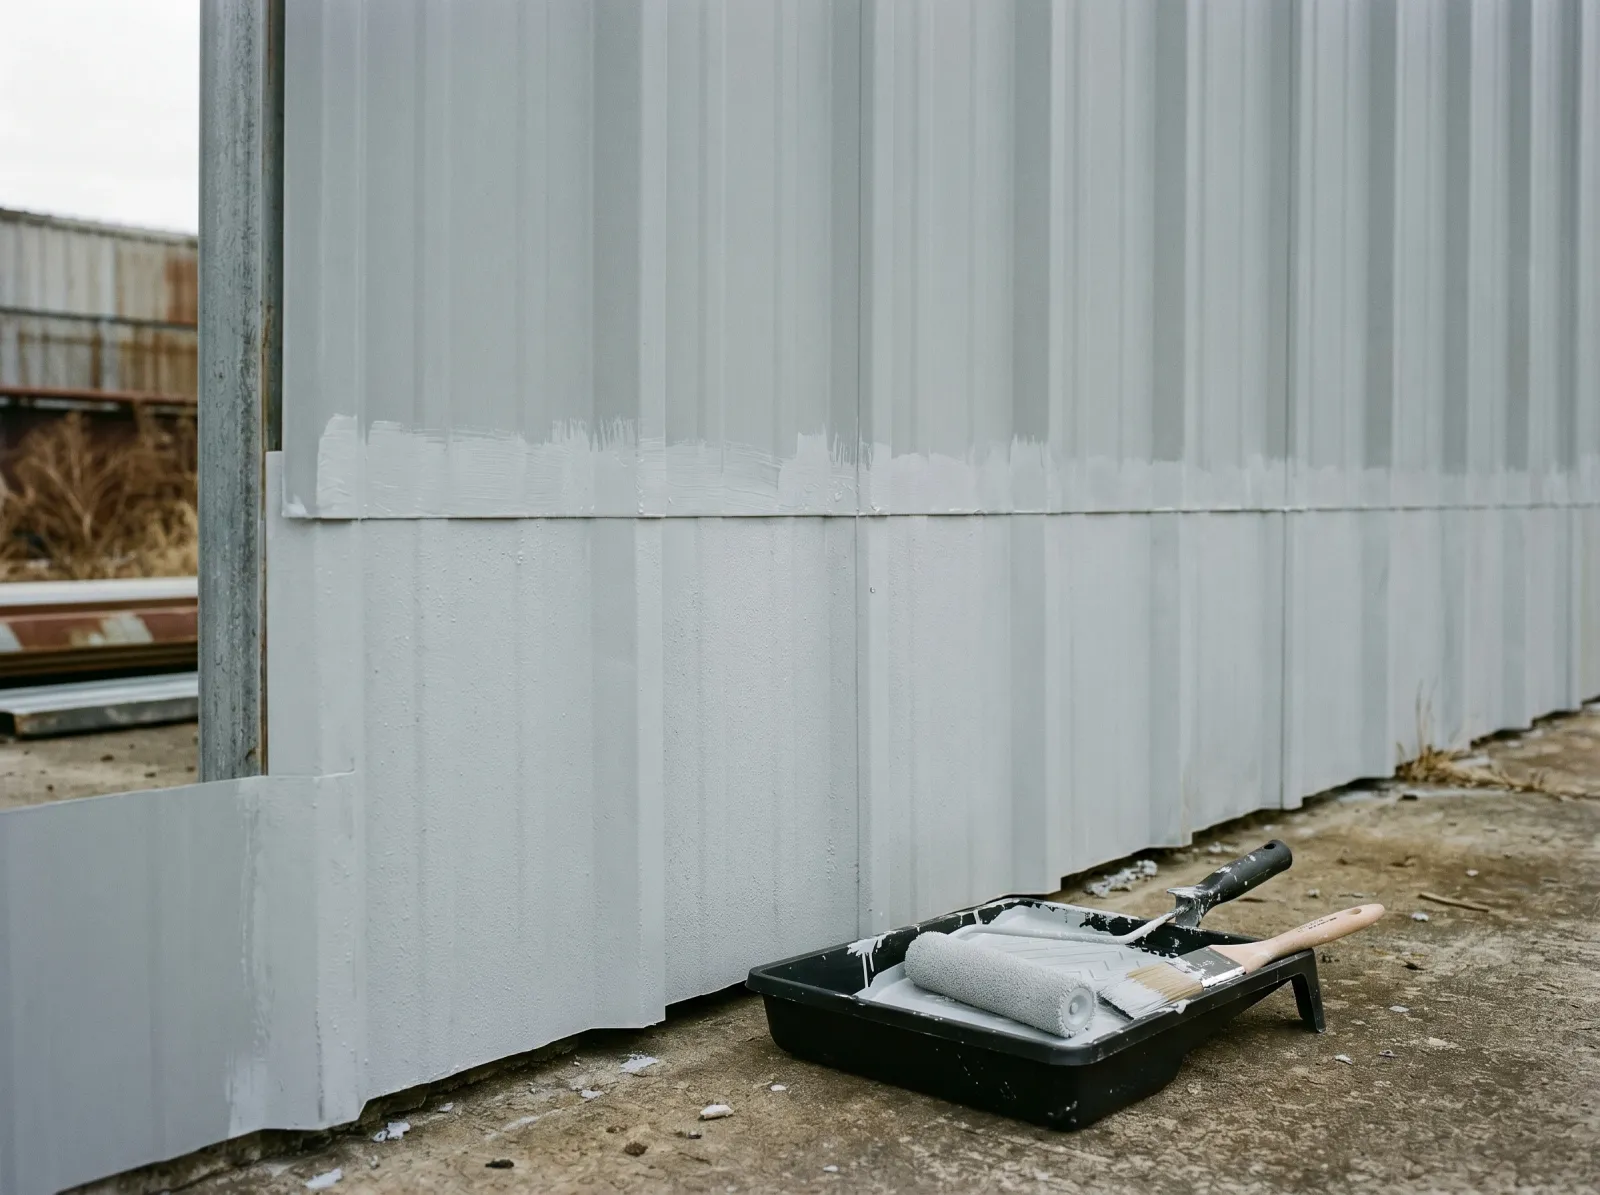
Step 5: Two Finish Coats
Two coats of exterior acrylic or DTM, back-rolled into the profile. The texture stays, the color is even.
Over sound, primed plastisol, you’ve got two good topcoat options. A 100% acrylic exterior (Benjamin Moore Aura Exterior, Sherwin-Williams Emerald Exterior, or Behr Marquee Exterior) flexes with the panel through heat cycles and holds color under UV. Or a direct-to-metal (DTM) acrylic such as Sherwin-Williams Pro Industrial DTM, built for steel and a little tougher against abrasion on a building people bump into. Either works over the bonding primer. For current SKU picks, see the exterior paint round-up.
Satin is the sheen to use. Flat looks chalky again fast on metal; gloss shows every dent and every roller mark. Satin splits the difference and matches the slightly soft look of weathered plastisol.
Brush the laps and cut edges, roll the field with a 1/2-inch nap, 3/4-inch if the profile is deep. Back-roll into the rib texture so paint sits in the grain instead of bridging over it. Two coats. The first looks patchy over a dark faded panel and that’s normal. The second evens it out and builds the film the topcoat needs to last.
Metal heats up. Dark color on a south wall in direct sun runs far hotter than the air, and paint flashes before it levels on a hot panel. Work the sunny side early morning or late afternoon. Stay between 50°F and 90°F surface temperature and at least 5°F above the dew point. Don’t stop in the middle of a panel run, or the lap mark shows up the first sunny morning.
Step 6: Dry, Recoat, and Cure
Most exterior acrylics are touch-dry in 2 to 4 hours and recoatable in 4 to 16 depending on temperature and humidity. Read the can and lean toward the longer number on a cool or damp day. Plastisol is non-porous, so the paint dries only by air exposure, not by soaking in. That makes it slower to harden than paint on wood.
Full cure runs about 30 days. During cure, don’t pressure-wash the wall, don’t lean ladders against the fresh paint, and keep sprinklers off it. A soft, uncured film picks up dirt and ladder scuffs that lock in permanently.
Common Mistakes
- Painting glossy, un-weathered plastisol. The new paint has nothing to grip. It sheets off the first winter. Wait until the coating dulls and chalks, or scuff aggressively and prove it with a cross-hatch test.
- Skipping the chalk wash. Paint bonds to chalk, chalk lets go, paint peels in sheets. Wash until a dark cloth comes back clean.
- Standard latex primer on plastisol. Latex doesn’t bond to PVC. Use a plastic-bonding primer, not a generic wall primer.
- Not scuffing the ribs. People sand the flats and skip the awkward profile ribs. Water sits in the ribs and peeling starts there. Scuff the whole panel.
- Ignoring bare galvanized under the flaking. Exposed zinc rejects topcoat and bleeds rust if it’s already corroding. Spot-prime it with a metal primer before the bonding primer goes wall-wide.
- One coat to save time. One coat over faded plastisol reads thin and patchy and won’t carry the UV load. Two coats, every time.
- Painting at noon on a south wall. Hot metal flashes the paint before it levels and you get a dead, lap-marked finish. Paint the sunny side in the cool hours.
Maintenance and Longevity
A bonding-primed, two-coat acrylic system over sound plastisol holds 8 to 12 years before it needs a refresh, less on a hard south or west exposure that bakes all summer. Watch the panel laps and the bottom edges first. That’s where water collects and where the new film lets go earliest.
Wash the wall once a year with a soft brush and detergent to keep chalk and mildew from building back up. No pressure washing in the first year while the film cures. If a section starts crazing or flaking again, treat it as a spot repair: scuff, spot-prime, two coats, feathered into the surrounding paint. When more than a third of a wall is failing at once, you’ve reached the end of the overcoat road and it’s panel-replacement time.
For the deeper version of the metal-substrate adhesion problem, the galvanized steel guide and the peeling paint fix both cover what’s happening underneath when a metal coating lets go.
Will it bite you in two years? Only if you painted over chalk, skipped the scuff, or used the wrong primer. Get the adhesion right and the wall holds for a decade.