How to Paint Over Mortar Joints
Painting mortar joints without a blotchy wall: how to kill efflorescence, why masonry primer matters, and the brush-before-roll order that fills every recessed joint.

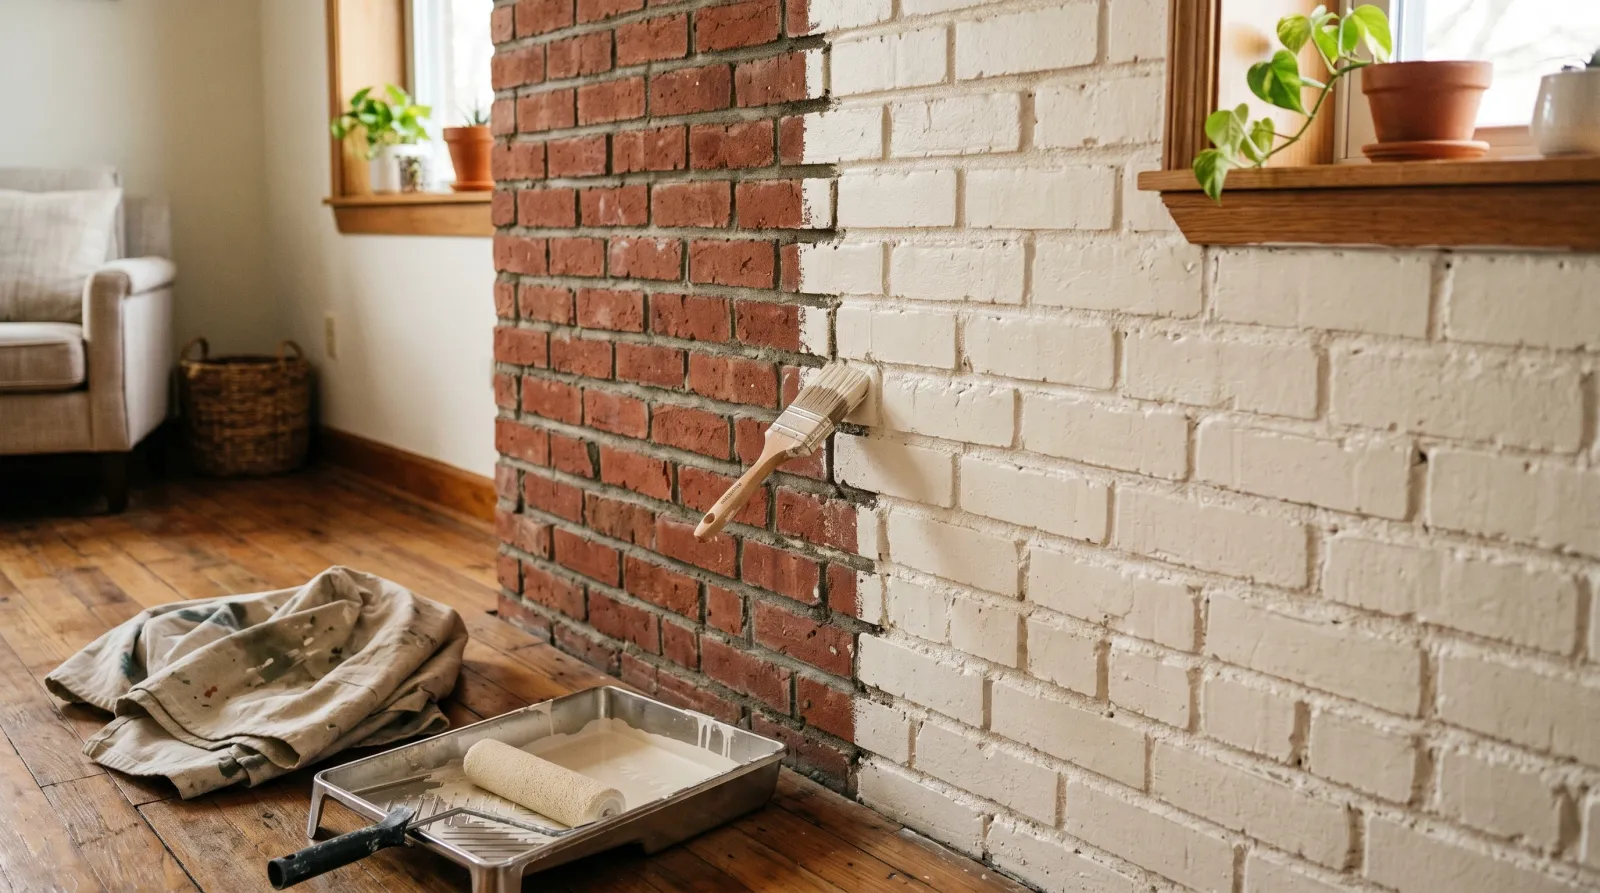
Mortar is the part that bites you. The brick faces paint fine. It’s the recessed joints between them that drink the first coat, dry blotchy, and show gray through your white wall a week later. Get the joints right and the brick takes care of itself.
TL;DR
- Clean first: wire-brush every joint, scrub off all efflorescence dry, then wash
- Repair: repoint crumbling mortar, fill hairline cracks. Paint won’t hold failing mortar
- Wait: 28 days on new mortar before any paint touches it
- Primer: masonry block-filler primer, brushed into the joints before rolling
- Paint: 100% acrylic masonry paint inside, breathable masonry or mineral paint outside
- Order: brush the joints first, then roll the faces, every single coat
- Cure: 7 days before washing, 30 for full hardness
- Skill: medium. The work is the joints, not the brick
What Mortar Joints Actually Are
Mortar is the cement-and-sand mix that bonds brick or block together. The joints are the gray lines you see between every brick, usually recessed a quarter inch or so below the brick faces. On a standard wall the mortar makes up close to 20% of the surface you’re about to paint.
That matters because mortar and brick are two different materials. Brick is fired clay, dense and only mildly porous. Mortar is a softer, sandier, more porous mix. They absorb paint at different rates, they hold moisture differently, and they fail differently. You’re not painting one wall. You’re painting two surfaces that happen to share a plane.
Why Mortar Joints Are Different From the Brick
Three things make the joints the hard part.
They’re more porous. Mortar soaks up the first coat of paint or primer like a sponge while the denser brick face barely takes any. Without a primer that fills that porosity, the joints dry lighter, duller, and chalkier than the brick. You end up with a wall that looks two-toned even though you used one can.
They’re recessed. A roller rides across the high points (the brick faces) and skips the low points (the joints). Roll a brick wall the way you’d roll drywall and you leave every joint half-coated. The brush has to go in first.
They move and they wick water. Mortar cracks before brick does, and water travels through the joint network faster than through the brick body. On exterior walls that’s where efflorescence pushes out and where freeze-thaw damage starts. I see it every spring on north-facing brick in the upper Midwest: hairline cracks in the joints, white salt staining, and paint lifting in patches right along the mortar lines.
Step 1: Clean and Kill the Efflorescence
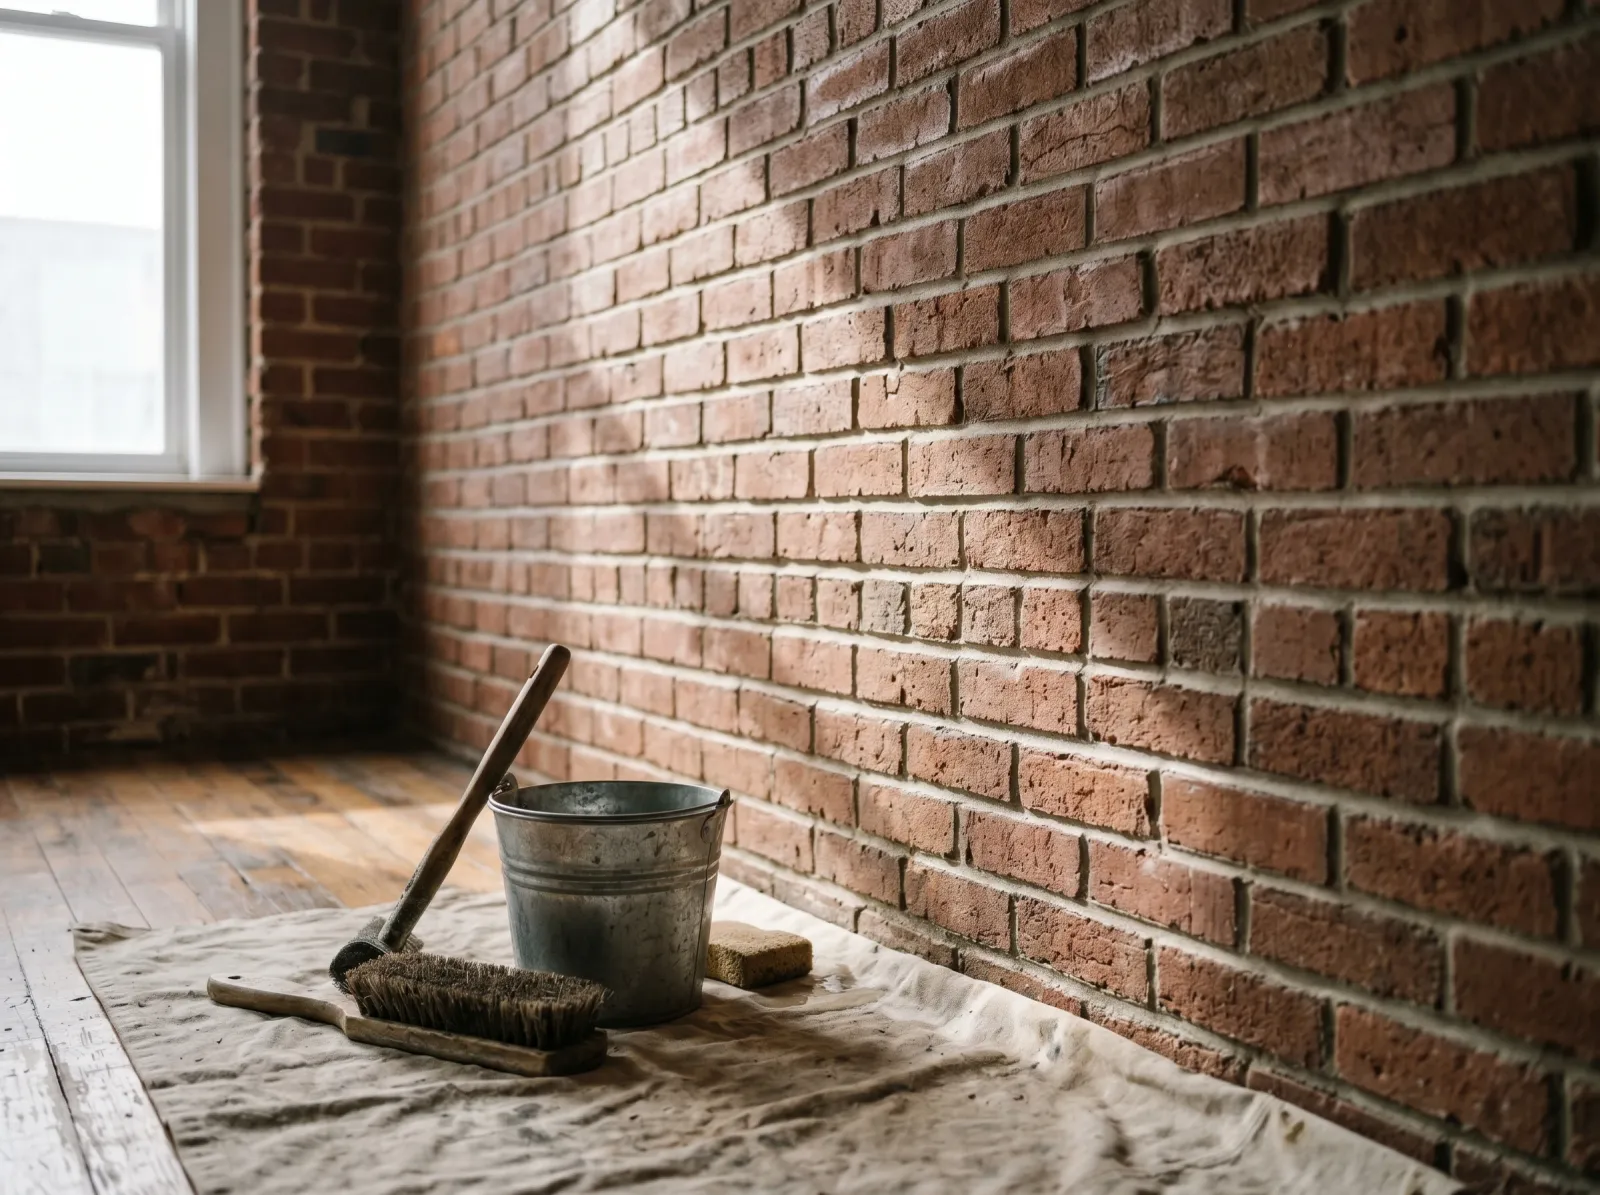
Wire brush across every joint, white efflorescence scrubbed off dry first, then a wash and 72 hours of drying.
Brick and mortar are filthy in ways you can’t see. Dust, soot, chalky residue, and on a lot of walls a white powder called efflorescence.
Start dry. Run a stiff wire brush hard across every joint and brick face. This knocks off loose grit, surface dust, and any efflorescence sitting on top. Do the efflorescence dry. Wet it first and you drive the salts back into the wall instead of removing them.
Then wash. TSP or a TSP substitute mixed per the label, scrubbed on with a brush, rinsed clean. For stubborn efflorescence that the wire brush didn’t fully clear, follow with white vinegar or a dedicated masonry cleaner from Prosoco or Sika. Rinse it all off.
Efflorescence is not cosmetic. It’s the wall telling you water is moving through it and leaving salt behind. Paint over it and the salts keep pushing outward and lift the film off in white blisters within months. If it keeps coming back after cleaning, you have a water problem to solve before you paint anything. The efflorescence fix guide walks through tracking down the source.
Let the wall dry a full 72 hours after washing. Brick and mortar hold water deep. A moisture meter under 15% is your green light. Prime over a damp wall and you’re back to blisters.
Step 2: Repair the Joints and Cracks
Paint is a finish. It is not a structural fix, and it will not hold a failing joint together.
Press a thumbnail or a screwdriver tip into the mortar. If it crumbles, flakes, or comes away sandy, that joint has to be repointed before any paint goes on. Rake out the soft material, pack in fresh mortar or a masonry repair caulk like Quikrete or Sashco Slab, tool it flush, and let it cure. Repointed mortar needs its own cure time, so treat a repaired joint like new mortar and give it the full 28 days if you packed in real mix. Repair caulk cures faster. Read the tube.
Hairline cracks in otherwise-sound joints get filled with a paintable masonry crack filler. Wider cracks (more than about an eighth of an inch) usually mean movement, and you want to understand why the wall is moving before you bury it under paint.
On new construction, this is also where the 28-day rule lands. Fresh mortar is loaded with lime and runs high alkaline. That alkalinity burns through ordinary primer and breaks down the binder in regular paint, a reaction called saponification that leaves the film soft and gummy. Twenty-eight days lets the mortar drop its pH and shed its construction moisture. Can’t wait? Use an alkali-resistant masonry primer rated for fresh masonry and accept the risk.
Safety note: brushing, grinding, or repointing mortar throws silica dust. Silica is the part of the sand in mortar that wrecks lungs over time. Wear an N95 minimum and eye protection any time you’re working the joints dry, and don’t sweep the dust up dry afterward. Wet it or vacuum it.
Step 3: Prime the Joints First, Then the Wall
Hairline mortar cracks packed, then masonry primer brushed deep into every joint before any roller touches the brick.
This is the step that separates a flat even wall from a blotchy one.
Use a masonry primer, not a general-purpose one. Zinsser Watertite, Behr Masonry, Loxon, or a dedicated block filler. These are built thick to fill the porosity of mortar and the pinholes in brick. A standard latex primer is too thin. It sinks into the joints and leaves them as thirsty as before.
Brush the joints first. Load a stiff 2.5-inch masonry brush and work primer down into every recessed mortar line before you touch a roller to the wall. Drive it in. The joints should look saturated and slightly glossier than the brick when you’re done. Then roll the brick faces with a thick 3/4-inch or 1-inch nap that can reach into the texture, and the roller will pick up where the brush left off and blend the two.
If the interior brick has smoke, soot, or old water stains, hit those spots with Zinsser Cover Stain first. Masonry primer fills and bonds, but it doesn’t block stains the way a dedicated stain-blocker does. For the difference between the two jobs, see what a primer actually does.
One full coat of primer is usually enough on previously painted or sound interior brick. Bare exterior brick and fresh masonry often want two. Look at the wall in raking light. Any joint still reading darker than the brick faces is still thirsty. Give it another pass.
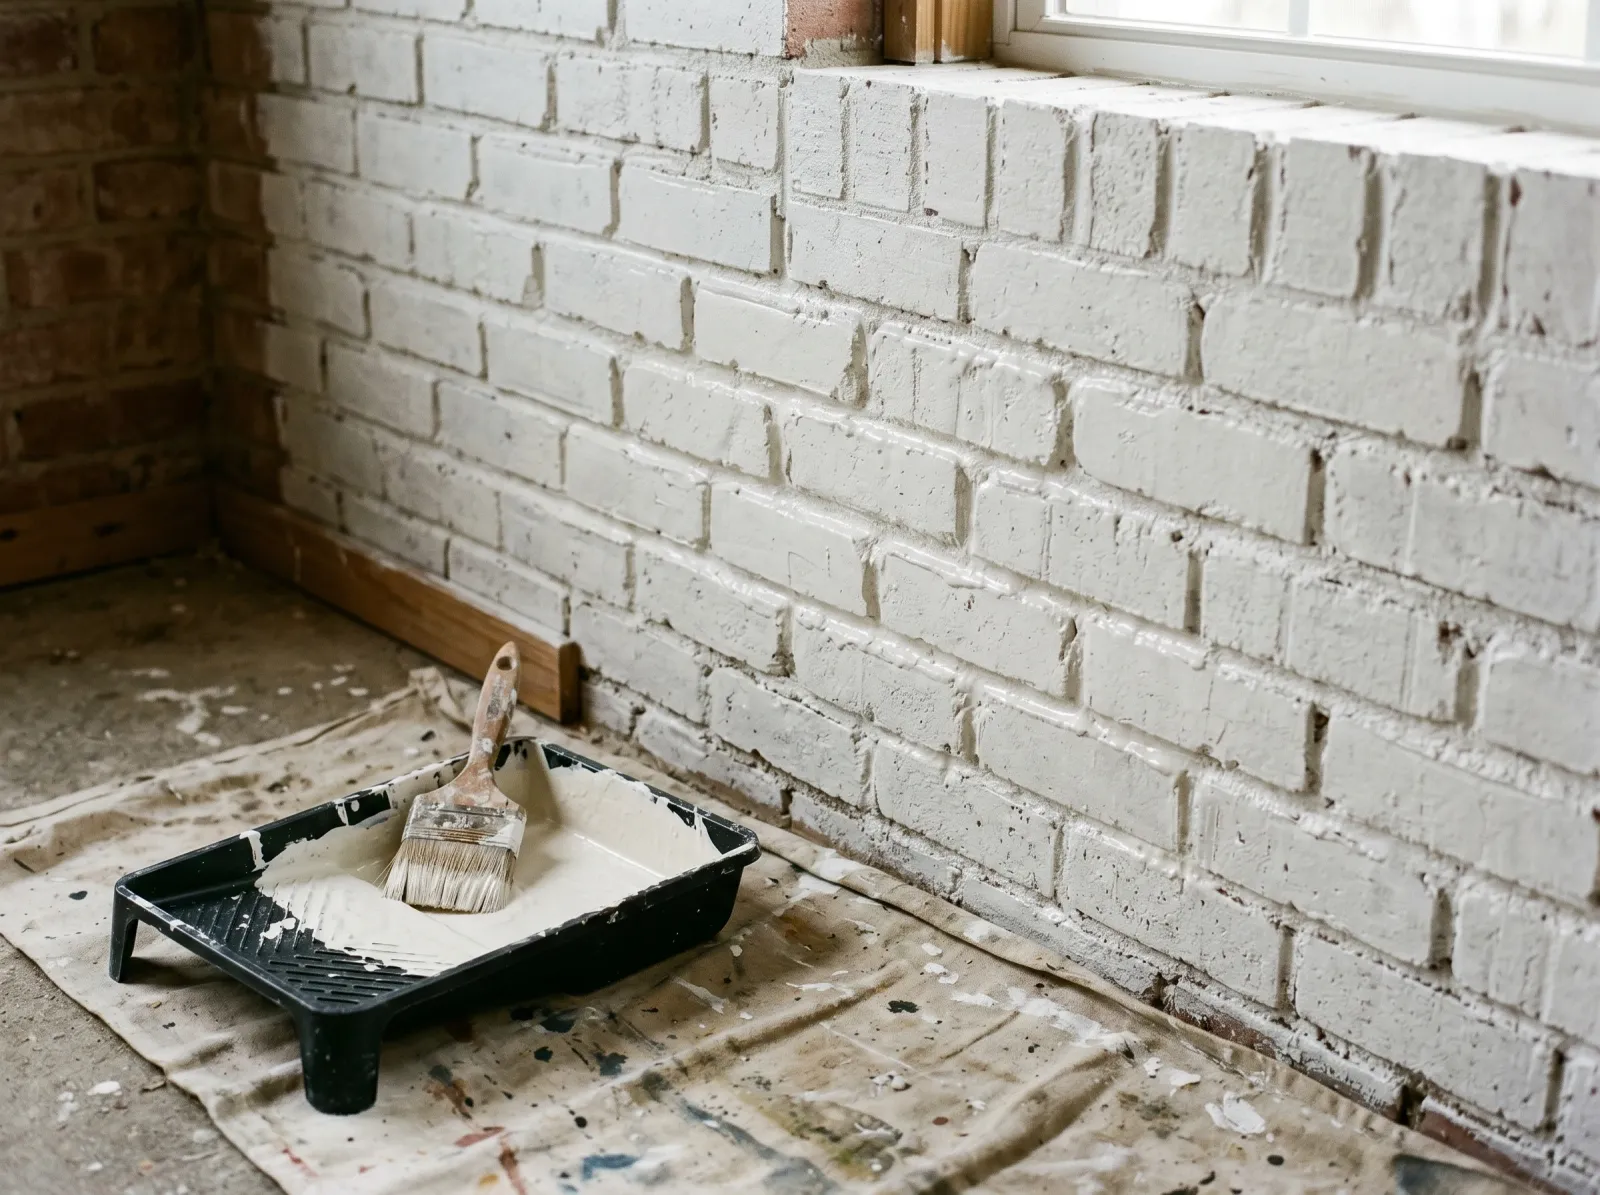
Step 4: Paint, Joints First Again
Brush the joints, roll the faces while the brush work is wet. The joints get painted first every coat.
The topcoat depends on where the wall lives.
Interior brick (a fireplace surround, an exposed accent wall) takes a 100% acrylic masonry paint or a quality interior wall paint in the sheen you want. Flat and matte hide the brick texture and any joint unevenness best; eggshell and satin clean easier but show every ridge. For the broader sheen tradeoff, see the sheen guide.
Exterior brick has to breathe. Brick walls move moisture from inside to out, and a film that seals that moisture in will blister and peel within a year. Use a breathable masonry paint or a mineral paint built to let vapor through. Standard interior latex on an outside brick wall is the most common way this whole job fails. For SKU picks built for masonry, see the best masonry paint round-up.
The technique is the same as the primer. Brush the joints full, roll the faces while the brush work is still wet, keep a wet edge, and don’t stop in the middle of a wall. Two coats, always two. The first coat covers, the second coat evens the sheen across the brick and mortar so the joints stop reading separately.
Painting a fireplace or a feature wall as part of a room refresh? The accent wall walkthrough covers the layout and color side of it.
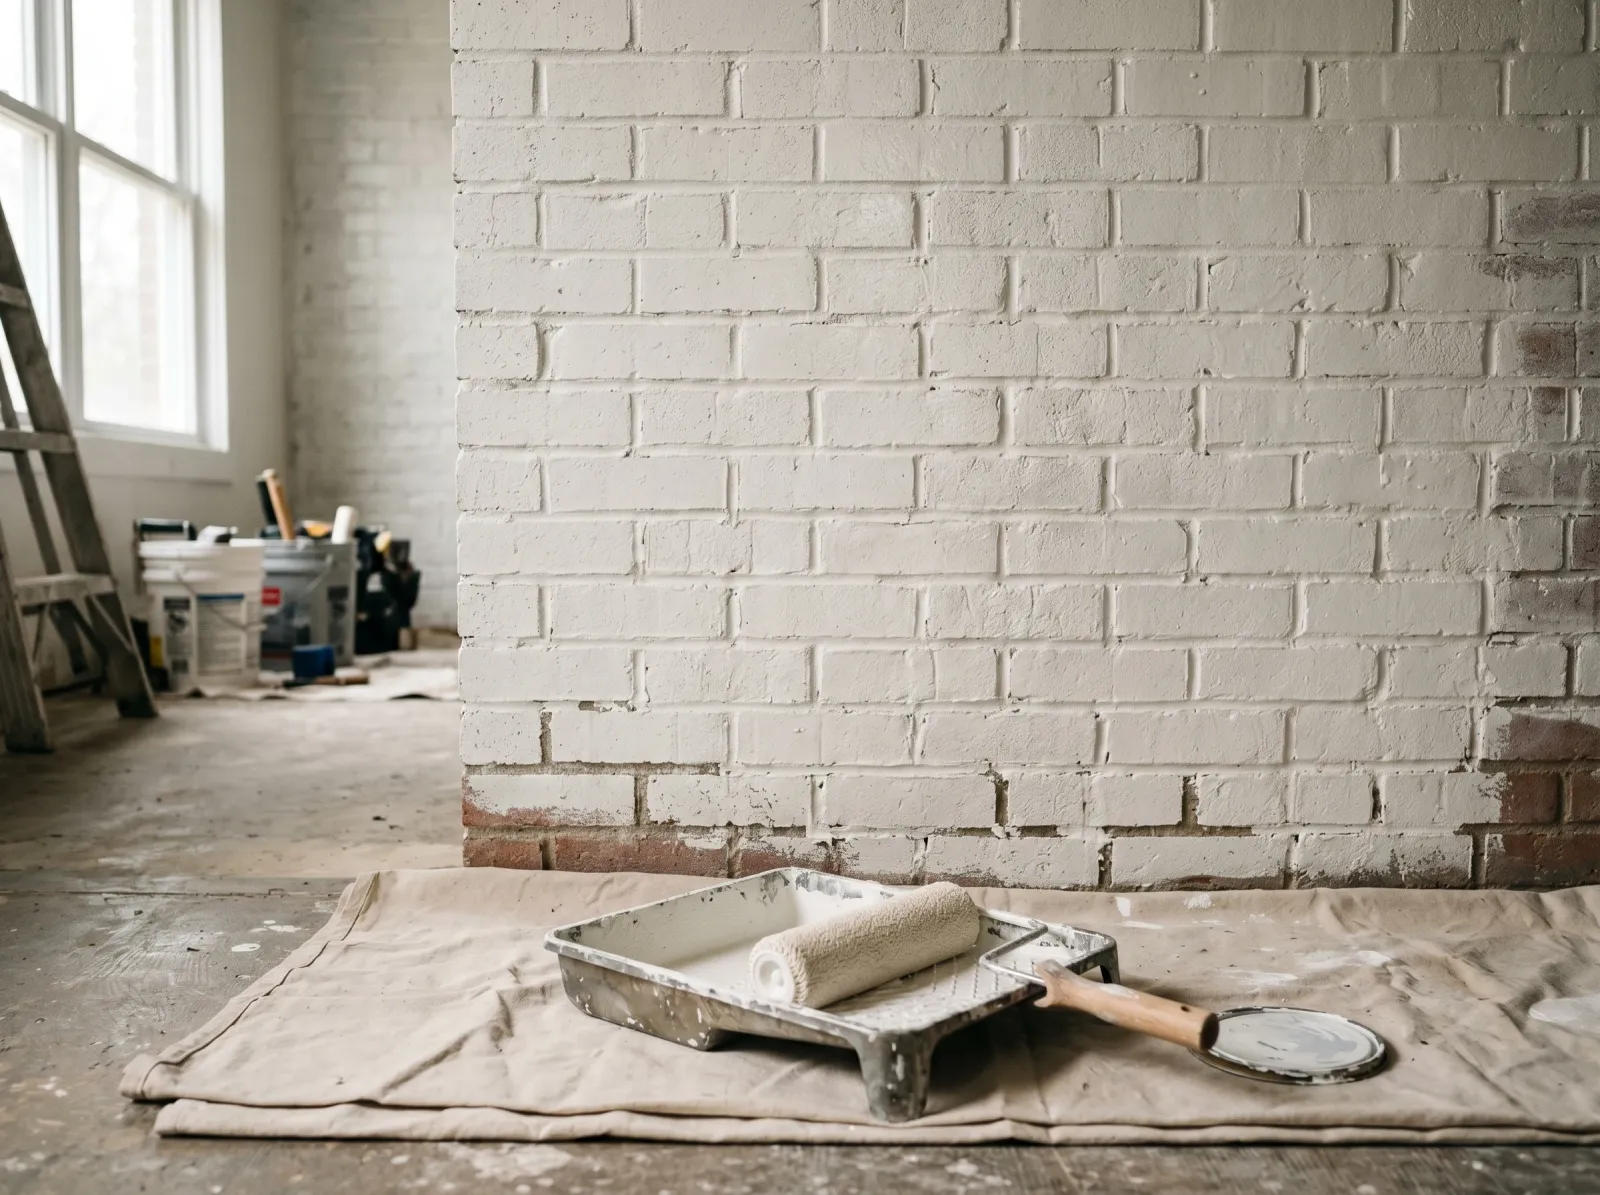
Step 5: Dry, Recoat, and Cure
Two coats. The second one buries the joints for good and evens the sheen across brick and mortar.
Most acrylic masonry paints are touch-dry in 1 to 2 hours and recoatable in 4. The deep joints and the porous mortar hold solvent longer than a flat drywall surface, so on a cold or humid day give it the full recoat window before the second coat. Read the can.
Full cure runs 30 days on masonry, same as most acrylics. During that month, don’t scrub the wall, don’t pressure-wash exterior brick, and don’t lean anything against it. A soft film picks up dirt and dents that lock in permanently. Wait 7 days before even a gentle wipe-down.
Common Mistakes
- Rolling the wall without brushing the joints first. Result: thin, gray, blotchy mortar lines showing through the topcoat. Fix is to brush every joint full of primer and paint before the roller touches the brick, every coat.
- Painting over efflorescence. Result: white salt blisters lift the paint off in patches. Fix is to scrub all the salt off dry, clean with vinegar or a masonry cleaner, and solve the moisture source before priming.
- Painting over crumbling mortar. Result: paint peels in sheets and pulls the joint with it. Fix is to repoint the soft joints and let them cure before any paint.
- General-purpose primer instead of masonry primer. Result: primer sinks into the porous joints and dries as thirsty as bare mortar. Fix is a thick block-filler masonry primer that fills the porosity.
- Sealing exterior brick with a non-breathable interior paint. Result: trapped moisture blows the film off within a year. Fix is a breathable masonry or mineral paint outside.
- Painting fresh mortar before 28 days. Result: alkali burns the binder and the paint stays soft and gummy. Fix is to wait, or use an alkali-resistant masonry primer rated for fresh masonry.
Maintenance & Longevity
Painted interior brick holds its finish 10 to 15 years. The wear points are the bottom courses near a floor and the joints around a fireplace firebox where heat cycles the film. Touch up with a small brush from the same can.
Exterior painted brick runs 7 to 10 years on a breathable system, less on a south or west wall that takes full sun. Walk the wall once a year and look at the joints first. Hairline cracks in the mortar and the start of efflorescence are the early warnings, and both show up in the joints before the brick faces. Clean the wall annually with a soft brush and a soap injector, never high-pressure water, which chews mortar out of the joints. Recaulk and repoint any joint that fails the season it shows, then spot-prime and topcoat. The breathable system underneath stays sound for years if you stay ahead of the joints.