What Is Saponification on Walls?
Saponification on walls is paint going soft, sticky, or brown over alkaline masonry. The chemistry behind it, plus how to clean, neutralize, and seal it.

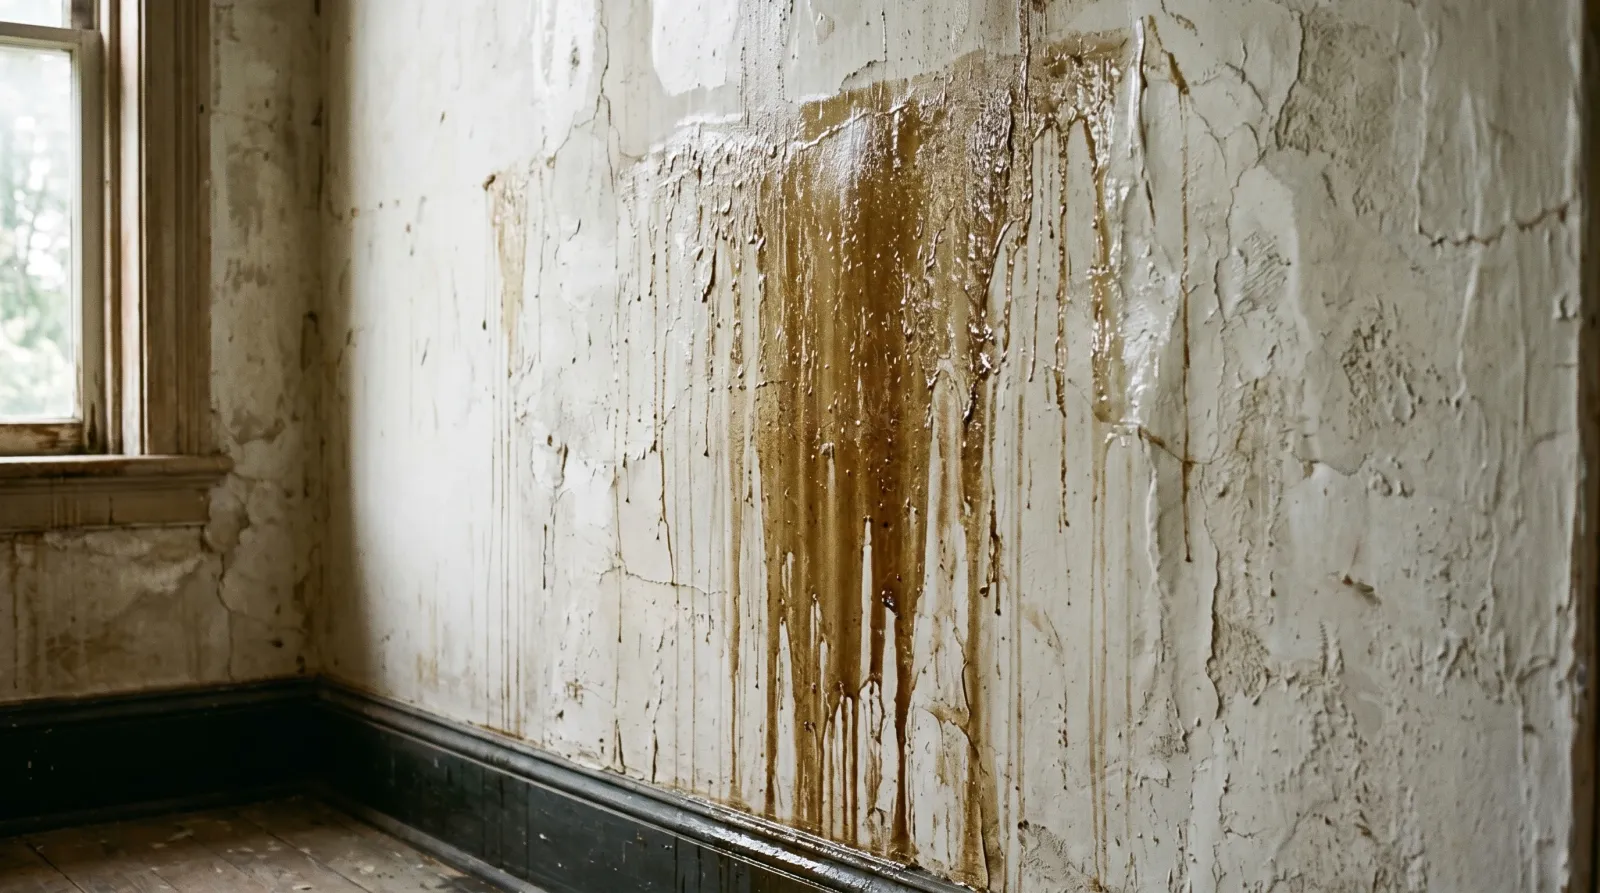
Most people meet saponification by touch before they name it. You go to wipe a mark off a basement wall or a bathroom near fresh plaster, and the paint is soft, slick, sometimes weeping a faint brown film that smears instead of cleaning. It feels like soap because it has become soap. That’s not a figure of speech. The paint film reacted with the wall and turned into a fatty salt.
TL;DR
- Saponification is a chemical reaction between an oil-based or alkyd paint film and the alkali (high pH) in masonry, concrete, or fresh plaster. The reaction converts the binder into soap.
- What you see: soft, sticky, or glossy paint, a soapy or greasy film, and brown to amber discoloration, usually low on the wall or near moisture.
- It’s an oil and alkyd problem. Latex and acrylic binders don’t saponify the same way, which is why the fix moves you to a water-based topcoat.
- The fix: wash off the soap, neutralize the surface, confirm it’s dry and the pH has dropped, then seal with an alkali-resistant masonry primer before recoating with 100% acrylic paint.
- Don’t just paint over it. The alkali and moisture are still there. Same paint, same reaction, a few months later.
Does This Match What You’re Seeing?
Saponification has a specific look and an unmistakable feel. Run a clean fingertip across the suspect area before you decide.
- Soft, tacky, or slick paint that never fully hardened: the binder has been chemically attacked. This is the core tell.
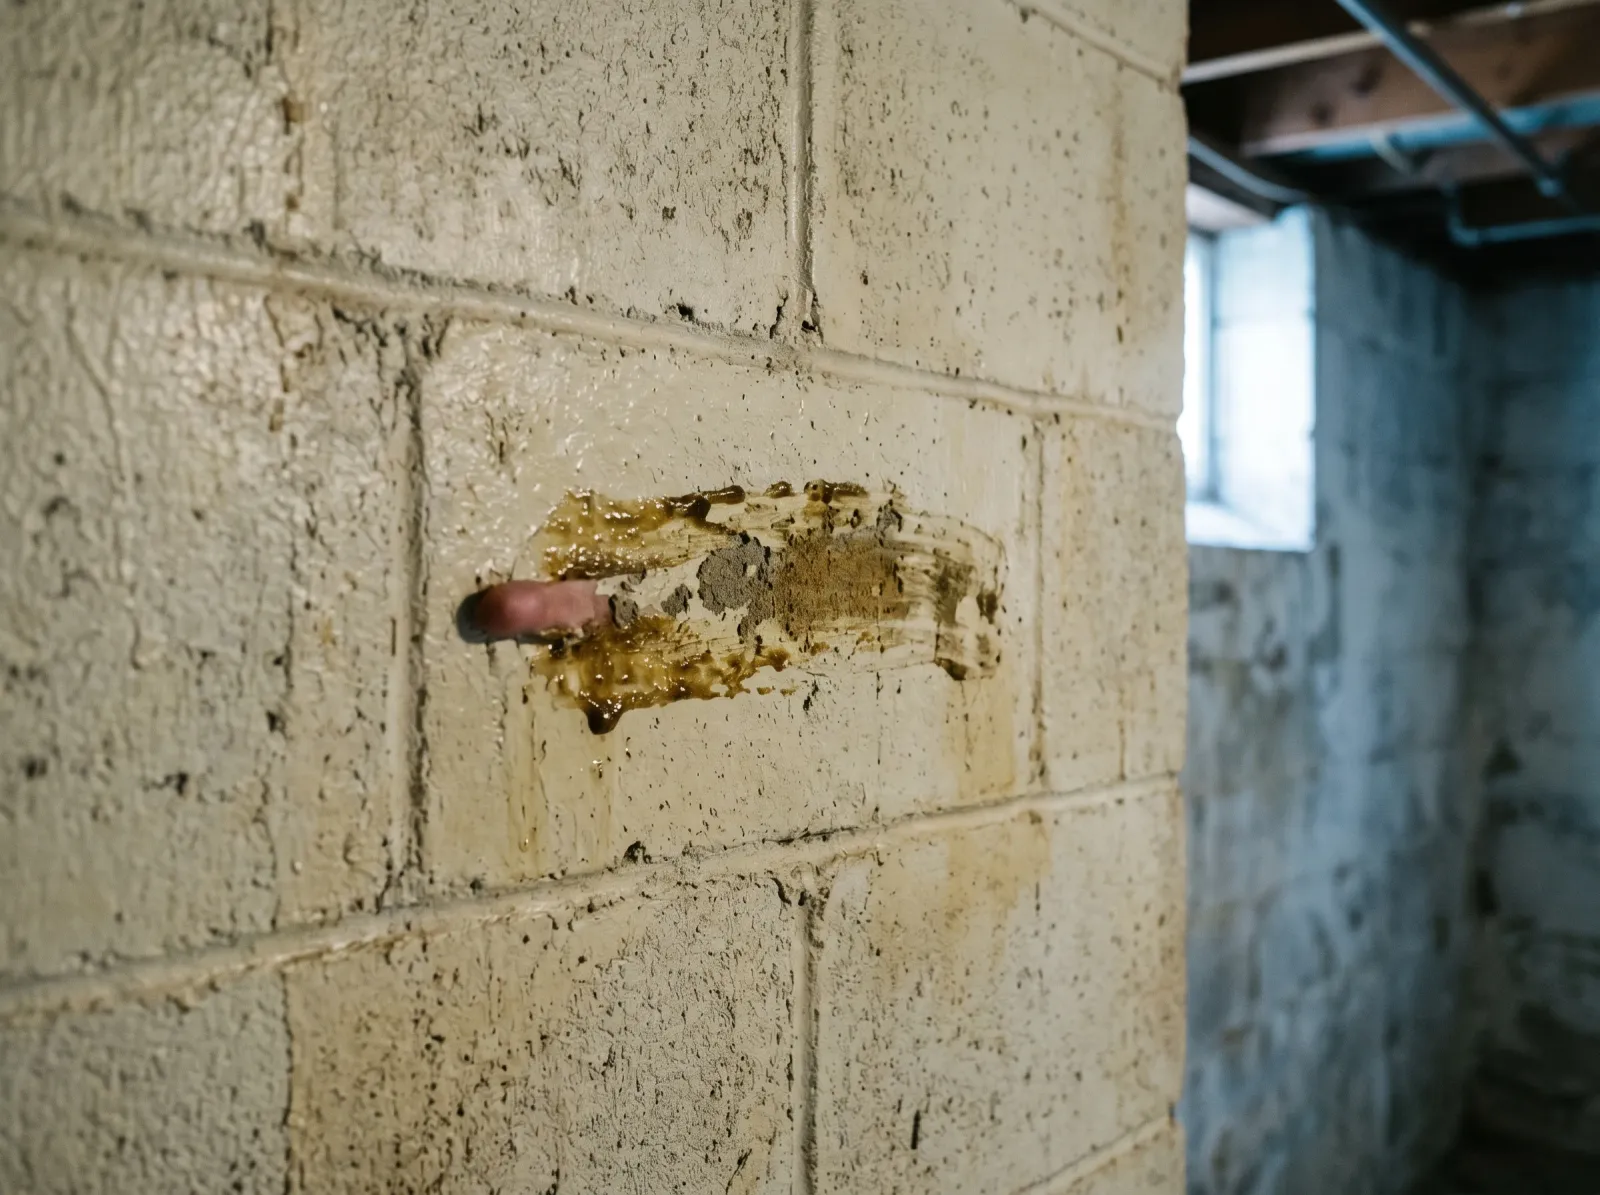
- A soapy or greasy film that smears when you wipe it: that film is the fatty salt the reaction produced. It will resist normal washing.
- Brown, amber, or yellowish staining bleeding through the paint: alkali-driven discoloration, often worse near the floor or a moisture source.
- Gloss going dull and blotchy on an oil enamel over masonry or plaster: early-stage attack before the film fully softens.
- The problem sits low on a basement or concrete-block wall, or around a bathroom on fresh plaster: moisture is carrying the alkali to the film.
Look-alikes to rule out. Efflorescence is a dry white crystalline powder that brushes off; that’s migrating salt, covered in the efflorescence on brick fix, and the paint itself is fine. Peeling is a dry film lifting and curling away, a bond failure, not a chemical one. Surfactant leaching on fresh latex makes glossy brown streaks too, but it appears days after painting and rinses off. Saponification is the only one where the film has gone soft and soapy.
How Serious Is This?
Cosmetically it’s loud, but it’s rarely a structural emergency. The honest severity ladder:
- Soft film, no active water, small area: a same-weekend fix. Clean, neutralize, seal, recoat.
- Recurring browning low on a basement wall: a moisture path through the masonry is feeding alkali to the film. Fix the water before you repaint or you’ll be back.
- Fresh concrete, stucco, or plaster painted too soon: the substrate is still curing and strongly alkaline. The repaint holds only once the wall is dry and the pH has dropped.
It repeats because saponification is two things meeting: an ester-based binder and a high-pH wet surface. Remove either one and the reaction stops.
Why This Is Happening (the Chemistry)
 Early saponification: the paint film has gone soft and a brown soapy residue smears under a fingertip.
Saponification is the same reaction that makes soap. Combine a fat or oil with a strong alkali like lye, and the alkali cleaves the ester bonds in the fat, producing a fatty-acid salt. That salt is soap. Your wall is running a slow version of the same process.
Here’s how it lands on a painted surface. Oil-based and alkyd paints cure by oxidation, and their binder is built on ester linkages, the chemical joints that hold the drying-oil film together. Masonry, concrete, and fresh plaster are strongly alkaline, with a surface pH around 12 to 13 when green, because Portland cement and lime release calcium hydroxide as they cure. Add moisture and that alkali becomes mobile. It migrates to the paint film, attacks the ester bonds the same way lye attacks a fat, and converts part of the film into a soft, water-soluble soap. The binder that was holding pigment in a hard film is now a greasy salt.
The brown discoloration comes from the degraded binder and the alkali pulling color out together. It concentrates low on the wall because liquid water carries the alkali, and water pools near the base.
Three conditions have to coincide. An ester-based binder (oil or alkyd). A high-pH substrate (masonry, concrete, lime plaster, fresh stucco). And moisture to mobilize the alkali. Take away any one and the film survives. The durable fix isn’t a better oil paint. It’s switching the binder and blocking the alkali.
The Fix
Work in order. Skipping the neutralize-and-dry steps is the most common reason this comes back.
Step 1. Confirm and Strip the Failed Film
Scrape off everything soft, tacky, or discolored with a stiff putty knife or carbide scraper. Saponified paint won’t hold a topcoat no matter what you put over it, because the layer underneath is soap. Remove it down to a sound surface; if the film below is also softening, keep going until you reach hard substrate.
If the home predates 1978, treat the old paint as lead until tested with 3M LeadCheck swabs, and follow EPA RRP practice: wet methods only, plastic containment, HEPA cleanup, no dry sanding.
Step 2. Wash Off the Soap
The soapy film is water-soluble, which works in your favor. Scrub with TSP (trisodium phosphate) or a TSP substitute, roughly a half cup per gallon of warm water, using a stiff brush. Work it for a few minutes, then rinse thoroughly with clean water to carry the fatty salt off the wall. One wash often isn’t enough on a greasy area; repeat until the surface no longer feels slick.
Step 3. Neutralize and Test the pH
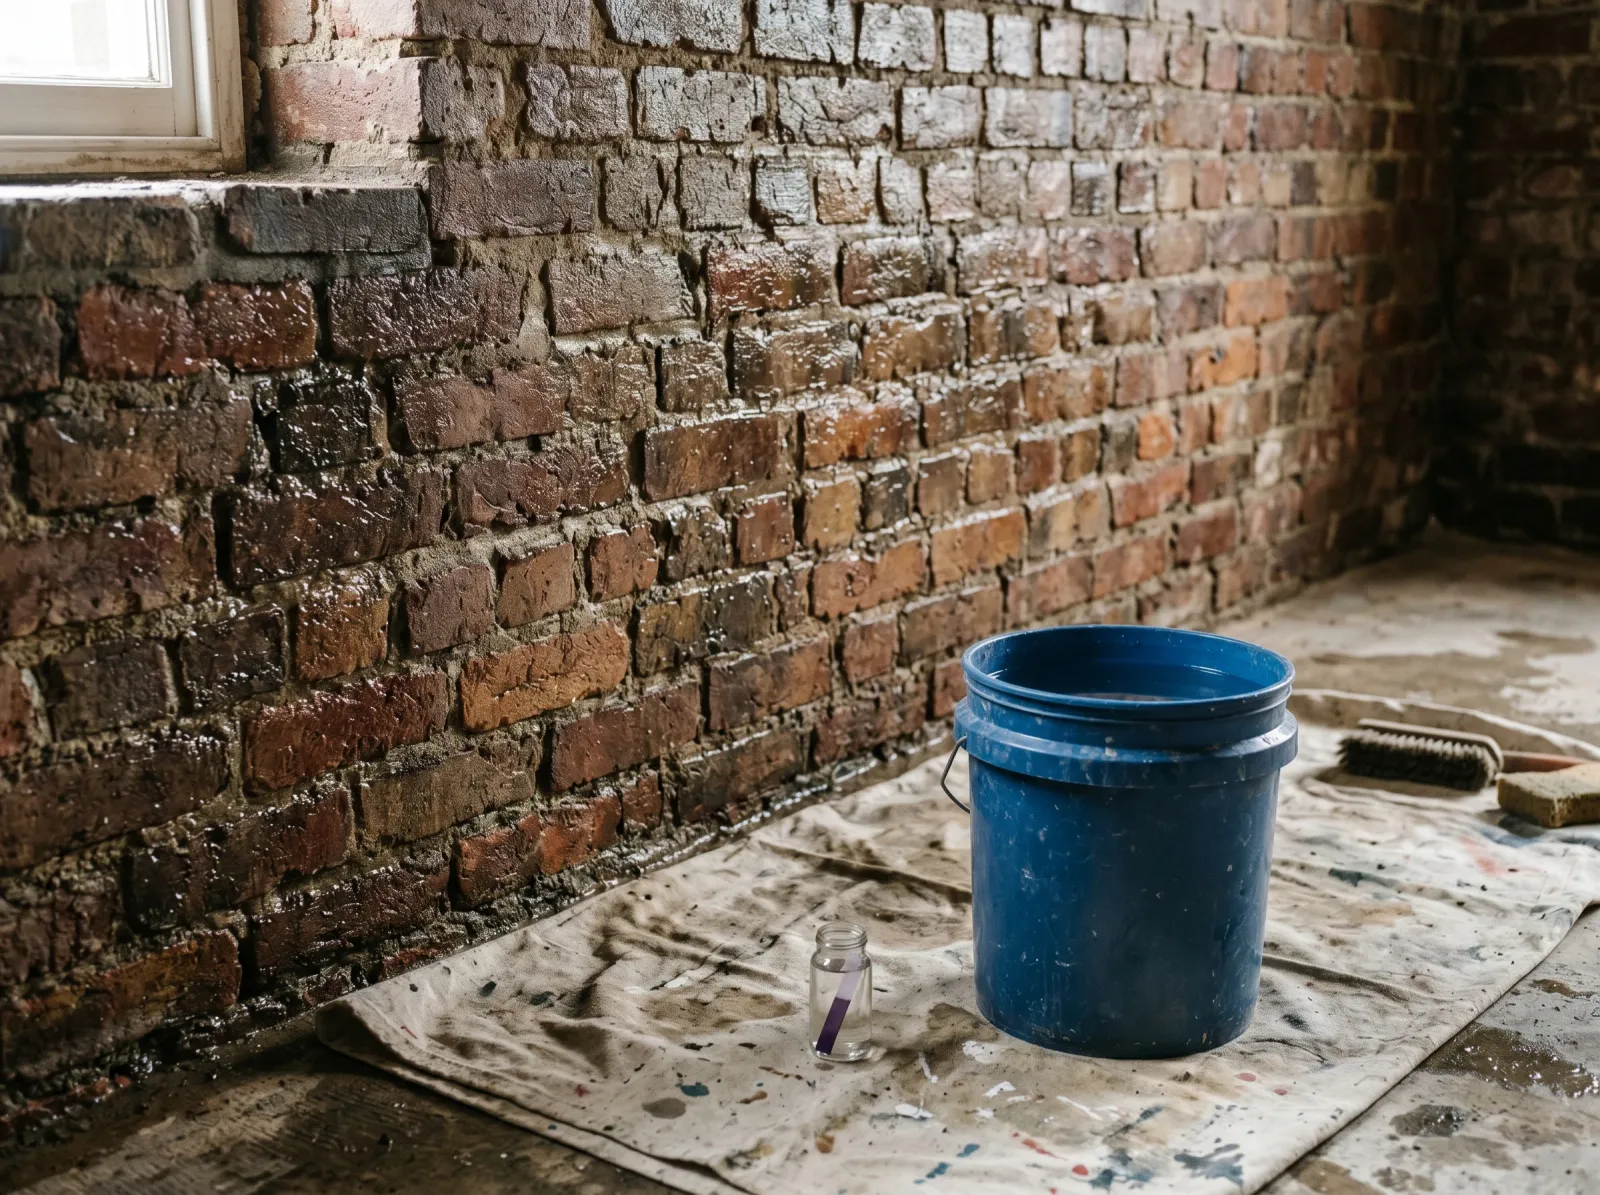 After washing, neutralize the alkali and confirm with a pH strip before any primer touches the wall.
Washing removes the soap but not the alkalinity that created it. Neutralize the substrate so a new film isn’t attacked on contact. A masonry neutralizing wash, or a dilute acidic rinse made for the purpose, brings the surface pH down. Rinse with clean water afterward and let it dry.
Then verify. Press a wet pH test strip against the surface, or use a masonry pH pen. You want a reading at or below about 9 before priming; closer to neutral is better. A reading of 11 or 12 means the alkali is still active, so neutralize again or wait for the wall to cure further. This thirty-second test is the difference between a repair that holds and one that re-soaps by fall.
Step 4. Dry Completely, Then Find the Water
Let the wall dry fully. On masonry that can mean several days. Moisture is one of the three legs the reaction stands on, so a damp wall is a wall that will fail again.
While it dries, find the water source: a leaking foundation, no vapor barrier behind a basement wall, poor drainage, a dead bathroom fan. If liquid water keeps reaching the masonry, no coating survives long. This step is doing more work than the paint will.
Step 5. Seal With an Alkali-Resistant Primer
Prime with a primer rated for high-pH masonry, not a general drywall PVA. Alkali-resistant masonry primers and block fillers are formulated to sit on a pH of 12 to 13 and still hold a topcoat; products like Zinsser Watertite are made for exactly this substrate. The primer does two jobs: it blocks residual alkali from reaching the topcoat, and it evens out the porous masonry so the finish film forms uniformly instead of soaking in. For more on that bonding-and-blocking layer, see what primer does.
Step 6. Topcoat With Acrylic, Not Oil
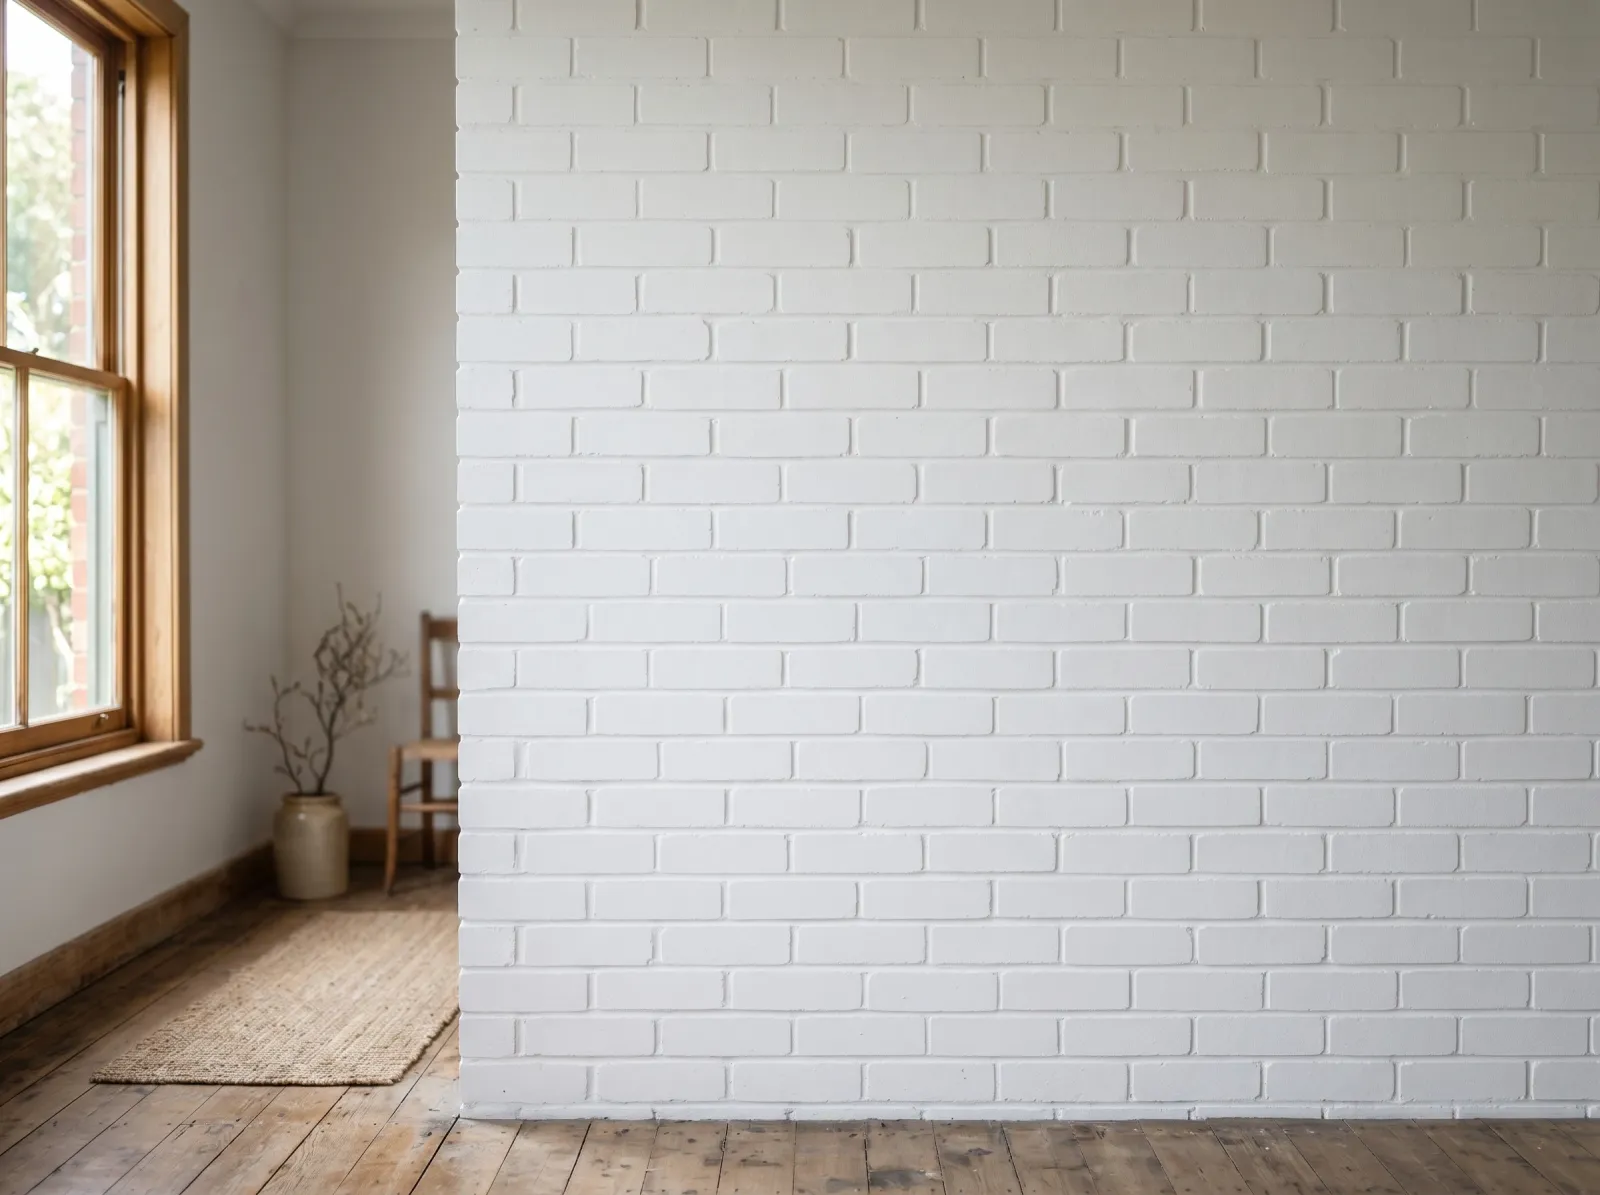 Sealed and finished in 100% acrylic, the wall cures to an even film that won’t re-saponify.
Finish with 100% acrylic latex paint. Acrylic binders don’t carry the ester chemistry that saponifies, so even if a little alkali makes it through, the topcoat won’t turn to soap. This is the structural reason the repair holds: you’ve changed the binder to one the alkali can’t cleave. Going back to an oil enamel walks you straight into the same failure. For the binder-by-binder comparison, see oil-based vs water-based paint.
Two coats. The first coat on primed masonry always looks thin where the texture varies.
Safety
Wear gloves and eye protection for TSP and any acidic neutralizer; both are caustic and can burn skin and eyes. Cross-ventilate. Never mix bleach with vinegar, ammonia, acidic neutralizers, or hydrogen peroxide. The combination produces toxic chlorine or chloramine gas. If you used one cleaner, rinse with clean water and let the wall dry before introducing another.
Common Mistakes
- Painting over it. The alkali and the soap are still there. New paint reacts or won’t bond. Strip and neutralize first.
- Washing but not neutralizing. You remove the soap and leave the chemistry that made it. The pH test catches this.
- Using a drywall PVA primer on masonry. PVA is for gypsum. It has no alkali resistance and fails on high-pH block.
- Recoating with another oil enamel. Same binder, same ester bonds, same reaction. Switch to acrylic.
- Skipping the moisture hunt. Dry the wall and find the leak, or the reaction restarts the next wet season.
- Painting green concrete or plaster. Fresh masonry is at peak alkalinity. Wait for the cure or prime with an alkali-resistant sealer.
Prevention
The reaction needs an ester binder, a high pH, and moisture. Deny it at least one.
- Let new masonry cure. Give concrete and stucco about 28 days, and fresh plaster several weeks. The surface pH falls as it carbonates with air.
- Use acrylic, not oil, on any masonry, concrete, or plaster. This removes the saponifiable binder entirely. See the plaster guide and the concrete floor guide.
- Prime high-pH or uncured surfaces with an alkali-resistant masonry primer when you can’t wait for a full cure.
- Control moisture. Grading and downspouts away from the foundation, a working bathroom exhaust fan, a vapor barrier behind below-grade walls. Dry walls don’t saponify.
When to Call a Pro
- Recurring saponification or browning on a basement wall, which usually means a foundation moisture problem behind the paint.
- Visible water intrusion, soft masonry, or a damp slab that won’t dry out.
- Pre-1978 home where stripping the failed film would disturb lead paint.
- A large area of fresh, strongly alkaline masonry where the coating system needs to be specified to the substrate.
- Any mold over about 10 square feet alongside the dampness (the EPA threshold for remediation).