Anti-Condensation Paint: Does It Work?
Anti-condensation paint cuts surface dampness by insulating the wall, not by stopping water. Here is the chemistry, where it helps, and where it fails.

Most people meet condensation the same way: a cold morning, a bathroom or a north-facing bedroom, and a wall corner that looks wet to the touch. Sometimes there are actual beads of water. Sometimes it is just a dark, damp patch with the first grey blush of mildew. Anti-condensation paint promises to make that stop. It can, in a narrow set of cases. The reason it works has nothing to do with waterproofing, and understanding that is the difference between fixing the wall and wasting a weekend.
TL;DR
- Anti-condensation paint works by insulation, not waterproofing. Hollow microsphere fillers keep the wall surface warmer so water vapor doesn’t reach its dew point on the face.
- It helps on cold spots: single-skin masonry, uninsulated corners, thermal bridges, bathroom ceilings.
- It does not fix rising damp, penetrating damp, or a plumbing leak. Those push liquid water from behind. No topcoat holds against that.
- The biggest failure is too little ventilation. If room air stays saturated, the dew point just moves somewhere else on the wall.
- Apply at the full specified film build (usually two coats) over a clean, dry, mildew-free surface. A thin single coat does almost nothing.
Does This Match What You’re Seeing?
Condensation looks like several different problems, and the fix changes with the diagnosis. Look at where the water is and when it shows up.
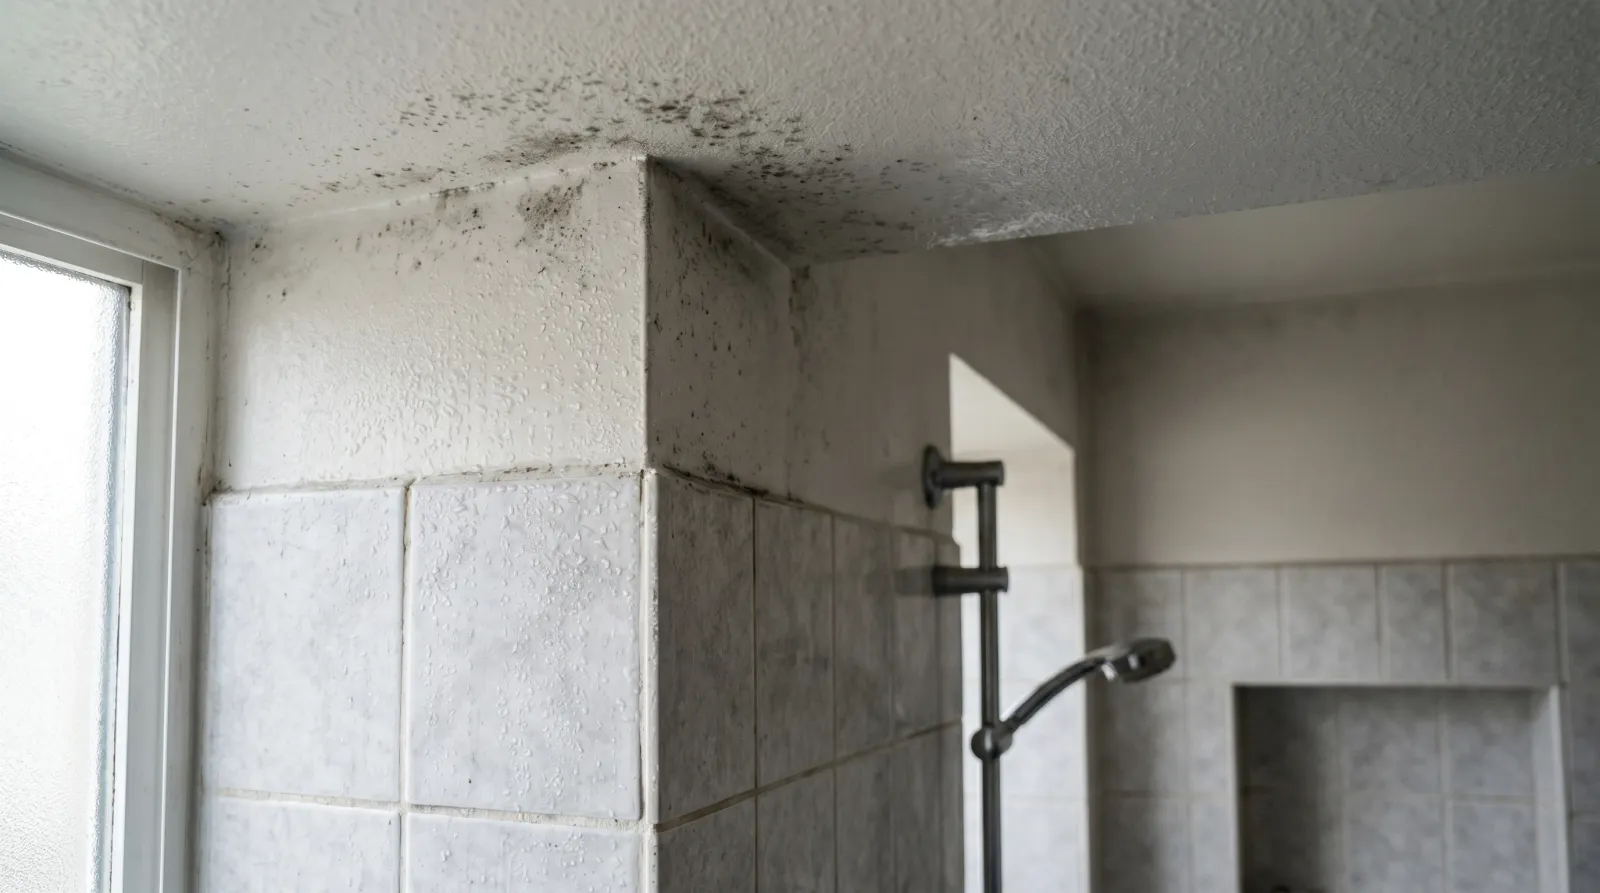
- Beads or a wet film on a cold wall, worst in winter mornings: true surface condensation. This is what anti-condensation paint is built for.
- Grey or black spotting in a cold corner or behind furniture: condensation that has fed mildew. Treat the growth first, then address the cold surface.
- A tide line low on the wall, staining upward: rising damp pulling groundwater up through masonry. Not a paint problem.
- A localized wet patch on an outside wall after rain: penetrating damp through a crack, failed pointing, or a leak. Find the breach.
- A spreading brown ring on the ceiling: a leak from above, not condensation. See how to fix water stains on a ceiling.
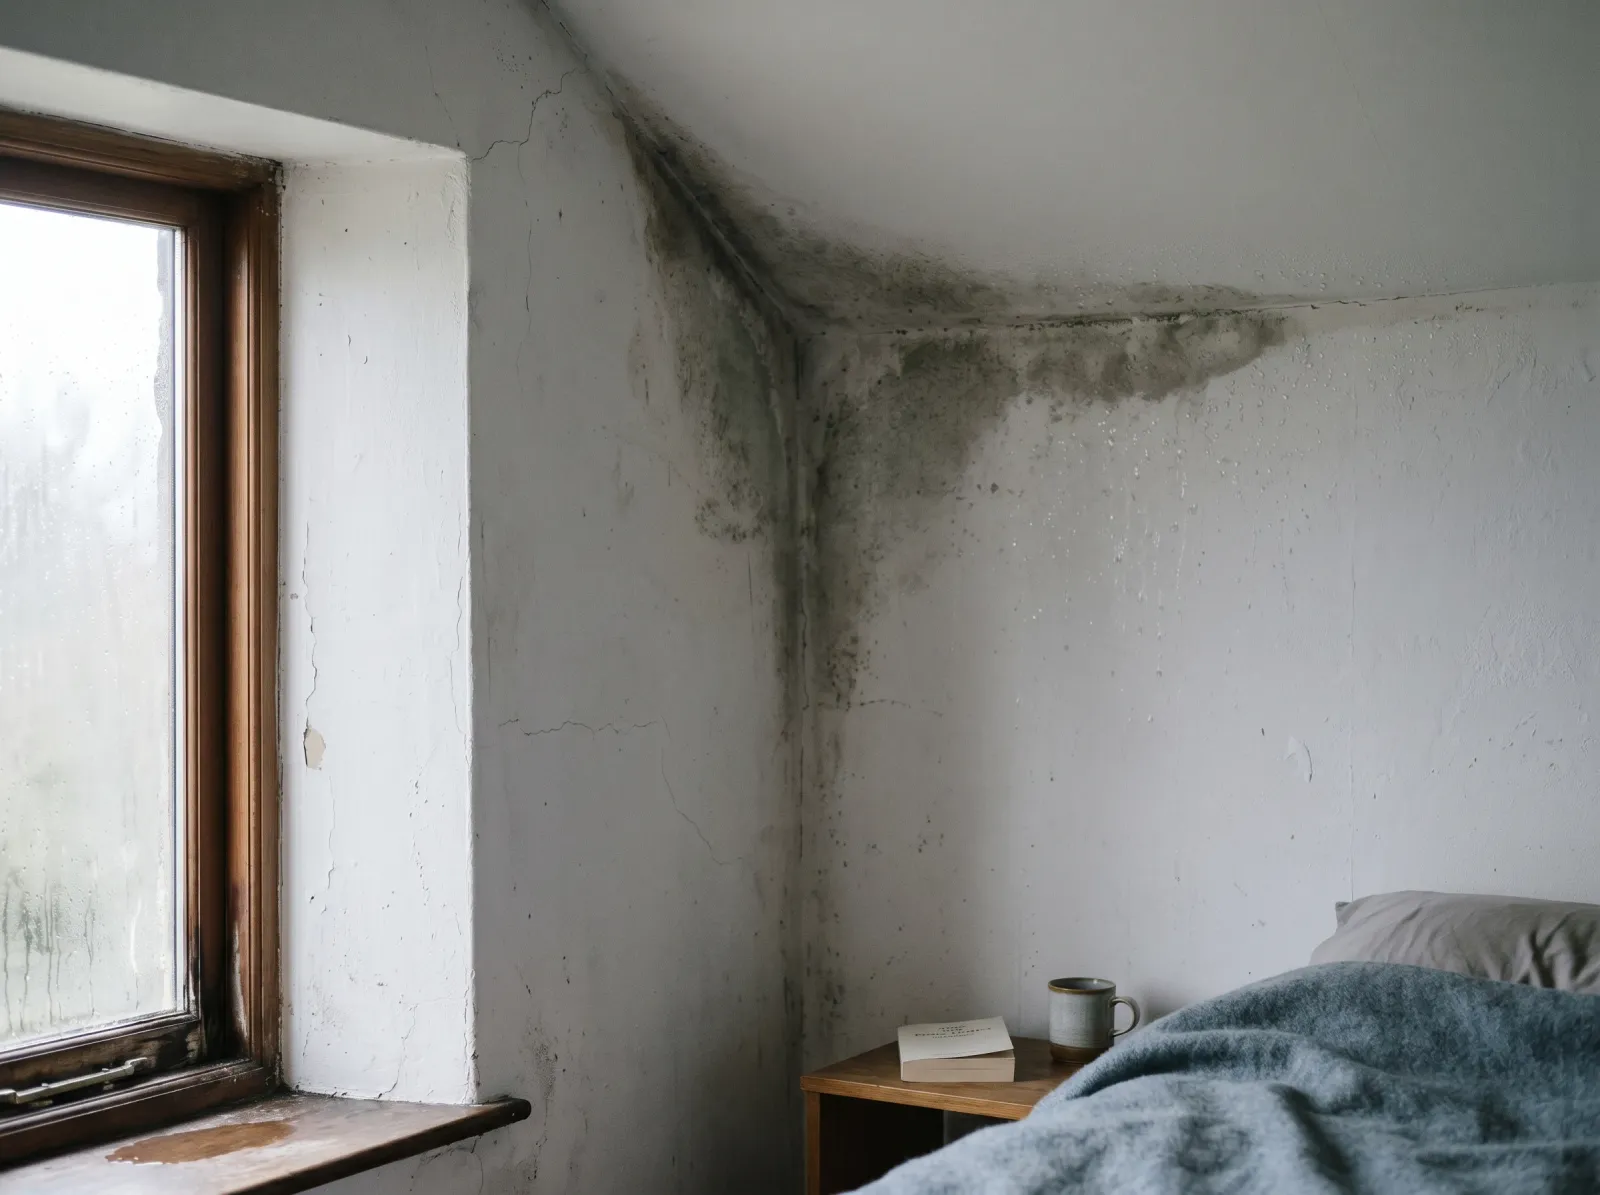 Condensation collects first where the wall is coldest: corners, behind furniture, around window reveals.
If the dampness comes and goes with the weather and the heating, it is condensation. If it is there in a dry spell, suspect liquid water from somewhere.
How Serious Is This?
Pure surface condensation is a low-severity, same-weekend fix once you have ruled out the alternatives. The water is forming on the paint, not coming through it, so the substrate underneath is usually sound.
It climbs to medium severity once mildew has taken hold, because spores are now a health and air-quality issue, not just a cosmetic one. It becomes a high-severity, stop-and-investigate problem if you find any of these:
- A tide line or salts low on the wall (rising damp)
- Soft, crumbling plaster or blown render
- Mildew covering more than about 10 square feet (the EPA’s threshold for professional remediation)
- Damp that persists through dry, warm weather
Those mean liquid water, and no coating fixes liquid water.
Why This Is Happening (Root Cause)
Air holds water vapor, and warm air holds more of it than cold air. Every cubic foot of air in your house has an amount of moisture in it, and a temperature below which that air can no longer hold it all. That temperature is the dew point. When air touches any surface colder than its dew point, water leaves the air and condenses on that surface. The wall isn’t leaking. The air is unloading onto it.
This is why condensation always starts in the cold spots. A corner where two exterior walls meet has more outside surface per unit of inside surface, so it runs colder. A single-skin garage wall, a window reveal, the strip of ceiling above a bathroom: all colder than the room average, all the first places to hit the dew point. Painters call these thermal bridges. The cold conducts straight through.
Two things push a wall toward condensation: a cold surface and humid air. Bathrooms and kitchens generate vapor in bulk. Drying laundry indoors, unvented dryers, and even breathing add to the load. If that moist air has nowhere to go because the room is sealed up against the cold, the relative humidity climbs and the dew point rises with it. Now even a moderately cool wall is below the dew point, and the water comes out.
Here is where the paint enters the chemistry. A normal paint film is thin and conducts heat readily, so the surface sits at nearly the same temperature as the cold structure behind it. Anti-condensation paint loads the binder with low-conductivity fillers, usually hollow glass or ceramic microspheres, sometimes a perlite or vermiculite texture. Those trapped air pockets slow heat loss through the film. The painted surface stays a degree or two warmer than the raw wall behind it. Lift the surface temperature above the dew point and the water has no cold face to condense on. That is the entire mechanism. It is insulation at the scale of a paint film, not a vapor barrier.
The honest limit follows directly from the mechanism. A coat of paint is fractions of a millimeter thick. It can nudge the surface temperature, not transform it. If your room air is heavily saturated, the dew point sits well above what a thin insulating film can lift the surface to, and the water finds the next-coldest spot. The paint buys margin. It does not manufacture dry air.
The Fix
Step 1 — Confirm It’s Condensation, Not Damp
Tape a square of kitchen foil tightly over the affected area, sealed on all four edges, and leave it 48 hours. Moisture on the room side of the foil means condensation: the air is depositing water on a cold surface. Moisture on the wall side means damp is coming through the structure. If it is structural damp, stop. A coating will fail over it. Find and fix the source first.
Step 2 — Kill Any Mildew
Where condensation has fed mildew, treat the growth before anything else. Use a dedicated mold cleaner such as Concrobium Mold Control per its label, or a 1:10 household bleach solution, wiped on and left the labeled dwell time (typically 10 minutes for bleach), then wiped down. Let it dry fully.
Never mix bleach with vinegar, ammonia, or hydrogen peroxide. The combination releases toxic chlorine or chloramine gas. Wear nitrile gloves, eye protection, and an N95, and cross-ventilate the room while you work. For the full mildew procedure, see how to fix mold on walls.
Step 3 — Dry the Wall
The substrate has to be dry before any coating goes on. On plaster that means at least a few days after cleaning; on masonry or concrete it can mean weeks. A moisture meter reading under about 12 to 15 percent on the wall scale is the target. Paint over a damp wall and you trap that moisture under an insulating film, which is exactly the wrong place for it. It will peel.
Step 4 — Prime If the Surface Needs It
Bare or repaired plaster pulls binder out of the topcoat unevenly, so seal it first. A standard acrylic wall primer works on sound plaster. On a previously mildewed surface or a stained one, use a stain-blocking primer so old spotting cannot ghost through. Fresh masonry that is still slightly alkaline wants an alkali-resistant primer. For the substrate specifics, see the guide to painting plaster.
Step 5 — Apply the Anti-Condensation Coating to Full Film Build
This is the step people get wrong. The insulation only works if the film is thick enough to hold an air-pocket layer. One thin coat behaves like ordinary paint. Apply the full coverage the data sheet specifies, almost always two coats, at the stated spread rate. Do not over-thin it to make it brush easier; thinning collapses the microsphere loading that does the insulating. Most of these products are matte by design, because a textured, low-sheen surface holds the filler and reads evenly. Respect the recoat window on the can, usually 4 to 16 hours depending on temperature and humidity.
 After an insulating coating, the surface runs warmer and the dew point moves off the wall face.
How Does It Compare to Regular and Mold-Resistant Paint?
These three categories get sold side by side and confused constantly. They solve different problems.
| Coating | What it adds | What it does | What it won’t do |
|---|---|---|---|
| Standard wall paint | Color, washability | Decorates, seals | Nothing for cold or mold |
| Mold-resistant paint | Biocide in the film | Stops spores colonizing the surface | Won’t keep the wall warm |
| Anti-condensation paint | Insulating microsphere filler | Raises surface temperature above the dew point | Won’t waterproof or sterilize |
The reason the categories overlap is that condensation and mildew travel together. A wall cold enough to bead water is a wall damp enough to grow mildew, so many anti-condensation products also carry a biocide, and many bathroom paints insulate slightly. Read the technical data sheet rather than the marketing on the front. If you have both a cold surface and a mildew history, you want a film that does both jobs. The best mold-resistant paint round-up covers the biocide side in depth.
Common Mistakes
- Painting over a wet or mildewed wall. Traps moisture, feeds spores under the film, peels.
- One thin coat. Below the specified film build there is no meaningful insulation. You painted the wall and changed nothing.
- Treating it as waterproofing. It manages vapor condensing out of the air. It does nothing against liquid water pushing through from behind.
- Ignoring ventilation. The coating raises the surface temperature a little. An extractor fan removes the moisture load entirely. The fan does more.
- Using it on rising or penetrating damp. Wrong diagnosis, guaranteed failure. Do the foil test first.
Recommended Product
Two well-distributed categories handle most US homes. For a bathroom or kitchen ceiling where the goal is stopping the drip and the spotting together, Zinsser Perma-White is the workhorse: a mildew-resistant interior film that holds up to a moist room, widely stocked, in matte through semi-gloss. For a genuinely cold wall, look for an insulating ceramic-microsphere additive or coating such as Hy-Tech’s ceramic insulating paint additive, which you stir into a quality interior paint to raise its thermal resistance. Match the sheen to the room using the sheen guide; matte hides the texture these coatings carry, and semi-gloss wipes down better in a bathroom.
Prevention
The paint is the smaller half of the fix. The air is the bigger half.
- Ventilate the moisture out. Run a bathroom extractor during the shower and for 20 minutes after. Target roughly 1 CFM per square foot of floor. A kitchen wants a vented range hood, not a recirculating one.
- Heat the cold spots. A wall that never warms up always condenses. Keep rooms above about 60°F and don’t seal off unused rooms completely; a cold sealed room is a condensation factory.
- Vent dryers and don’t dry laundry indoors. An unvented dryer dumps gallons of water into the air over a week.
- Insulate the structure where you can. The paint is a stopgap for a thermal bridge. Real wall insulation fixes the cold surface at the source.
- Run a dehumidifier in chronically damp rooms. Pulling the room’s relative humidity down below about 60 percent lowers the dew point so the wall stops reaching it.
When to Call a Pro
- A tide line, salts, or blown plaster low on the wall: suspected rising damp, needs a damp specialist.
- Wet patches that track rain: penetrating damp, needs the building envelope inspected.
- Mildew over more than about 10 square feet (EPA threshold for professional remediation).
- A pre-1978 home where you’d be sanding old paint: lead test first.
- Condensation that returns through warm, dry weather: the moisture source is structural, not seasonal.
Anti-condensation paint earns its place on one specific wall: a cold surface in a room whose air you can also dry out. Lift the surface above the dew point, pull the humidity down with ventilation, and the water has nowhere left to form. Skip the ventilation and trust the can alone, and the dew point just moves to the next cold corner the paint didn’t reach.