Best Wall Stencils
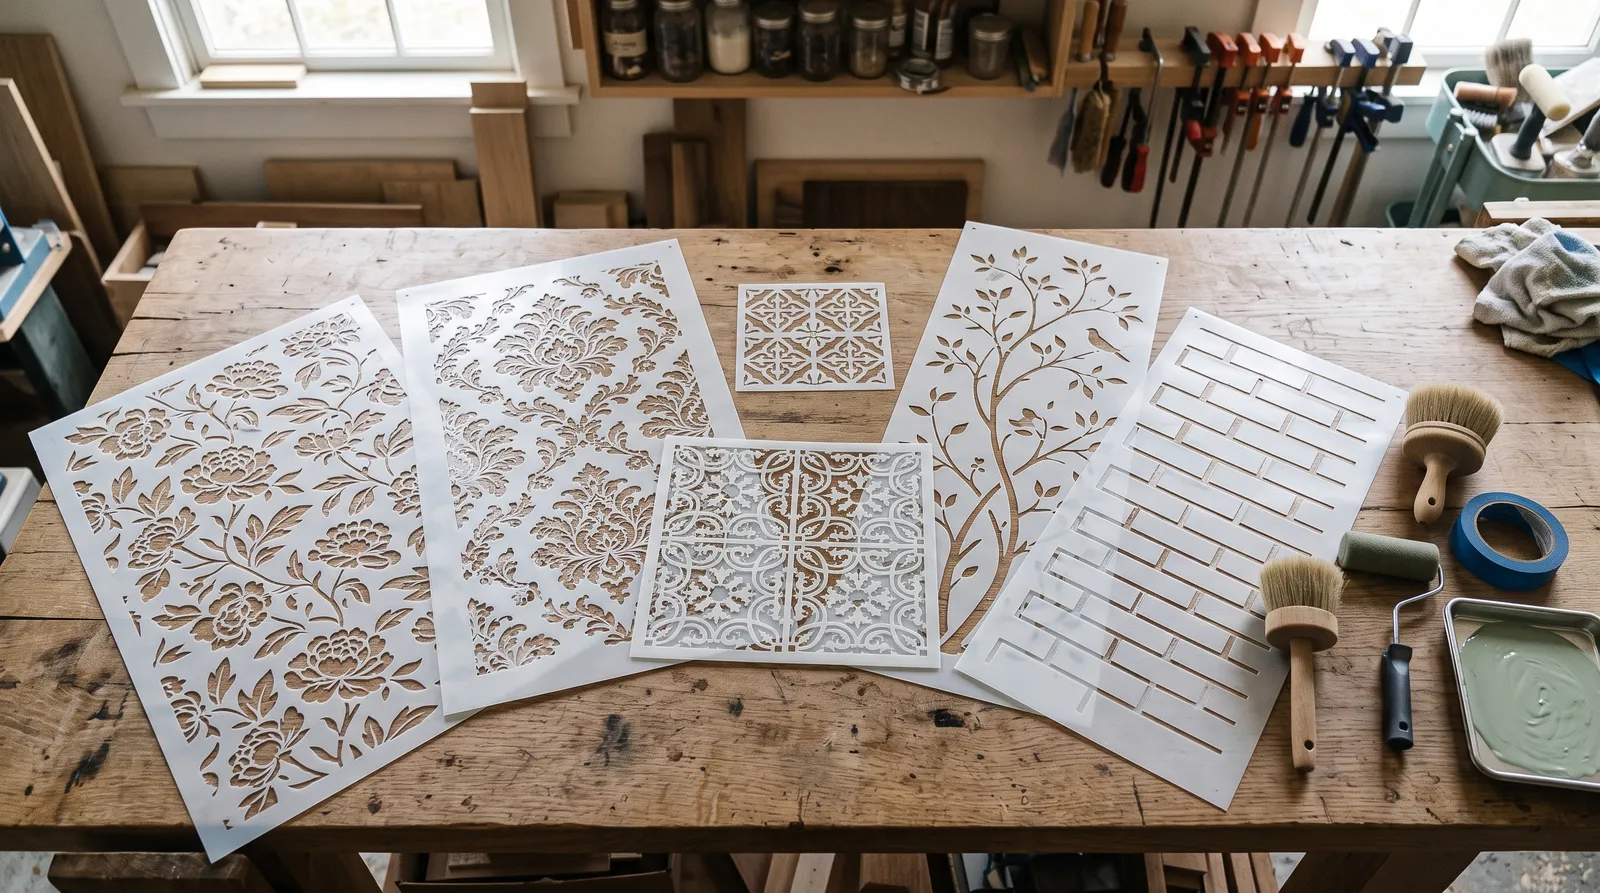
Six wall stencils tested across drywall, a plaster accent wall, a laundry floor, and a backsplash. Top pick: the Cutting Edge Stencils Peony Allover, plus where each one falls short.

Disclosure: Some links below are affiliate links. We earn a commission if you buy through them, at no extra cost to you.
Top pick: the Cutting Edge Stencils Peony Allover Stencil, $49.95. Twelve-mil plastic, a 22 by 22 inch repeat, real registration elements, and a free top-edge sheet for the partial strip under the ceiling where most allover patterns visibly fall apart. It wins on stiffness and on registration, which are the two specs that decide whether your wall looks like wallpaper or like a craft project. It falls short on scale, because a 22-inch repeat means about 40 placements on a standard bedroom wall. If you want a feature wall done in an afternoon instead of a Saturday, the Royal Design Studio Upscaled Isadora Damask covers nearly nine square feet per placement. If you are stenciling a backsplash or a tile floor, skip both and buy a tile stencil.
Six stencils. Four real jobs. One of them I had to repaint.
Why These Six and Not Sixty
The wall stencil market is enormous and mostly noise. Thousands of listings, a handful of real manufacturers, and an ocean of thin laser-cut sheets that arrive curled in a mailer tube and never lie flat again. I narrowed to six by ignoring everything that would not tell me its material thickness on the product page. That single filter cut the field by about ninety percent, and it is the same filter you should use.
What survived came down to two brands with real pattern libraries and consistent material specs, spread across the four things people actually stencil: an accent wall, a whole feature wall, a backsplash, and a floor.
The results were not close. The Peony and the Bricks, both 12 mil, held their shape against a wall with nothing but tape at four corners. The 7 mil Isadora sagged in the middle of its own 42-inch span and needed spray adhesive across the whole face before it behaved. The 10 mil sheets sat in between, which is where most of this category lives.
Stiffness is the whole ballgame. A sheet that flexes under the roller lets paint creep under the edge, and a creeping edge is what makes a stenciled wall read as amateur from across the room.
How I Ran the Test
Same protocol on every sheet, three applicators, one wall at a time.
Bleed test. Every stencil went on scrap drywall three ways before it touched a real wall. A dense 4-inch foam roller offloaded to near-dry. A stubby round stencil brush pounced straight down. And one deliberately overloaded roller pass, because that is what a tired person does at placement thirty. I held a straightedge to the printed edge afterward and marked every spot where paint crossed by more than about a sixteenth of an inch. The overloaded pass is the honest one. It tells you how much the stencil forgives.
Registration drift. Laser line snapped at placement one, checked again at placement twenty. Any pattern with real registration elements stayed within a hair. The drift shows up as a pattern that slowly tilts across a wall, and by the time you notice, you have painted half the room.
Durability. Each sheet got wiped clean after every fifth placement and inspected for curl, bridge tears, and whether it still lay flat.
Real jobs. A 12 by 9 ft bedroom accent wall over Level 4 drywall in Benjamin Moore Regal Select matte, sage over off-white. A stair landing with a plaster skim coat and a lot of live texture. A 58 sq ft laundry room floor over sealed concrete, floor enamel plus two coats of water-based poly. And a 26 sq ft kitchen backsplash between counter and upper cabinets, where every placement sits at eye level under a task light and there is nowhere to hide.
The backsplash is the one I repainted. More on that below.
Reading a Stencil Spec Sheet
Four numbers matter and the rest is styling.
Thickness in Mils
Twelve mil is the stiff end of the consumer market. The sheet holds its own shape, sits flat against drywall, and gives the crispest edge because it does not flex when the roller passes over it. Ten mil is the sensible middle and what most tile and mural stencils use, because a big sheet at 12 mil gets unwieldy. Seven mil is thin. It is not disqualifying on its own, and Royal Design Studio uses it on patterns that are genuinely good, but a 7 mil sheet at 42 inches wide will sag between tape points and you will be buying spray adhesive.
Anything under 5 mil is a craft stencil. Fine for a sign, wrong for a wall.
Repeat Size Against Your Wall
Do this math before you click buy. A standard bedroom accent wall is roughly 12 by 9 ft, call it 108 square feet. A 22 by 22 inch repeat covers about 3.4 sq ft per placement, so you are looking at 40 placements including the partials. A 42 by 30 inch design covers 8.75 sq ft, which is 12 placements. Same wall, same paint, one third the labor.
Small repeats are not worse. They give a finer pattern and they handle better around window casings and outlets. They cost time.
Registration and the Ceiling Strip
A stencil without registration marks makes you align each placement by eye off the previous one. Errors compound. Twenty placements later the pattern is running downhill and there is no fixing it without repainting.
Every allover pattern hits the ceiling with a partial repeat, and the full sheet is too tall to fit the remaining gap. Good stencils ship a separate top-edge piece cut for exactly that. Cutting Edge includes one on both allover patterns here; Royal Design Studio calls it a ceiling filler element. If a stencil does not come with one, budget an hour of frustration and a bent sheet.
Single Overlay vs Multi-Layer
Single overlay is one sheet, one color, one pass, with bridges holding the design together. Multi-layer splits the design so you can shade it, and buys you depth at the cost of registering a second sheet and timing the dry. Every pick here is single overlay. That is deliberate. Multi-layer stencils are a skill purchase, and if this is your first one, they will eat your weekend.
Comparison at a Glance
| Brand / Model | Material | Design size | Best for | Price |
|---|---|---|---|---|
| Cutting Edge Peony Allover | 12 mil plastic | 22 x 22 in | Accent walls, crispest edge | $49.95 |
| Royal Design Studio Upscaled Isadora Damask | 7 mil Mylar | 42 x 30 in | Full feature walls, fastest coverage | $98.95 |
| Cutting Edge Santa Ana Tile | 10 mil mylar | 4x4 to 16x16 in | Backsplashes, small tile work, budget | From $9.95 |
| Royal Design Studio Upscaled Lisboa Tile | 10 mil Mylar | 30 x 30 in | Floors | $69.95 |
| Cutting Edge Avian Chinoiserie Mural | 10 mil mylar | 21.4x30.4 or 32x45.5 in | Statement wall, mural look | $59.95 |
| Cutting Edge Bricks Allover | 12 mil plastic | 21.4 x 22.1 in | Faux brick, beginner-proof | $43.95 |
1. Cutting Edge Stencils Peony Allover, Top Pick
The Peony is the sheet I would hand someone doing their first stencil wall who wants it to look like wallpaper.
Twelve mil is the reason. Tape it at four corners on smooth drywall and it lies down and stays down. On the overloaded-roller test, the one where I deliberately flooded a near-saturated roller across the sheet, the Peony bled in three spots along the outer blossom edges and nowhere else. The 7 mil Isadora bled along most of its perimeter under the same abuse. Stiffness does not just improve the edge. It buys you tolerance for the mistake you will make at placement thirty when your arm is tired.
Registration is the second reason. The pattern includes elements you line up against the previous placement, and over twenty placements against a laser line the drift was small enough that I could not measure it reliably with a ruler. That is the difference between a wall you look at and a wall you keep noticing.
The free top-edge stencil deserves more credit than it gets. The amateur fix for that strip under the ceiling is to bend the full sheet into the corner and hope. Cutting Edge cuts you a piece for it. On the bedroom wall it took eight minutes and the ceiling line looks intentional.
Where it costs you is scale. A 22 by 22 inch repeat on a 12 by 9 ft wall was 40 placements and about seven hours including the drying between passes. The individual blossoms run 2 to 2.5 inches wide with thin bridges between petals, and those bridges load with paint quickly. I wiped the back of the sheet every fourth placement, and the two times I stretched it to six, the next placement came out fuzzy. Budget the wiping into your day.
| Spec | Value |
|---|---|
| Material | 12 mil clear plastic |
| Sheet size | 24 by 28 in |
| Design repeat | 22 by 22 in |
| Layers | Single overlay, plus free top-edge stencil |
| Approx. price | $49.95 |
Buy it if: you want a wallpaper-grade result on an accent wall and you have a full day to give it. Skip it if: you are covering a whole room and the placement count matters more to you than the fineness of the pattern.
2. Royal Design Studio Upscaled Isadora Damask, Best for Covering a Big Wall Fast
Different problem, different answer. The Isadora is what you buy when the wall is large and the calendar is short.
The 42 by 30 inch design covers 8.75 sq ft per placement. The same bedroom wall that took the Peony 40 placements took the Isadora 12, and the whole thing was done between lunch and dinner. The pattern is a classic damask, big and confident, and from six feet away nobody reads it as a stencil. It ships with a ceiling filler element, so the top strip lines up rather than getting fudged.
The trade-off is the 7 mil Mylar. A sheet this large at this thickness sags in the middle under its own weight, and tape at the corners does not solve it. I sprayed repositionable adhesive across the whole back face, which works, and which I count against the stencil because the 12 mil sheets did not need it. Bleed on the overloaded pass was worse than the Peony by a clear margin.
It is also $98.95, and a 42-inch sheet is awkward for one person. Around a window casing you are folding a large floppy rectangle with one hand while holding a laser line with the other.
Buy it if: you have a full feature wall or a stairwell and you want it finished this weekend. Skip it if: it is a powder room, or you would rather not add spray adhesive to the shopping list.
3. Cutting Edge Stencils Santa Ana Tile, Best Budget
Nine dollars and ninety-five cents.
That price is the point. A tile stencil at $9.95 means you have no excuse for not painting a test panel first, and the test panel is what saves you from the mistake I made on the backsplash. Six sizes from 4 by 4 inch up to a 12 by 24 inch double tile, so you can match the grid of whatever is already in the room instead of imposing a new one on it. The free grout-line stencil in the pack does the alignment work, which on tile stenciling is most of the job.
Ten-mil mylar, cleans under a faucet, does not curl.
The catch is repeat count. My 26 sq ft backsplash in the 6 by 6 inch size was about 120 placements, and around placement seventy I started rushing. Two tiles came out with soft edges at eye level under an undercabinet light, which is the least forgiving lighting in a house. I rolled the section back to base color and redid it. The stencil was not the problem.
Verdict: the cheapest real stencil worth owning, and the right first purchase for anyone who has never done this.
4. Royal Design Studio Upscaled Lisboa Tile, Best for Floors
Floors punish small stencils. A 58 sq ft laundry room in a 6 by 6 inch tile pattern is roughly 230 placements on your knees, and nobody finishes that.
The Lisboa is 30 by 30 inches. My laundry floor took about ten placements plus the perimeter partials, and the whole layout was down in under three hours. Ten-mil Mylar matters more here than on a wall, because you will kneel on the sheet, and 7 mil creases permanently when you do. It is a single layer, so there is no second sheet to register while you are working on concrete.
Two real problems. The first is that a 30-inch repeat leaves large partial tiles at the walls, and trimming a $69.95 sheet down to fit a 9-inch strip is a one-way decision. Plan the layout from the center of the room outward and accept the partials at the edges, the same way you would with real tile. The second is that the stencil is only half the job. Latex wall paint on a floor will not last a year. Use floor and porch enamel or one of the chalk paints we rate, then two coats of water-based poly over the whole thing. Skipping the topcoat is the single most common way a stenciled floor fails.
| Spec | Value |
|---|---|
| Material | 10 mil Mylar, laser cut |
| Design size | 30 by 30 in |
| Layers | Single, includes filler element |
| Best for | Laundry rooms, entries, small baths, patios |
| Approx. price | $69.95 |
Buy it if: you have a small floor, a weekend, and a can of water-based poly already on the shelf.
5. Cutting Edge Stencils Avian Chinoiserie Mural, Best Statement Wall
This one is not a repeat pattern in the way your eye expects, and that is why it works. Birds on branches, blossoms layered behind them, and enough irregularity that the grid your brain is hunting for never quite resolves. On the stair landing it read as a hand-painted mural, which is the entire reason to buy a mural stencil.
Two sizes, 21.4 by 30.4 in and 32 by 45.5 in, and built-in registration marks. It works as an allover or stopped partway up the wall over a chair rail, which is the more forgiving option if you have never done this.
It is also the least forgiving sheet in the test. Fine branch and blossom detail means thin bridges everywhere, and thin bridges bleed. On the overloaded roller pass the birds turned to mush. Pounce it with a nearly dry round stencil brush, build in three light passes, and stay off eggshell. Flat or matte only. At 10 mil in the large size it wants spray adhesive across the face.
One honest note: this is the design most likely to look dated in five years. The damask and the tile patterns will age slower.
6. Cutting Edge Stencils Bricks Allover, Best Faux Texture
The beginner-proof one.
Bricks run 2.2 inches tall by 6.3 to 7.9 inches wide, which means big open shapes and almost no thin bridges to bleed under. On the overloaded roller test it barely registered a fault, and it is 12 mil, so it lies flat and stays there. The pack includes a top-edge piece and a small single-brick sheet for the awkward spots behind a toilet or a radiator.
The interesting use is not paint at all. Trowel lightweight joint compound through the openings with a 6-inch knife, pull the sheet while the compound is wet, and you get real relief instead of a printed brick. Scrape the compound off the sheet before it sets or you will be soaking it in the sink for an hour.
Verdict: the right stencil for a first-timer and the wrong one for anyone unsure about faux brick, because taking it back off a wall is a full weekend of skim coat and sanding.
Stencils I Bought and Did Not Recommend
- Generic 4 mil craft sheets from marketplace sellers. Arrived rolled in a tube, never lay flat, bled everywhere. This is most of what shows up when you search for a wall stencil.
- Adhesive-backed single-use stencils. They stick beautifully and produce a clean edge exactly once. If you are doing one small motif over a door, fine. For a wall, the cost per square foot is absurd.
- Multi-layer damask kits. Beautiful results in the hands of someone who has done ten of them. I would not put a beginner in front of one.
- Oversized floor stencils above 36 inches. Past 36 inches a floor sheet stops being manageable on your knees.
Paint, Applicator, and the Part That Actually Decides the Result
The stencil is maybe a third of the outcome. Technique is the rest.
Use flat or matte latex, and if you are working over a wall you just painted, give it a full week to cure before you tape anything to it. Fresh paint pulls. The sheen guide covers why gloss makes every imperfection visible, and that goes double for stencil edges.
Load a dense 4-inch foam roller, then offload it on a paper towel until it looks like it has no paint left. It has plenty. That near-dry roller is what separates a crisp wall from a blurry one, and the same dense-foam logic applies to the covers in our roller round-up. On textured surfaces, switch to a round stencil brush and pounce straight down into the wall rather than rolling across it. A roller skips over the low spots in orange peel; a brush pushes paint into them.
Two light passes always beat one heavy one. Always.
Tape at four corners for a stiff sheet on smooth drywall. Add repositionable spray adhesive on the back of the sheet, flashed off for a minute so it goes tacky rather than wet, whenever the sheet is thin, large, on a ceiling, or on a floor. Use a low-tack tape so you are not pulling base coat off the wall; the painter’s tape round-up has the ones that release clean.
Prep matters as much as it does for any paint job. On patched or repaired walls, the stencil will find every ridge you did not sand, and the fix is the same as it is for repainting repaired drywall: flat, primed, and cured before you start.
Cleaning and Storing
Wipe the back of the sheet with a damp rag every four or five placements. This is the single habit that decides whether your stencil lasts one project or ten. Paint builds on the underside first, and a sheet with a paint ridge on the back cannot lie flat, which is exactly how bleeding starts.
At the end of a session, wash the whole sheet in warm water with dish soap before the paint sets. Lay it in a bathtub if it is large. Do not scrub with a stiff brush; you will fray the bridges, and once a bridge tears the design is done. For dried-on paint, a soak and a plastic putty knife used flat beats force.
Store flat, between two pieces of cardboard, under something heavy. Never rolled. A rolled stencil develops a memory curl that no amount of flattening fixes.
Realistic life: a 12 mil sheet cleaned properly runs several hundred placements across multiple rooms. A 7 mil sheet is closer to one large project before the edges soften.
Mistakes That Ruin a Stencil Wall
- Too much paint on the applicator. This is the cause of roughly every bad stencil job I have seen. Offload until the roller looks dry, then offload once more.
- Skipping the test panel. Paint the pattern on scrap drywall before the wall. Ten minutes tells you your paint is too thin, your color is too close to the base, or your applicator is wrong.
- Starting at a corner. Start at the most visible spot, usually the center of the wall at eye level, and work outward. The awkward partial repeats end up where nobody looks.
- Stenciling over uncured paint. Base coat needs a week. Tape on a four-day-old wall pulls the color off in strips.
- No topcoat on a floor. Latex on a laundry floor lasts one winter. Two coats of water-based poly is not optional.
- Ignoring the ceiling strip until you get there. Check whether your stencil includes a top-edge piece before you start, not at placement 38.
- Buying the pattern before checking the material. If the listing does not state a mil thickness, the answer is thin. Move on.
If you are stenciling one accent wall and want it to look bought rather than made, buy the Peony, a quart of matte, a dense foam roller, and a can of repositionable adhesive. That is about $75 and a Saturday. If the wall is big and the Saturday is spoken for, pay the $98.95 for the Isadora and get your afternoon back.
Ask a Question