How to Seal a Driveway
Driveway sealing done right: identify asphalt or concrete, fill the cracks first, wait for the weather window, then squeegee or spray thin coats. Products, timing, and cure schedule.

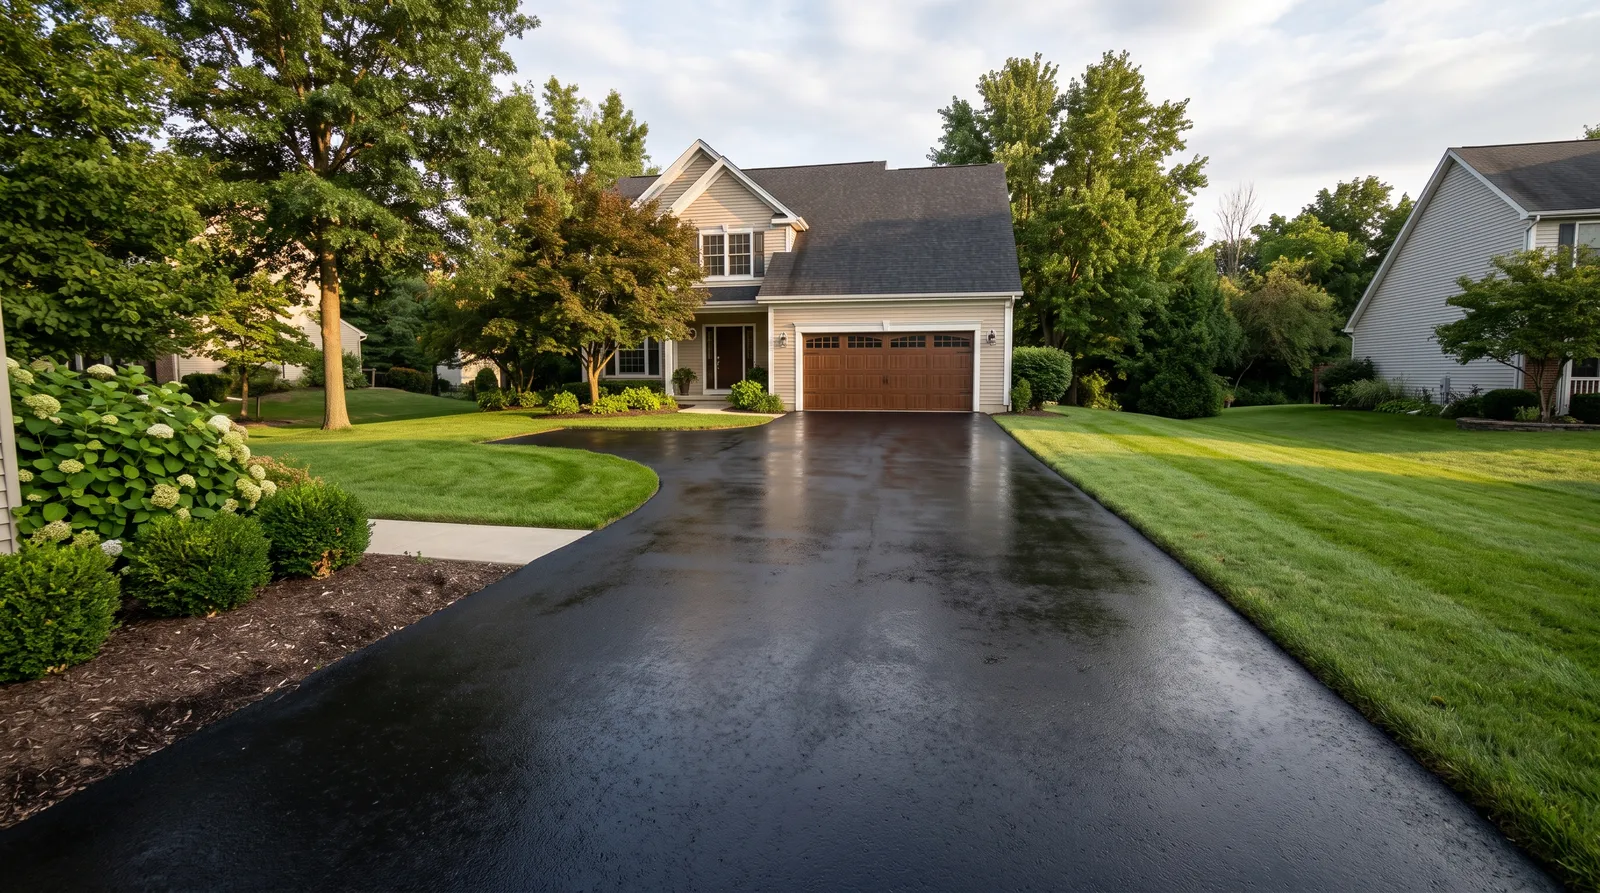
Sealing a driveway is two different jobs sharing one name. Asphalt gets a thick black coating squeegeed on top of it. Concrete gets a thin clear sealer that soaks in and disappears. Use the wrong one and you waste a weekend.
Both versions fail for the same two reasons though. Somebody sealed over open cracks, or somebody sealed in the wrong weather. Fill the cracks, wait for the window, then put down thin coats. That’s the job.
What You’ll Get
Asphalt: an even dark surface that sheds water instead of drinking it, with the cracks plugged so winter can’t pry them open. Three years before it needs another coat.
Concrete: a slab that beads water, shrugs off road salt, and doesn’t soak up oil drips. No shine, no film, nothing that can peel. Three to five years between coats.
Neither one fixes structural damage. Sealer is a raincoat, not a repair.
Honest Take on Difficulty and Time
Easy work, hard timing. Nothing about pulling a squeegee is skilled labor. The difficulty is that this job has three separate waiting periods and if you compress any of them, you get a failure you can see from the street.
Plan two days. Day one you rake out the cracks, fill them, wash the driveway, and degrease the oil spots. Then it has to dry — overnight minimum, a full 24 hours if the weather is cool. Day two you seal, 3 to 5 hours for a two-car driveway. Then the driveway is closed. Cars at 48 hours. Park on the street and tell the neighbors.
The weather window is the real gate. You need 24 hours of dry before you start, and 24 to 48 hours of dry with no overnight temperature drop after you finish. In most of the country that means late spring or early fall.
What You’ll Need
Figure Out Which Surface You Have First
Asphalt is black or faded gray-brown, slightly rough, and has no seams. Concrete is pale gray, harder, and has straight control joints cut into it every few feet. If you’re not sure, drip water on it — asphalt looks patchy and dark, concrete goes uniformly darker and holds a wet mark longer.
Asphalt Sealer
Coal-tar sealers are banned or restricted in a growing list of states and counties, so most of what you’ll find on a shelf is an asphalt emulsion, usually with sand and polymer added. Latex-ite Ultra Shield is the one I keep going back to, mostly because it cures down to 40 degrees and that widens the fall window by a couple of weeks. For rough, porous, never-sealed asphalt, Latex-ite Airport Grade+ has more solids and fills better. Black Jack Drive-Maxx 1000 dries fast and carries a lot of sand, which helps traction on a sloped drive.
The full comparison and coverage numbers are in the best driveway sealer round-up.
Concrete Sealer
Different chemistry entirely. You want a silane-siloxane penetrating sealer — it soaks into the pores, reacts, and leaves nothing on the surface. Nothing on the surface means nothing to peel. Ghostshield Siloxa-Tek 8500 and Foundation Armor SX5000 are both straight silane-siloxane. If you want the darker wet look, Behr Premium Wet-Look Sealer at Home Depot is an acrylic film — it looks great and it will eventually need stripping. Your call.
More options in the best concrete sealer round-up.
Crack Fillers
For asphalt: Latex-ite Pli-Stix is a rubber rope you press into the crack and melt with a torch, and it’s the one that actually holds through a freeze cycle. Bottle-pour filler is fine for hairlines. Potholes and alligatored patches need a trowel-grade patch like Latex-ite Trowel Patch.
For concrete: a self-leveling polyurethane like Sikaflex Self-Leveling Sealant in a caulk gun. Deep joints get backer rod first so the sealant doesn’t sink.
Tools
An asphalt sealer squeegee, 24 or 30 inches, with rubber on one edge and brush bristles on the other. Don’t substitute a floor squeegee — the brush side is what scrubs the sealer into the surface. A pressure washer, 3,000 PSI, ideally with a surface cleaner attachment so you don’t leave wand stripes. A pump sprayer and a roller on a pole if you’re doing concrete. And old boots. Sealer does not come off.
Work out how much to buy with the driveway sealer calculator.
Step 1 — Identify the Surface and Check the Damage
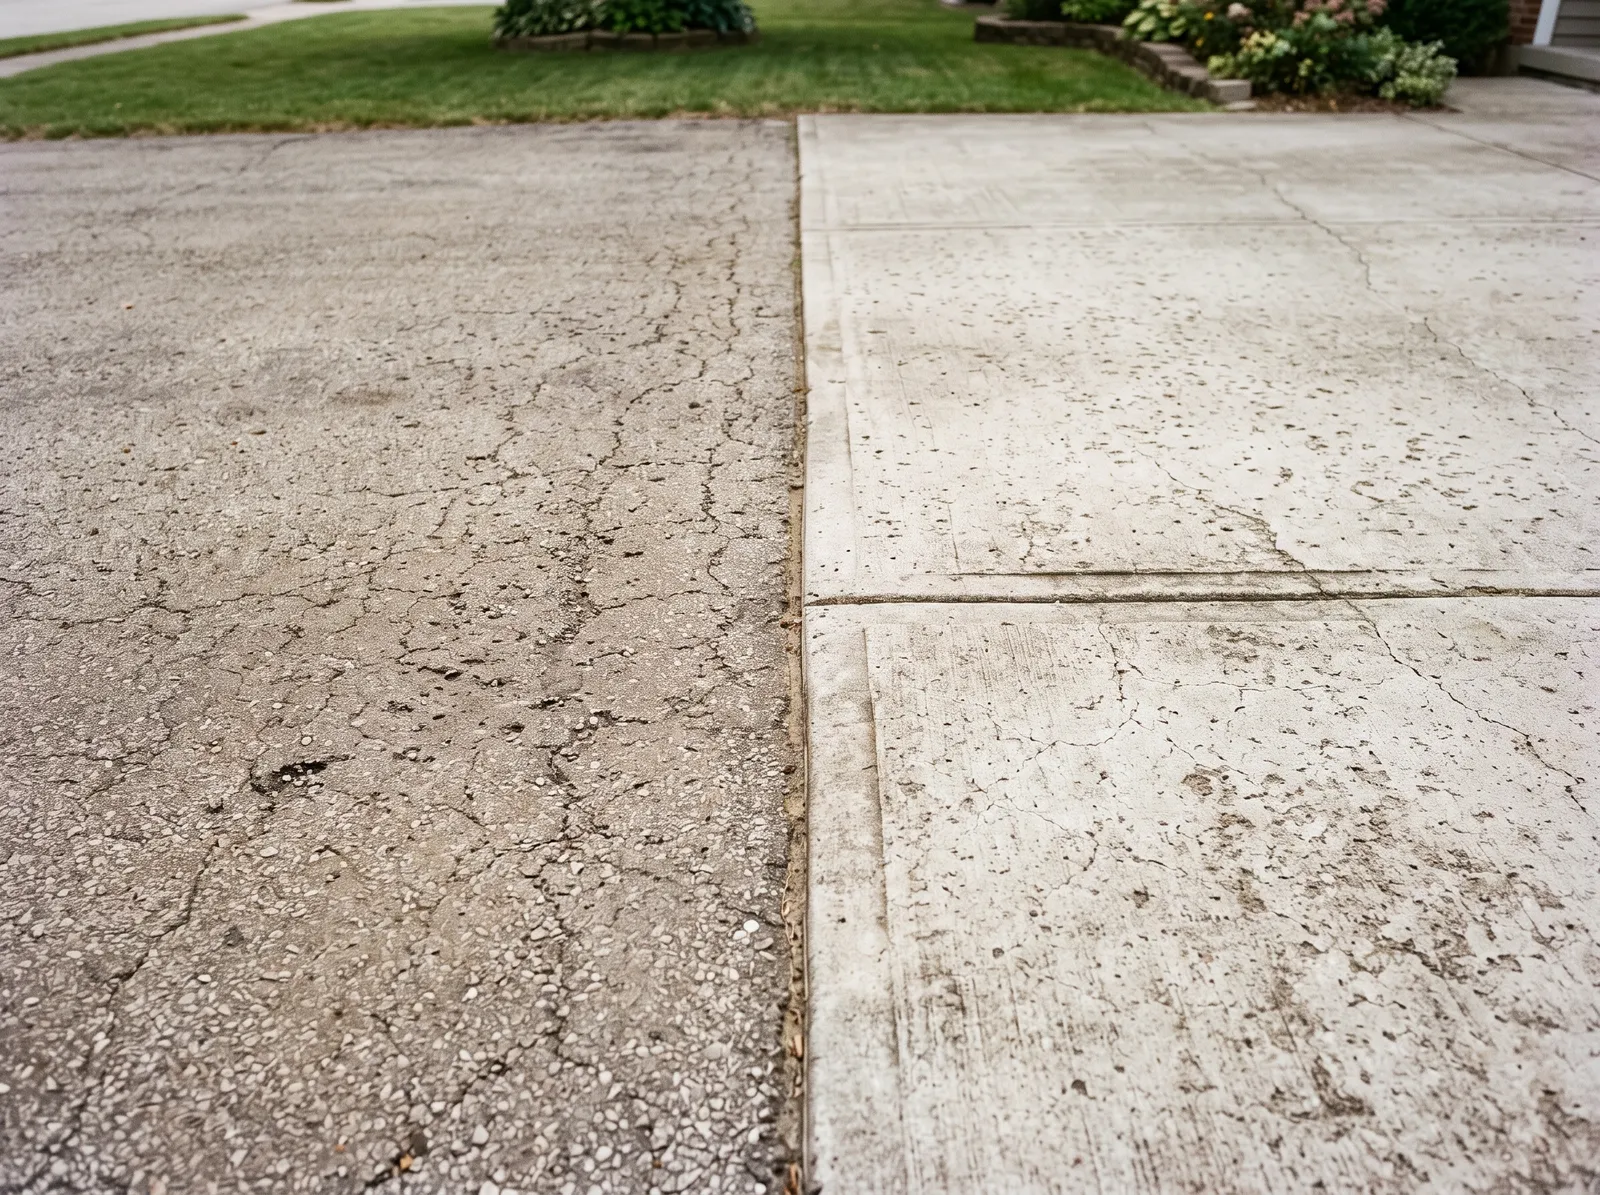
Faded gray asphalt on one side, weathered concrete on the other. Same word, completely different job.
Walk the whole driveway before you buy anything. Measure it — length times width, that’s your square footage.
Then sort the damage. Hairline cracks under 1/4-inch, fine, bottle filler handles them. Cracks over 1/2-inch need rope filler or hot pour. Anything wider than an inch, or a crack with a lip where one side has settled, means the base underneath has moved and sealer won’t help.
Alligator cracking — that scaly pattern of interconnected cracks — is a failed base, not a failed surface. Sealer over alligatoring buys you one season. Patch it or have that section cut out.
Watch out for a driveway that’s already been sealed six or seven times. Look at the edge where it meets the lawn. If you can see layers stacked up like plywood, you have too much coating. Another coat will crack. Scrape the loose stuff off first.
Step 2 — Fill Every Crack, Then Let It Cure
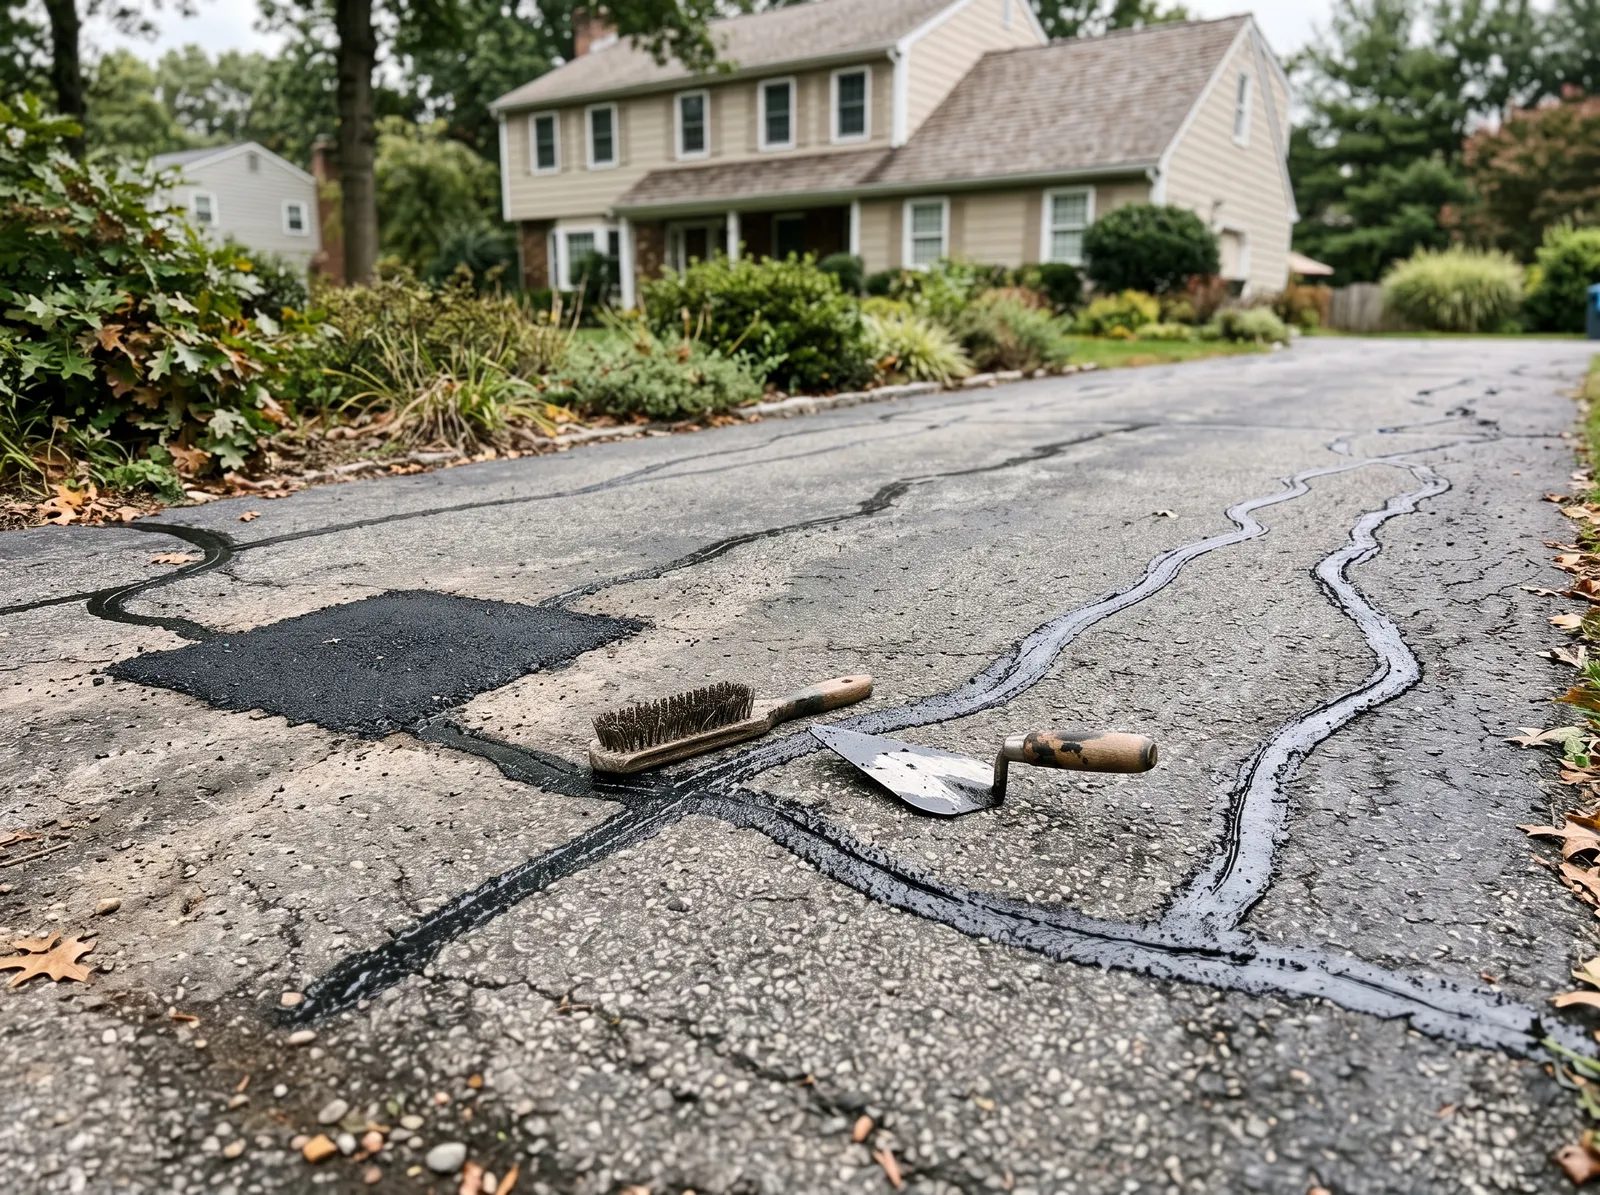
Every crack raked clean and filled, potholes troweled flat, left to cure before any sealer goes down.
This is the step that decides whether the job lasts. Sealer is roughly the thickness of heavy paint. It bridges nothing. An open crack under fresh sealer is still an open crack, and water still runs down it into the base, freezes, and pries the crack wider.
Rake each crack out first. A screwdriver or a wire brush pulls out packed dirt, weeds, and old crumbling filler. Blow it clean with the leaf blower. Filler will not stick to dirt.
On asphalt: press the rope filler down into the crack until it sits just below the surface, then heat it with the torch until it flows and bonds to both walls. Bottle filler goes in the same way, slightly overfilled since it shrinks as it cures. Potholes get trowel patch, tamped in layers, feathered flat with the surrounding pavement.
On concrete: backer rod into anything deeper than 1/2-inch, then self-leveling polyurethane on top. It levels itself flat. Don’t tool it.
Then wait. Crack filler needs at least 24 hours before sealer goes over it, and deep fills want longer. Sealing over uncured filler traps solvent and leaves a soft, sunken stripe down every crack.
Watch out for overfilling. Filler mounded above the surface stays proud forever, catches the squeegee, and shows as a raised black line through the finished coat. Fill to just under flush.
Step 3 — Clean It, Degrease It, Dry It
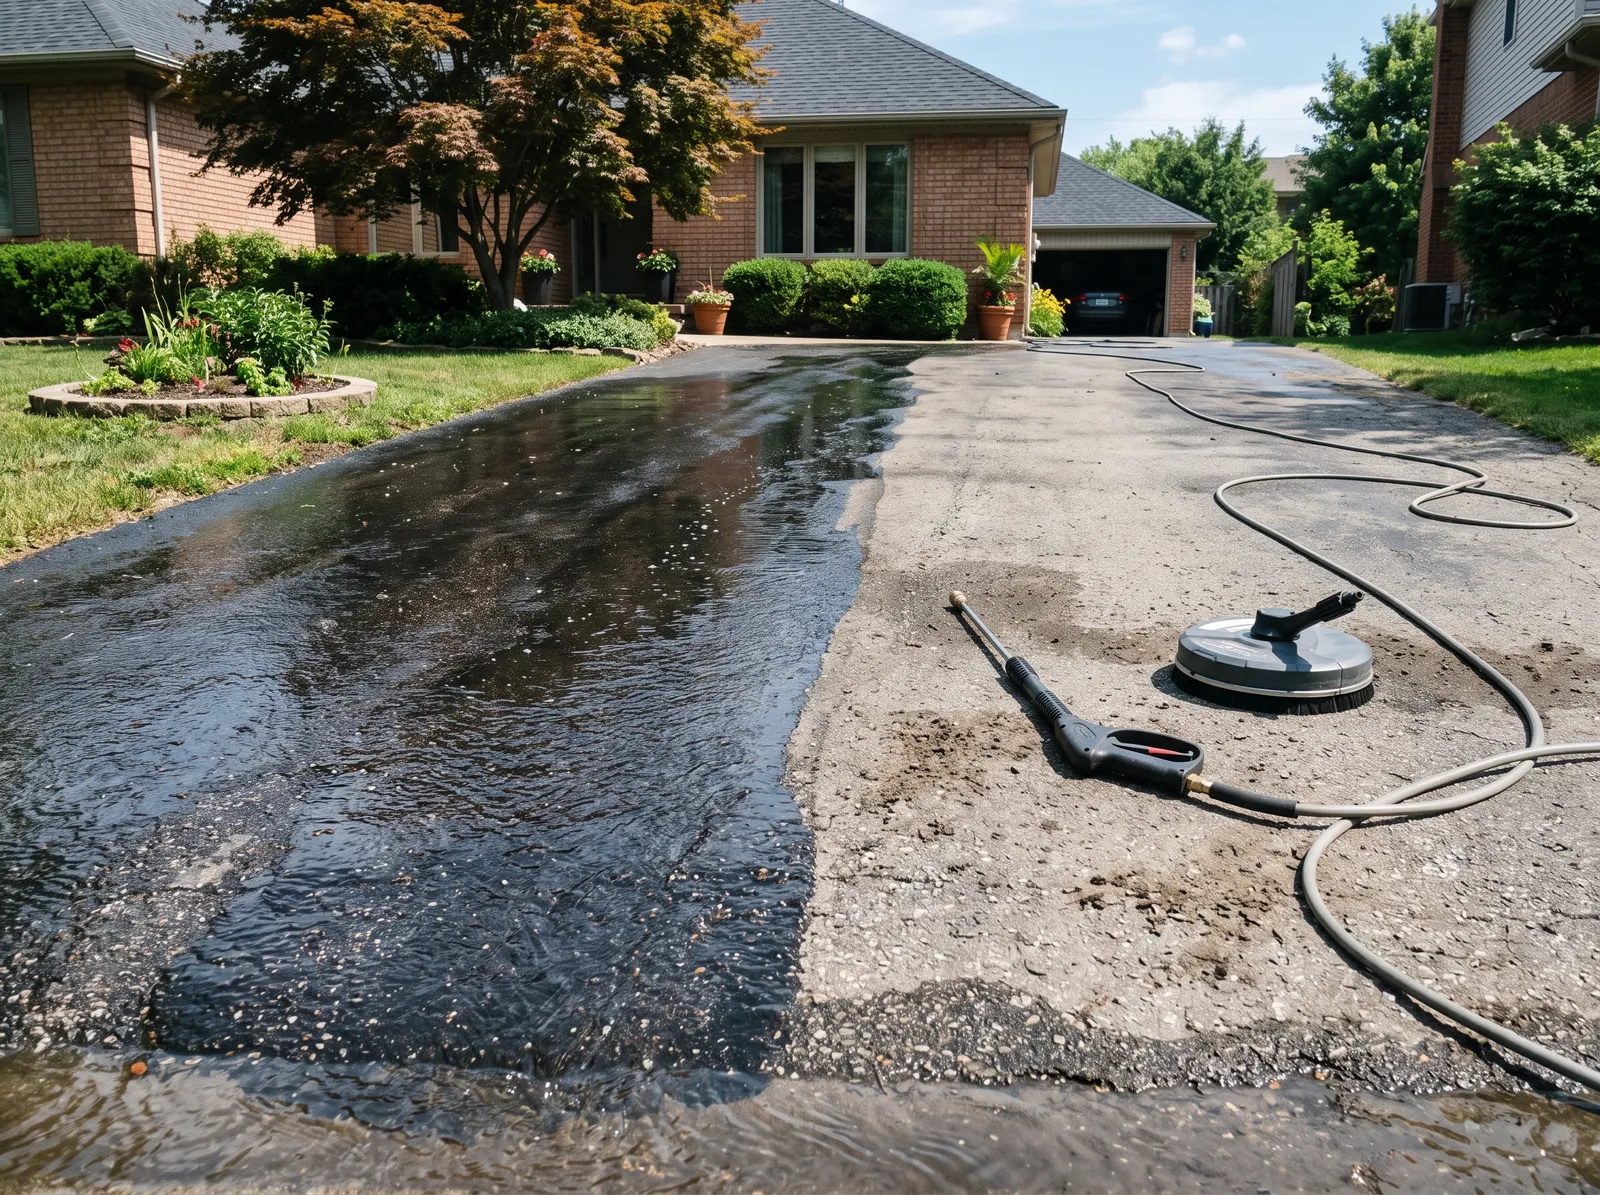
Pressure washed, oil spots degreased, then a full dry day. Sealer over damp pavement peels in sheets.
Sealer bonds to pavement. It does not bond to the dirt film sitting on the pavement.
Pull the weeds along the edges and kill the roots. Sweep hard, then pressure wash the whole surface. A surface cleaner attachment gives you even results; a bare wand leaves stripes if you’re sloppy with the overlap. Keep the tip moving and don’t dwell on asphalt — 3,000 PSI held in one place will chew aggregate loose.
Oil and transmission fluid stains get separate treatment. Sealer will not stick over oil, period. Scrub the spots with a concrete degreaser, rinse, and check — if the spot still darkens when wet, it’s still contaminated. Bad ones need an oil-spot primer before sealing.
Then dry. Overnight minimum after a wash, a full 24 hours if it’s under 65 degrees or the driveway sits in shade. Asphalt looks dry on top long before the pores are. Sealer applied over damp pavement doesn’t bond; it lifts off in sheets the first time a car turns its wheels while stopped.
Watch out for sprinklers. I’ve watched a perfect prep job get ruined at 5 a.m. by a lawn system nobody thought to shut off. Turn it off the day before and leave it off until the sealer has cured.
Step 4 — Apply It: Squeegee for Asphalt, Sprayer for Concrete
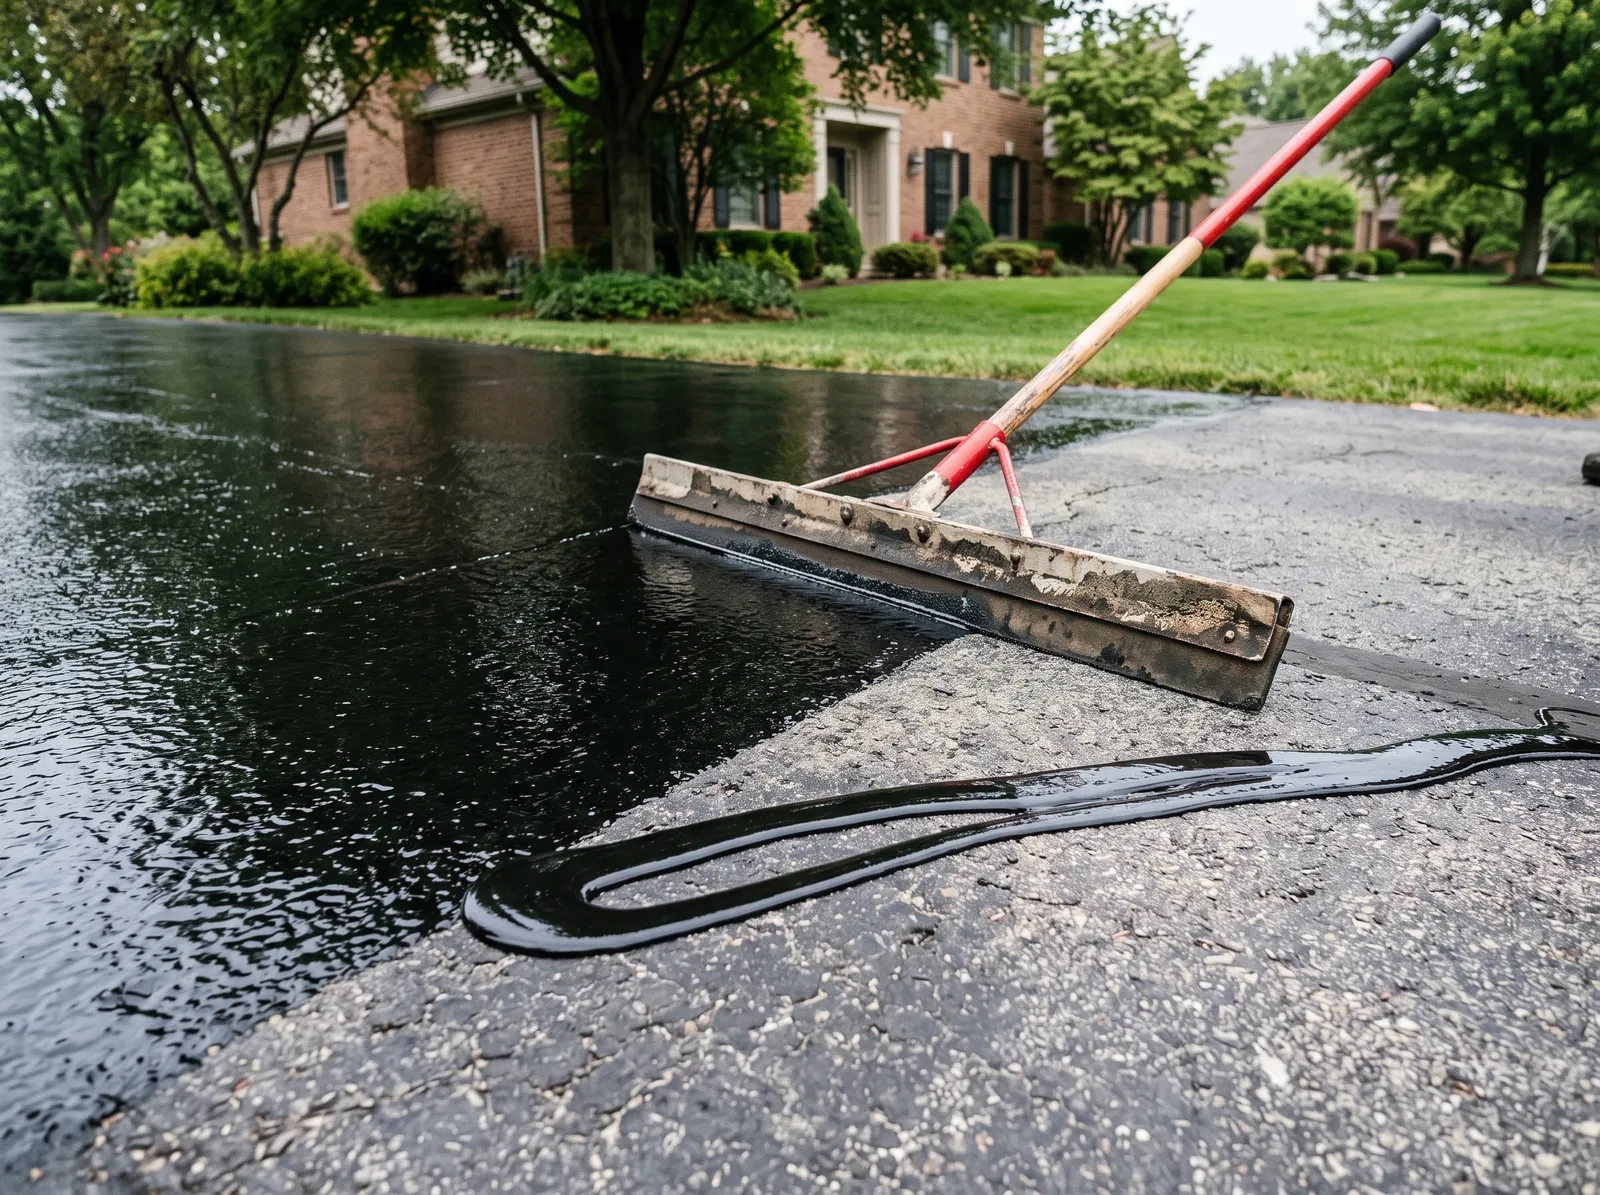
Sealer poured in a ribbon and pulled in thin overlapping passes, working backwards toward the street.
Mask first. Tape rosin paper or cardboard along the garage apron, the sidewalk, and any brick edging. Sealer splashes and it does not wash off concrete.
Asphalt: Pour and Pull
Stir the pail thoroughly — sand and solids settle hard, and unstirred sealer goes on thin and gray. Cut the edges first with a brush, a 2-foot border all the way around, same as you’d cut in a room.
Then start at the garage and work backwards toward the street, so you’re never standing on wet coating. Pour a ribbon across the driveway, about 3 feet of pavement’s worth, and pull it with the squeegee in overlapping passes. Push with the brush side to scrub it into the pores, then pull back with the rubber side to level it.
Thin. Thinner than you think. A properly applied coat looks slightly translucent while wet, not like a puddle. Thick sealer skins over and stays soft underneath for weeks, and it cracks the following spring.
Two thin coats beat one thick one every time. Let coat one dry per the label — usually 4 to 8 hours — then run coat two at 90 degrees to the first, crossways. Cross-hatching is how you cover the holidays you left in coat one.
Concrete: Spray and Back-Roll
Penetrating sealer is thin as water. Put it in a garden pump sprayer with a fan tip and spray in even overlapping passes, wetting the surface without flooding it. Then back-roll with a 3/8-inch nap roller on a pole to break up any puddles and spread the excess.
Puddles matter here. Silane-siloxane that pools and dries on the surface leaves a white haze you have to scrub off. Anything still sitting on top after 10 minutes gets rolled out or wiped.
Second coat goes on wet-on-wet, usually within 10 to 20 minutes while the first is still damp. Check the label — some products want that timing exactly.
Watch out for the sun on asphalt. Pavement over 90 degrees flashes the sealer surface before the body of the coat cures, and you get a chalky finish that powders under tires. Start early. Follow the shade if you have any.
Step 5 — Cure It and Keep Everyone Off
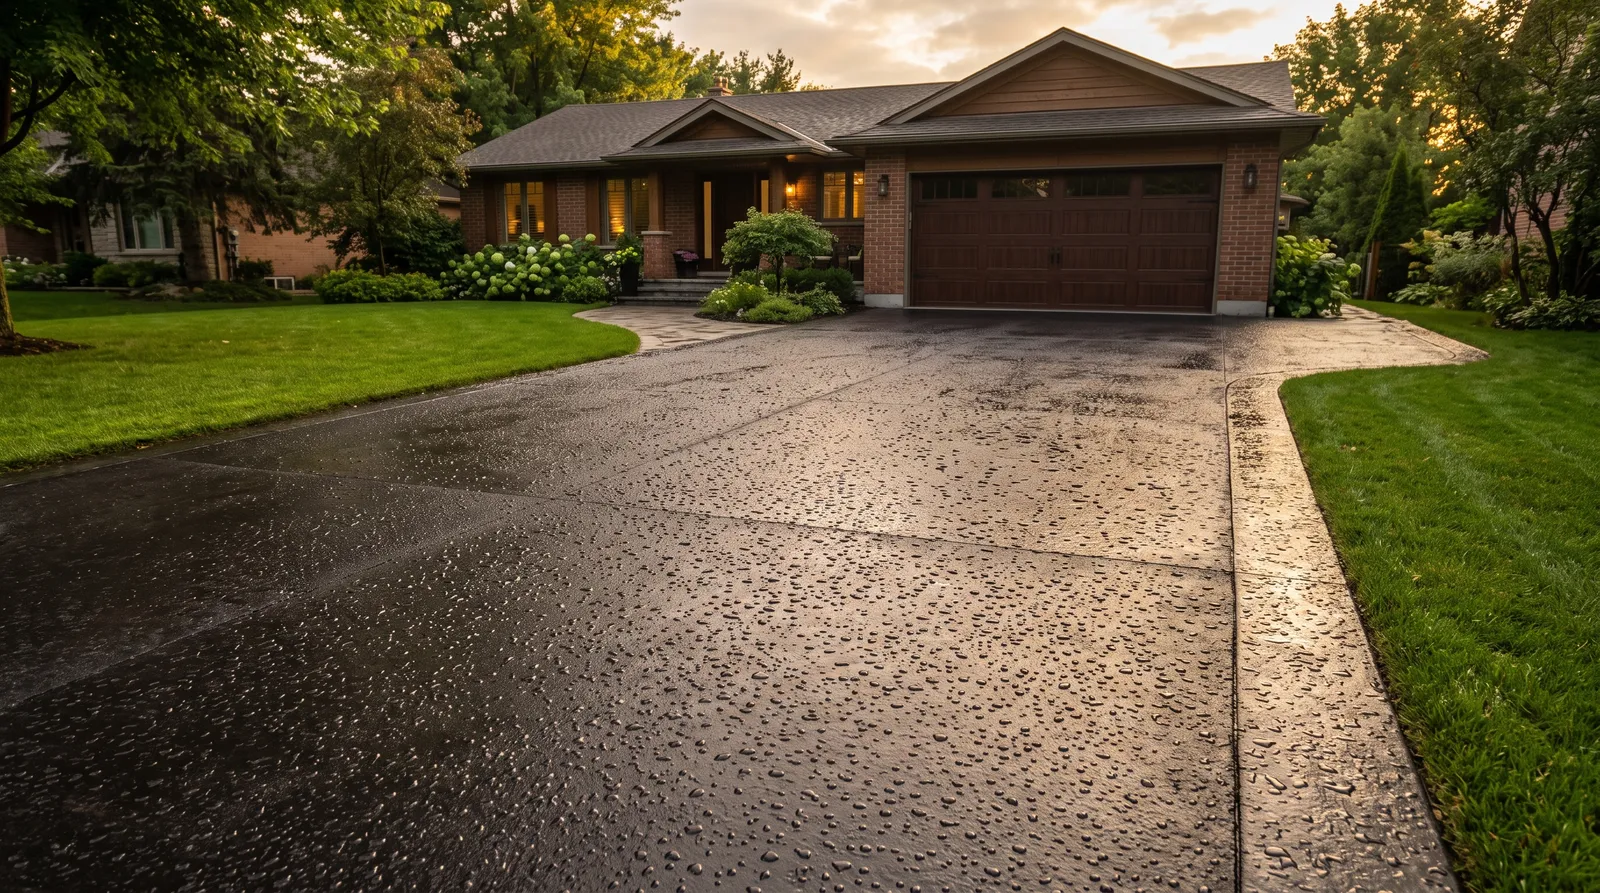
48 hours later. Uniform color, no tire marks, water beading at the low end.
Rope it off. Two sawhorses, caution tape, whatever you have. People will walk on it, and asphalt sealer holds a footprint for good.
Foot traffic after 4 to 8 hours if it’s warm and dry. Cars after 48 hours on asphalt — 24 is the label minimum and the label assumes ideal conditions. Concrete penetrating sealer takes vehicles at 24 hours but wants a full week before salt or heavy rain. Pull the masking while the sealer is still slightly soft; peeling tape off cured sealer takes the edge with it.
When you park again for the first few weeks, don’t turn the wheel while stopped. That twisting motion scuffs fresh sealer, and it shows as gray crescents at every parking spot.
Common Mistakes
- Sealing over open cracks. Sealer bridges nothing. The crack survives, hidden and black, and water keeps running into the base. Fill first, cure 24 hours, then seal.
- Sealing too often. Asphalt does not need annual sealing. Coating stacked on coating gets thicker than it can flex, and thick sealer cracks into a scaly shell that has to be scraped. Every 2 to 3 years.
- Going on too thick. One heavy coat looks great wet and stays soft for weeks. Two thin cross-hatched coats cure properly and last longer. This is the single most common homeowner error.
- Sealing damp pavement. The surface dries hours before the pores do. Sealer over damp asphalt peels off in sheets the first time a tire turns on it. Give it a full dry day after washing.
- Ignoring the overnight low. Everyone checks the afternoon high. The coating cures overnight, and a night below 50 degrees leaves a soft, chalky film. Check both numbers.
- Sealing over oil stains. Nothing sticks to oil. Degrease, rinse, verify, and prime the stubborn spots before you go over them.
Cure Schedule
| Time after sealing | What’s safe |
|---|---|
| 30 to 60 min | Surface skinned over, tacky underneath |
| 4 to 8 hrs | Foot traffic; second coat can go on asphalt |
| 24 hrs | Cars on concrete penetrating sealer |
| 48 hrs | Cars on asphalt sealer — do this, not the 24-hour minimum |
| 7 days | Full cure; salt, heavy rain, and turning wheels while parked |
Cool or humid weather stretches all of it. If the surface still feels tacky under your thumb, it isn’t ready for a car.
Maintenance
Asphalt: recoat every 2 to 3 years, not every year. The tell is color and water. When the black has faded to gray-brown and rain soaks in dark instead of beading, it’s time. Between coats, fill new cracks as they show up — a $12 bottle of crack filler in October is cheaper than a base repair in April.
Concrete: recoat every 3 to 5 years with penetrating sealer. Splash water on it. Beads, you’re fine. Soaks in and darkens, you’re due. Because there’s no film, a recoat is just clean and spray. No stripping, ever.
Both surfaces: keep the edges clear. Grass and weeds growing into the pavement edge pry it apart from the side.
Cost Breakdown
| Item | Asphalt | Concrete |
|---|---|---|
| Sealer for 600 sq ft, two coats | $60–$120 (3 pails) | $170–$260 (5 gal penetrating) |
| Crack filler / patch | $30–$60 | $20–$40 |
| Degreaser | $15 | $15 |
| Squeegee or sprayer + roller | $25–$40 | $30–$50 |
| Masking paper and tape | $10 | $10 |
| Total | ~$140–$245 | ~$235–$375 |
Pressure washer rental adds $40 to $75 for a day. A contractor sealing the same asphalt driveway runs $250 to $600, so doing it yourself saves real money on asphalt and saves less on concrete, where the material is most of the cost.
Numbers assume a standard 600 square foot two-car driveway. Rough, never-sealed asphalt drinks noticeably more — budget an extra pail.
What’ll Bite You in Two Years
Not the sealer. The edges.
The outer 12 inches of a driveway has no support on one side, and that’s where everything starts. Grass roots creep in, the edge crumbles, a crack opens parallel to the lawn line, and water gets under the base. Two years later you’re not sealing a driveway, you’re rebuilding an edge.
So every spring, walk the perimeter. Cut the sod back off the pavement, fill any edge crack, and make sure water is running off the driveway instead of standing along the low side. Five minutes twice a year keeps the edge alive for a decade.
And if the asphalt has gone past sealing — alligatored, potholed, settling in places — sealer is throwing money at a base problem. Same goes for concrete that’s heaved or cracked through the slab. If you’re at the point of wanting a color change on concrete instead of a clear sealer, that’s a coating job, not a sealing job, and the concrete driveway painting guide covers the etch-prime-epoxy route and what it takes to survive hot tires.
Ask a Question