How to Paint a Pressure-Treated Fence
Painting a treated fence is mostly a waiting game. Why new boards have to dry for months, the moisture test, the right primer, and what bites you in two years.


New pressure-treated fence. You want it painted this weekend. The fence has other plans.
Here’s the rule, and it’s the one nobody tells you at the lumber yard: that wood is soaked. Treated lumber gets pumped full of preservative under pressure, and it leaves the plant wet. Paint a wet fence and the water trapped under the film pushes the paint right back off. By next spring it’s peeling in sheets and you’re scraping. So the first job isn’t painting. It’s waiting, and testing, and knowing when the wood is finally ready.
What You’ll Get
A fence with even, sealed color that sheds water and lasts. If you do the prep right, paint holds 5 to 7 years before a refresh, stain a little less but easier to redo.
Honest Take on Difficulty and Time
The painting is a weekend. The waiting is the project.
Fresh green treated lumber needs months to dry before it’ll take a coat. Three to six months is typical. In a wet climate, a year. So if you just built the fence, mark a date on the calendar and walk away. If the fence is a few years old already, you’re in luck. Old treated wood is dry and weathered, which is exactly the surface paint wants.
The active work breaks down like this. Day one: wash and let it dry. A few dry days later: prime. Day two: two coats of finish, a few hours apart. Then a week of cure before you lean anything on it.
A sprayer turns a long fence from a brutal day into a manageable one. Past about 60 linear feet, rent or buy one. Under that, a 4-inch brush is fine and you skip the masking.
What You’ll Need
Paint and Primer
Exterior acrylic latex in a satin sheen. Acrylic stays flexible, and a fence moves with every wet-dry cycle, so a brittle finish cracks. Behr Premium Plus Exterior, BM Aura Exterior, and Sherwin-Williams SuperPaint Exterior all hold up. Budget about a gallon per 175 square feet per coat, and plan on two coats.
Over the raw wood you need an exterior stain-blocking primer (Zinsser Cover Stain or KILZ Premium). Treated wood fights adhesion and it bleeds tannin. The primer is what grabs the wood and stops the brown bleed-through. Don’t skip it.
If you’d rather see the grain, skip paint and use a semi-transparent exterior stain instead. The trade-offs live in the best deck and fence stain round-up. For solid color picks, see the best exterior paint round-up. And for the wood-specific prep on rails and posts, the exterior wood guide covers it.
Tools
A pump sprayer and a stiff brush for the wash. For applying: an airless sprayer plus a 4-inch brush if the run is long, or just a 4-inch exterior block brush and a stain pad if it’s short. Drop cloths under the fence, plastic over any shrubs you like.
The one tool people skip and shouldn’t: a moisture meter. A $25 pin meter tells you the truth about whether the wood is dry. Guessing instead is how the $400 repaint happens. Brush picks are in the paint brush round-up.
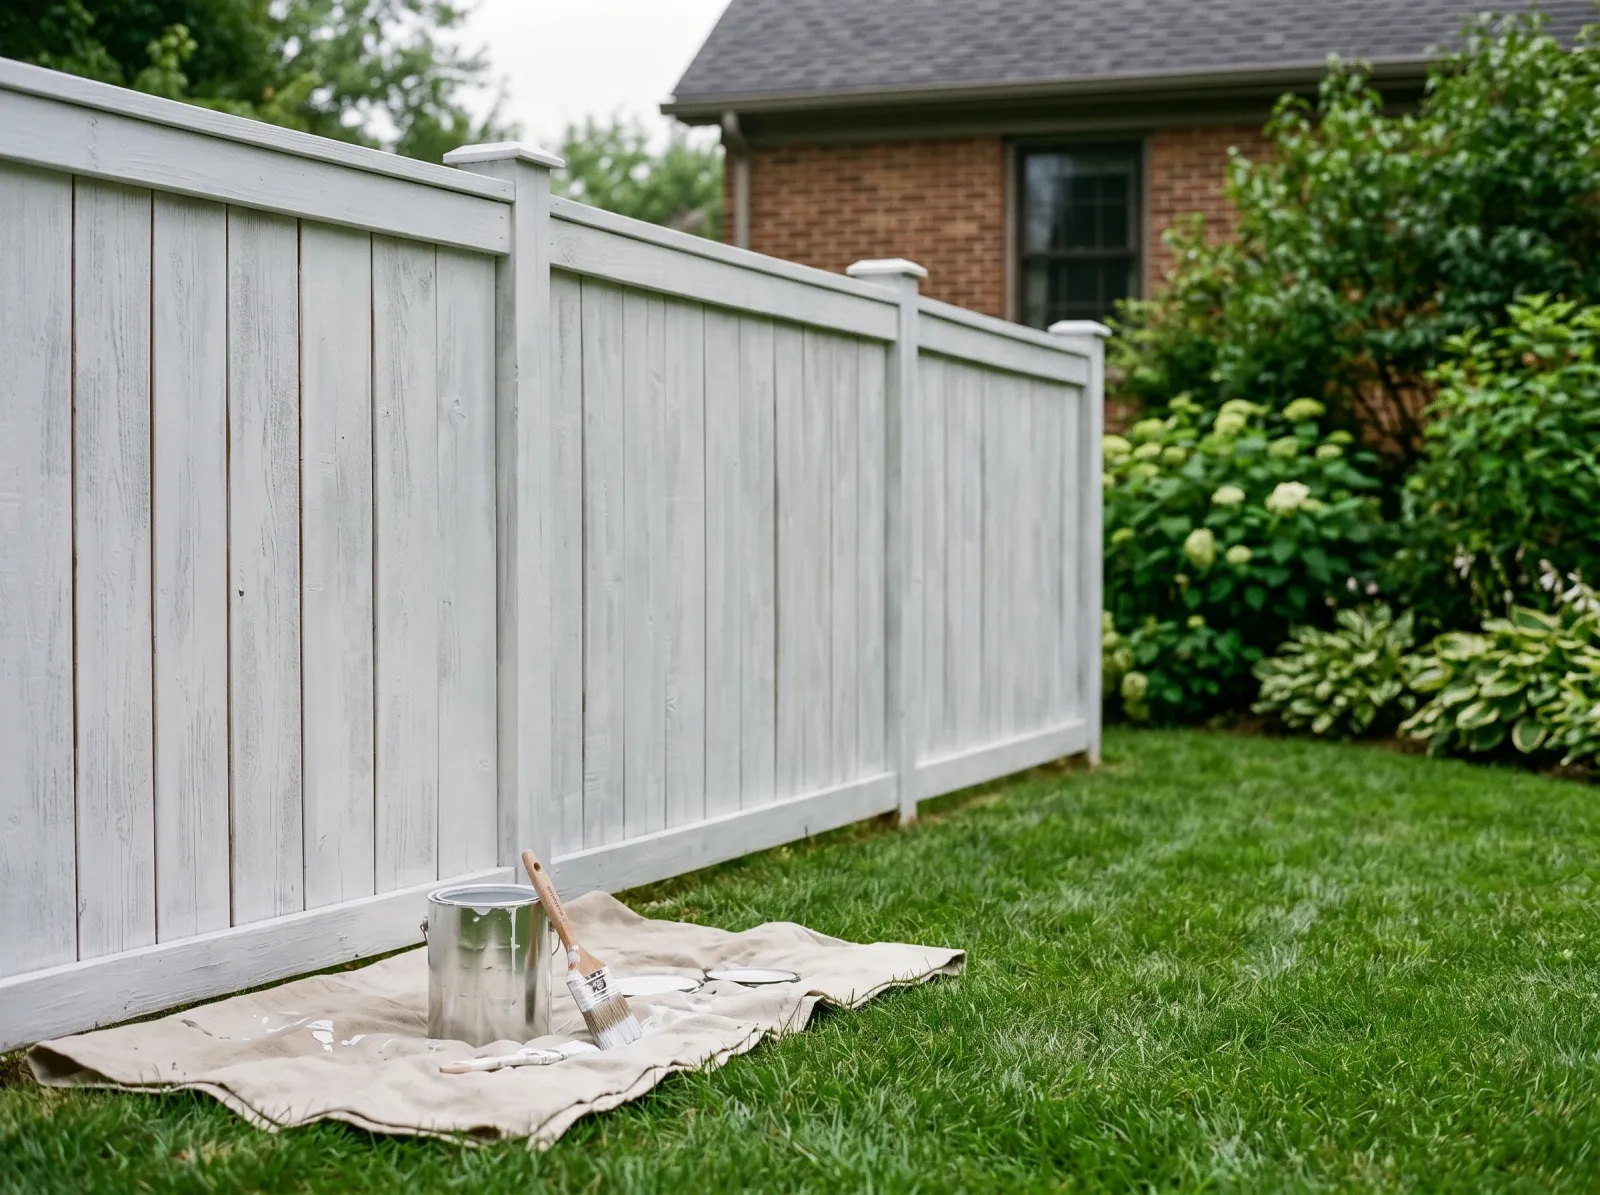
Step 1 — Clean the Fence and Test the Moisture
 Washed down, drying out, and metered. Under 15 percent or you walk away.
Wash the whole fence. New lumber has a waxy mill glaze and a fine surface residue from the treatment; old lumber has dirt, mildew, and gray UV-damaged fiber. An oxygenated deck cleaner and a stiff brush takes both off. Rinse and let it dry.
Now the test that decides everything. Push a pin moisture meter into a few boards, including the shaded bottoms where water hides. You want under 15 percent. Second check: flick water on the surface. If it beads and sits, the wood is still too wet and full of preservative. If it soaks in within a minute or two, you’re clear.
Watch out for the assumption that “it’s been a month, close enough.” A month is not enough for green treated wood. Trust the meter, not the calendar.
Step 2 — Prime the Bare Wood
 One uniform coat of exterior stain-blocker. Adhesion is won right here.
One full coat of exterior latex stain-blocking primer over every bare and weathered face. Hit the end grain on the post tops and the cut ends hard. That’s the thirstiest wood on the fence and where rot starts.
Brush it into the grain, don’t just lay it on the surface. Treated pine is rough and porous, and the primer has to bite into it. Let it dry the full time on the can before you topcoat. Usually a few hours, longer in humidity.
Watch out for knots and resin streaks. Treated pine has plenty, and they bleed amber through a light finish coat. If you see weeping resin, spot-prime those knots a second time. The block-knots-bleeding fix covers the stubborn ones.
Step 3 — First Finish Coat
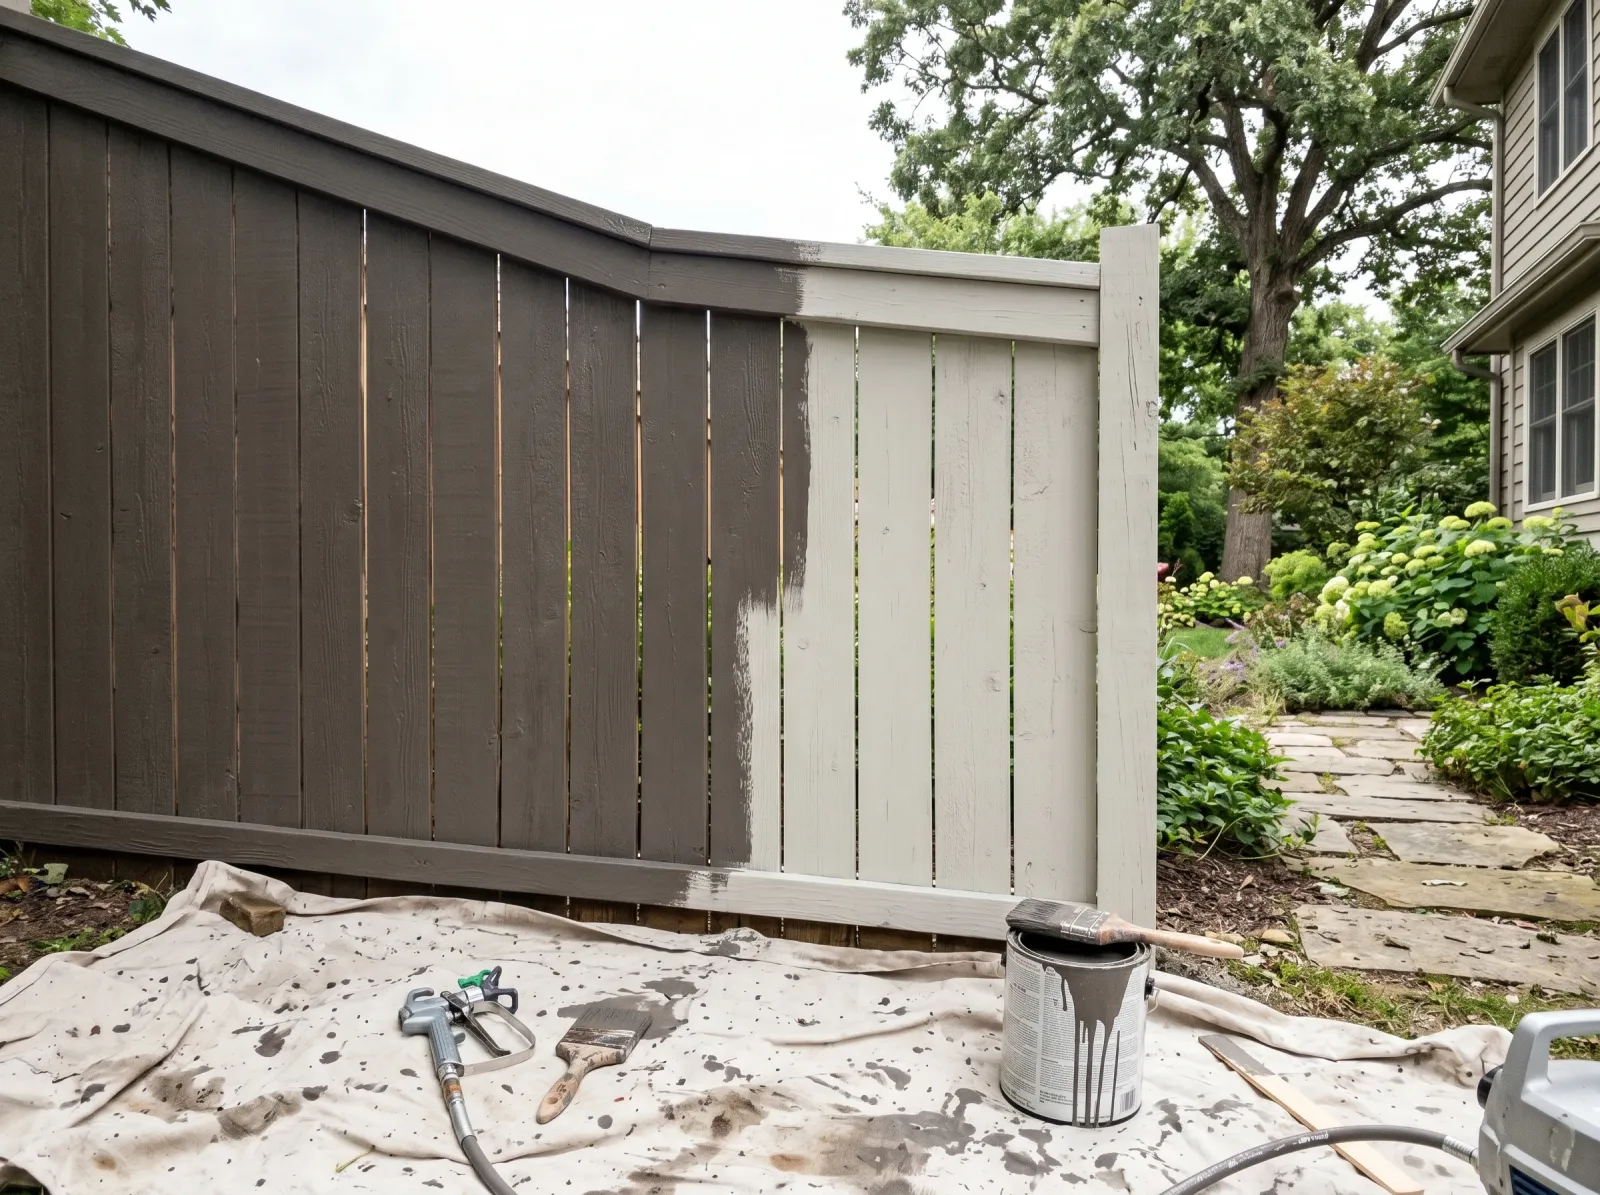 Spray it on, then drag a brush through it. Spraying alone leaves paint sitting on top of the grain.
Spray the field if you’ve got a sprayer, working top board to bottom so drips land on unpainted wood you’ll cover anyway. Keep a wet edge across each board’s full length. Don’t stop in the middle of a board.
Here’s the part that separates a fence that lasts from one that peels: back-rolling, or in this case back-brushing. Right after you spray a section, drag the 4-inch brush through it. The brush works paint down into the rough grain instead of letting it bridge on top. Spray-only on a fence looks fine for a year, then sheets off because it never keyed into the wood.
Watch out for the gaps between boards and the back faces. Water gets behind a fence. Get paint into the edges and as far around the back as you can reach.
Step 4 — Second Coat, Edges Last
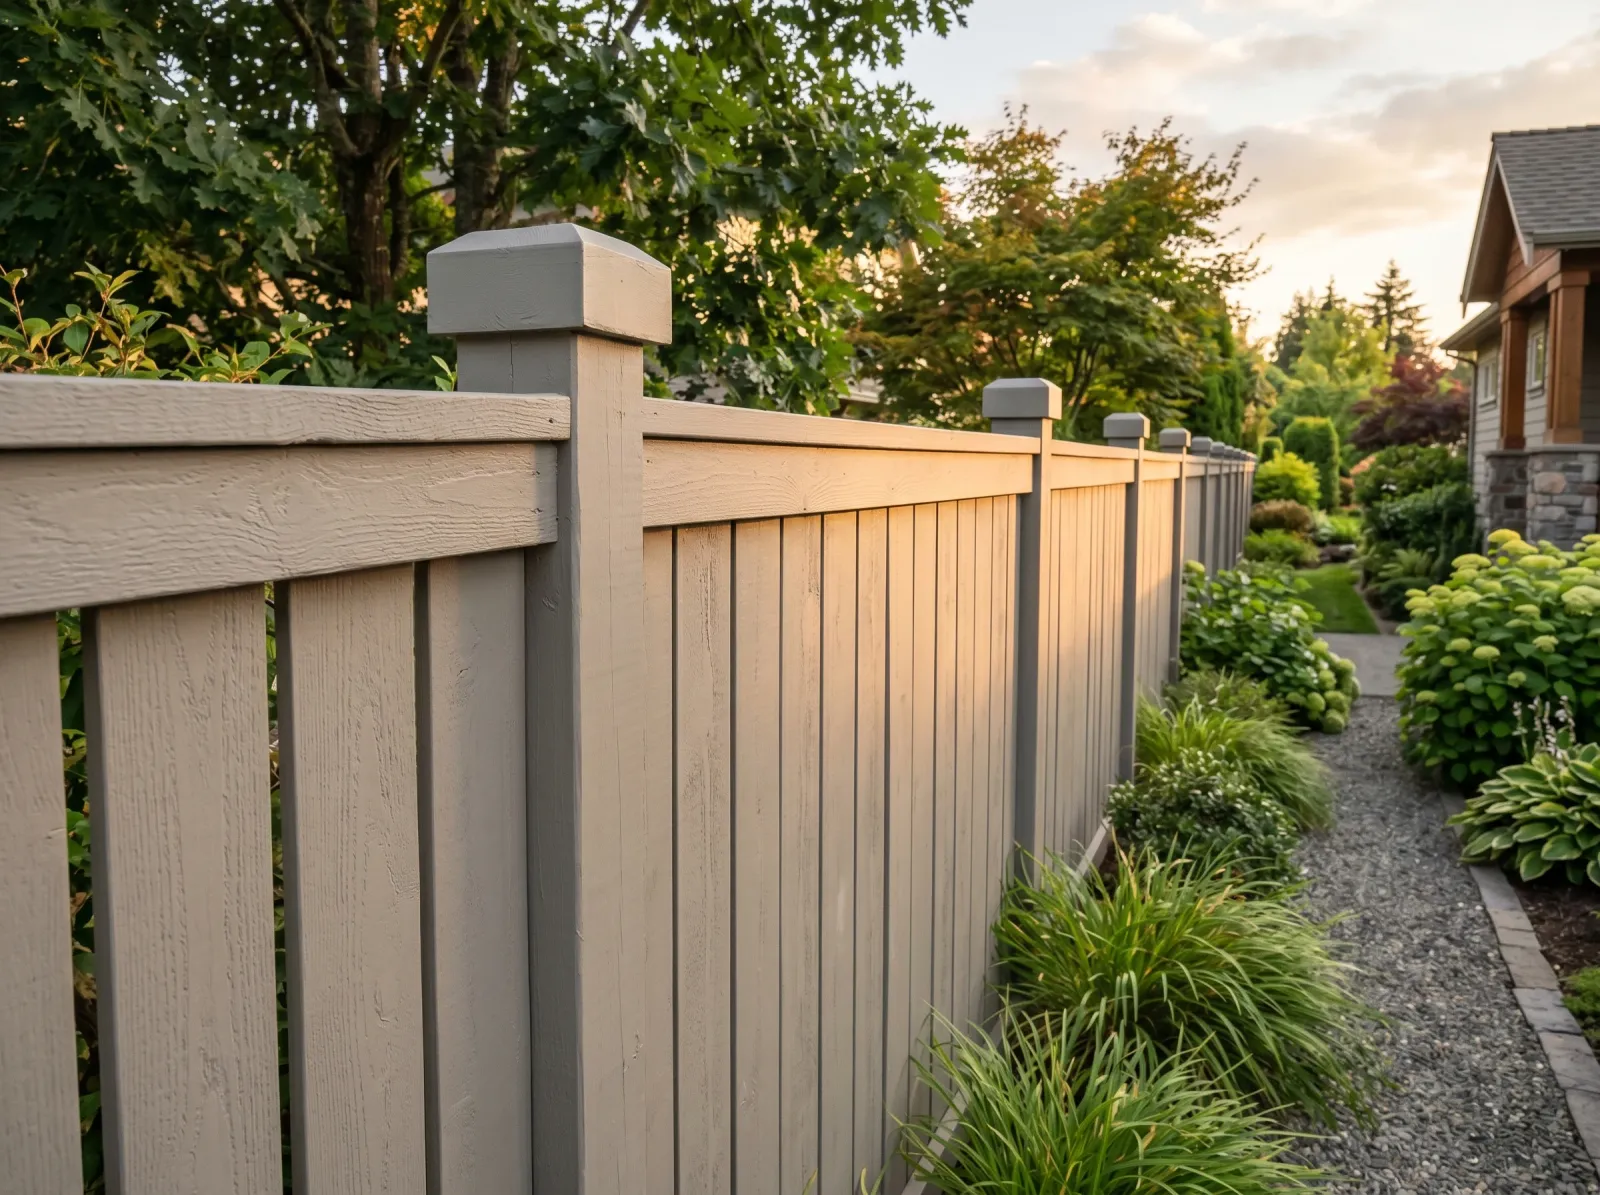 Full color. Post tops and end grain coated thick because that’s where water gets in first.
Wait the recoat time on the can (usually 4 hours for exterior acrylic in good weather) and lay the second coat the same way. Spray, back-brush, keep the wet edge moving.
The second coat is where you build film thickness, and on a fence that mil thickness is your whole defense against weather. Don’t stretch the paint thin to save a gallon. A thin two-coat job fails faster than a fat one.
Finish with the details: post caps, the end grain again, the bottom rail, anywhere end grain or a horizontal surface collects standing water. Those are the spots that fail first, so they get the most paint.
Step 5 — Cure and Reset
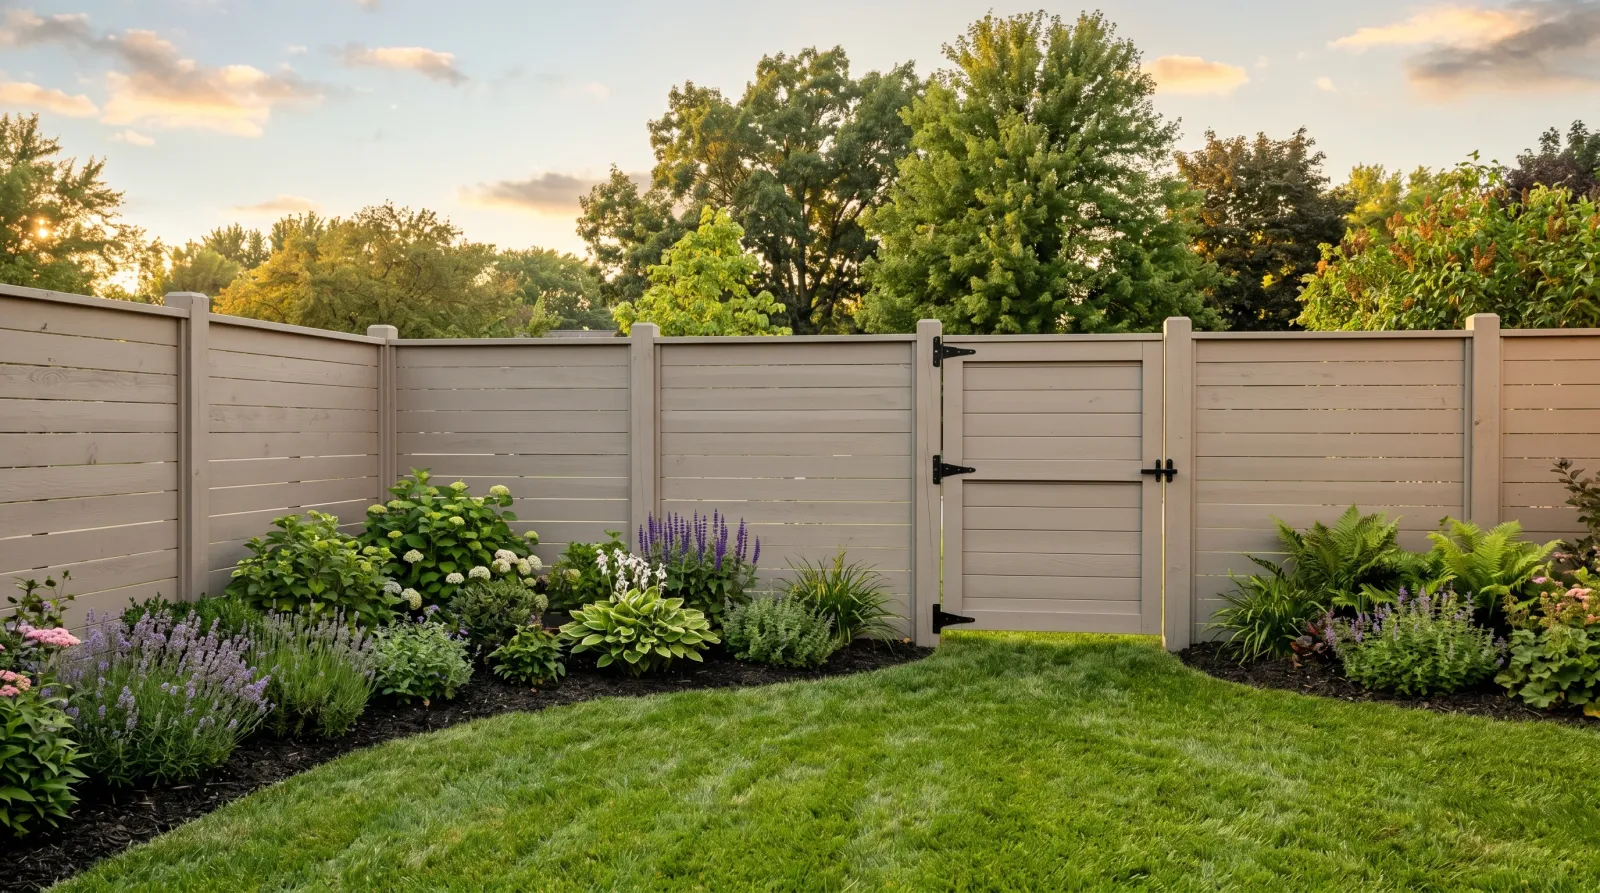 Hardware back on, drop cloths gone. A week before you lean a ladder on it.
Pull the drop cloths and the plastic off the shrubs. Rehang the gate hardware if you took it off. The coat is touch-dry in a few hours but it’s soft for days, so keep the dog and the weed trimmer away from it.
Wash the sprayer and brushes out with warm water until it runs clear. Latex cleans up easy while it’s wet. Let it dry on the tools and you’re buying new ones.
Should You Paint or Stain a Pressure-Treated Fence?
Honest answer from someone who’s redone a lot of fences: stain is usually the better play.
Paint sits on top as a film. The wood swells and shrinks with every rain and dry spell, and eventually that movement cracks the film. Cracked paint peels, peeling paint means scraping, and scraping a whole fence is a miserable weekend. Stain soaks into the wood. It fades instead of peeling, and when it’s time to redo it you just wash and recoat — no scraping.
| Solid/semi-transparent stain | Exterior paint | |
|---|---|---|
| Look | Grain shows (semi) or muted solid color | Full opaque color |
| Lasts | 3-5 yrs, fades gracefully | 5-7 yrs, then peels |
| Redo | Wash and recoat | Scrape, prime, recoat |
| Prep | Lighter, often no primer | Clean, prime, two coats |
| Best when | You want low-maintenance | You’re matching house trim or want bold solid color |
Paint when you want a specific solid color, you’re matching the trim on the house, or the look matters more than the upkeep. Otherwise, stain. For sheen questions either way, the sheen guide breaks down where satin sits.
Common Mistakes
- Painting fresh treated wood. The wood is soaked from the factory. Paint traps the moisture, it pushes back out, and the coat peels by spring. Test under 15 percent before you open a can.
- Skipping the primer. Treated lumber resists adhesion and bleeds tannin. No primer means brown stains weeping through your color within a season and a topcoat that doesn’t grip. Exterior stain-blocker, one coat minimum.
- Spraying without back-brushing. Sprayed paint bridges on top of rough grain and never keys in. Looks great for a year, sheets off the second. Drag a brush through every sprayed section.
- Ignoring the back faces and bottom edges. Water wicks in from behind and below where you didn’t seal. That hidden moisture lifts the paint off the front. Get coating into the gaps and around the back.
- Stretching two coats thin. Film thickness is the protection. A skimpy two-coat job fails years before a proper one. Use the paint the coverage rate calls for.
Cure Schedule
| Time after final coat | What’s safe |
|---|---|
| 4 hours | Touch dry; don’t bump it |
| 24 hours | Light rain is okay; gate can swing |
| 7 days | Lean a ladder, brush against it |
| 30 days | Full cure; scrub and pressure-wash |
Watch the forecast before you start. Rain in the first few hours will ruin a fresh coat. Two dry days on either side of the job is the safe window.
Maintenance and Touch-Ups
A properly primed and painted fence holds 5 to 7 years before it wants a refresh. The south and west faces fade and chalk first because they eat the most sun. Stain runs 3 to 5 years but redoes without scraping.
Once a year, walk the fence. Hit any chip or crack while it’s small: scrape the loose edge, spot-prime bare wood, dab your leftover paint over it. A 10-minute touch-up in year three is what keeps you off a ladder scraping the whole run in year five. If it’s already peeling in patches, the peeling-paint fix walks through scraping back to a sound edge.
Keep a labeled quart of the color in the garage. Fence paint and house trim get mixed up fast.
Cost Breakdown
| Item | $ |
|---|---|
| Exterior paint, 2 gallons satin | $90 |
| Exterior primer, 1 gallon | $30 |
| Wood cleaner | $15 |
| Brushes, pad, drop cloths | $35 |
| Moisture meter (one-time) | $25 |
| Total | $195 |
Numbers are for an average backyard run with mid-tier paint. A short fence with a brush only runs closer to $90. A long run where you rent an airless adds about $40 for the day but saves your shoulder.
What’ll bite you in two years: the bottom 6 inches and the back faces you couldn’t quite reach. That’s where the next failure starts, every time. Reach them now, or meet them again with a scraper.