How to Paint Laundry Cabinets
Painting laundry cabinets the right way: how to degrease the detergent film, prime slick melamine, and pick an enamel that survives a damp room. Every step explained.

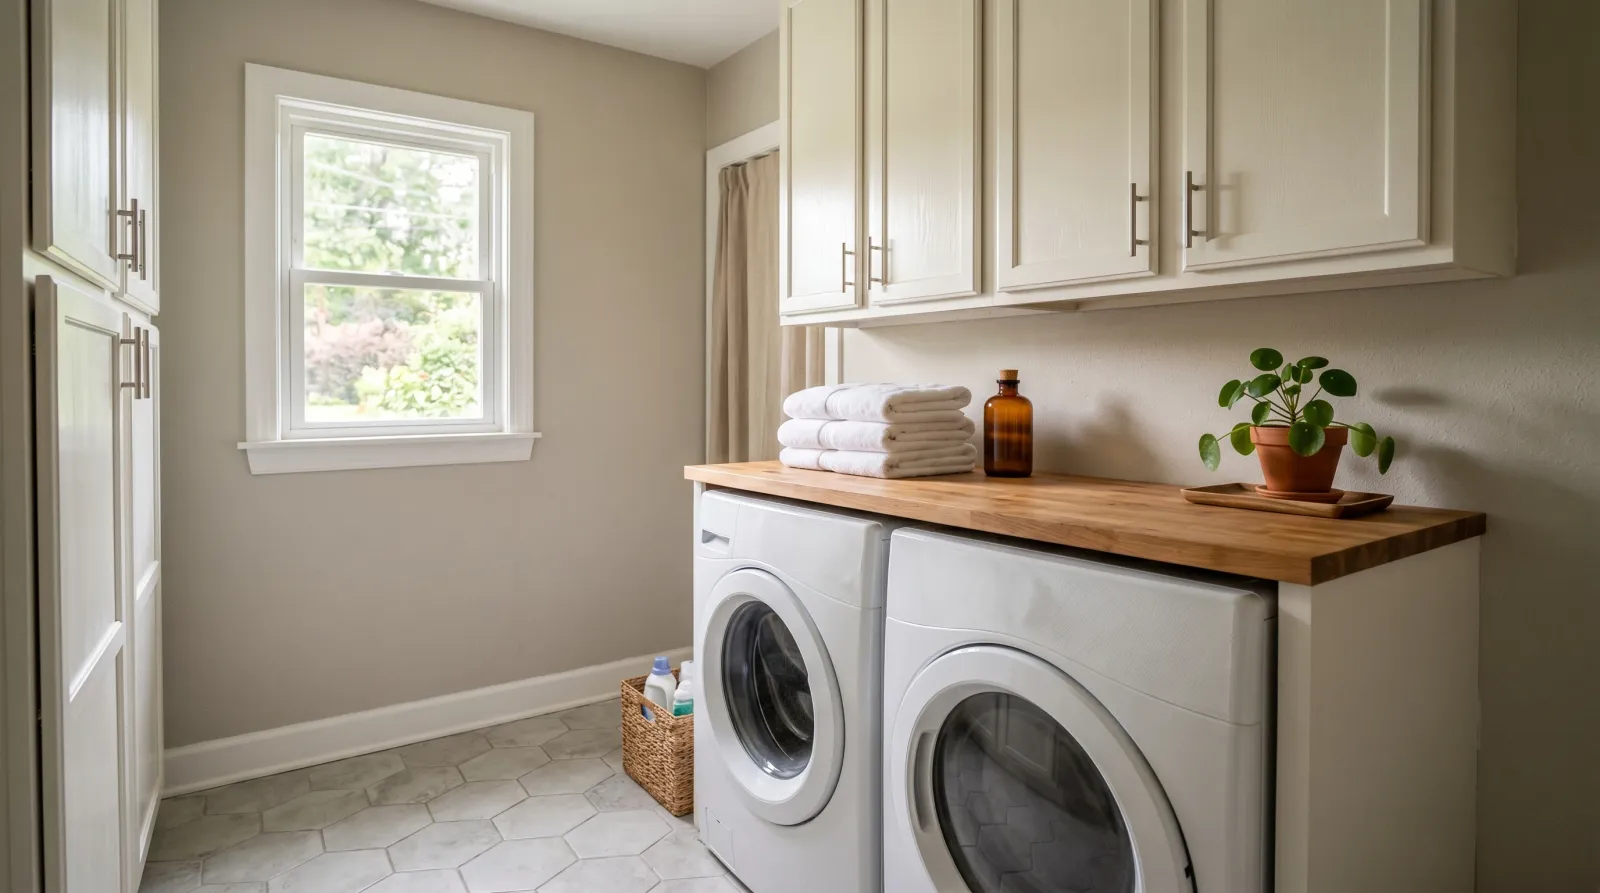
Okay, so the laundry room is the room nobody photographs, which is exactly why those builder-grade cabinets above the washer have looked the same sad beige since the house was built. You want to paint them. Good news first: these are the easiest cabinets in the house to repaint. There aren’t many of them, nobody’s judging the inside, and you can take the doors somewhere with more room.
Here’s the catch nobody mentions. The laundry room is damp, and the cabinets are coated in a fine film of detergent dust and dryer lint you can’t see. Paint that film instead of the cabinet, and your nice new coat peels off in a few months. So the whole job lives and dies on two things: cleaning that film off, and priming the slick surface underneath. Get those right and the painting part is genuinely easy.
What You’ll Get
A laundry room that looks finished instead of forgotten, in one weekend of work plus a week before you load the shelves back up. A quart of enamel and a quart of primer cover most small laundry runs, so the materials land well under what a single new cabinet door would cost.
Honest Take on Difficulty and Time
Medium, mostly because of the prep, not the painting. The degrease-scuff-prime sequence is the part people skip, and it’s the part that decides whether the finish lasts. Plan on a weekend: prep and prime on day one, two coats over day two, then leave it alone for a week.
| Stage | Active time | When it’s safe to use |
|---|---|---|
| Degrease, scuff, label hardware | 1–2 hrs | n/a |
| Prime (one coat) | 1 hr | recoat next day |
| Two coats enamel | 2–3 hrs | rehang at 24 hrs |
| Cure | none | full use at 30 days |
If anyone tells you it’s an afternoon job, they’re not counting the dry time between coats. Cabinet enamel wants long recoat windows. BM Advance asks for 16 hours between coats, and rushing it is how you get a soft, draggy finish that never hardens.
What You’ll Need
Paint and Primer
A quart of cabinet enamel in semi-gloss (a hard, wipeable finish, shinier than satin, the standard for any cabinet). Benjamin Moore Advance, Sherwin-Williams Emerald Urethane, or INSL-X Cabinet Coat. These are waterborne alkyds, which means they brush on like latex but cure hard like old oil paint. That hardness is what survives a detergent jug knocking the door.
And a quart of bonding primer (a primer made to grip slick, non-porous surfaces). INSL-X Stix or Zinsser Bulls Eye 1-2-3 Plus. You almost certainly need it, because most laundry cabinets are melamine, not wood. More on telling them apart in Step 2.
Most laundry cabinets are the same melamine box as a budget kitchen run, so the kitchen cabinet paint round-up covers the exact SKUs and how they compare. If your cabinets turn out to be melamine, the melamine painting guide has the surface-specific prep in more depth than I’ll repeat here.
Tools
A 2.5-inch angled sash brush for the cabinet boxes and the routed door edges, plus a 4-inch foam-mini roller for the flat door faces. The foam roller is what leaves a smooth, almost sprayed-looking surface. A bristle brush alone leaves visible strokes on a big flat panel.
You’ll also want a cordless drill for the hinge and pull screws, a labeled baggie for the hardware, sawhorses or stacked boxes to paint doors flat, painter’s tape, a drop cloth, and a 220-grit sanding sponge. The brush is the one place not to cheap out. The paint brush picks hold an edge for years. A $4 brush sheds bristles into your wet enamel.
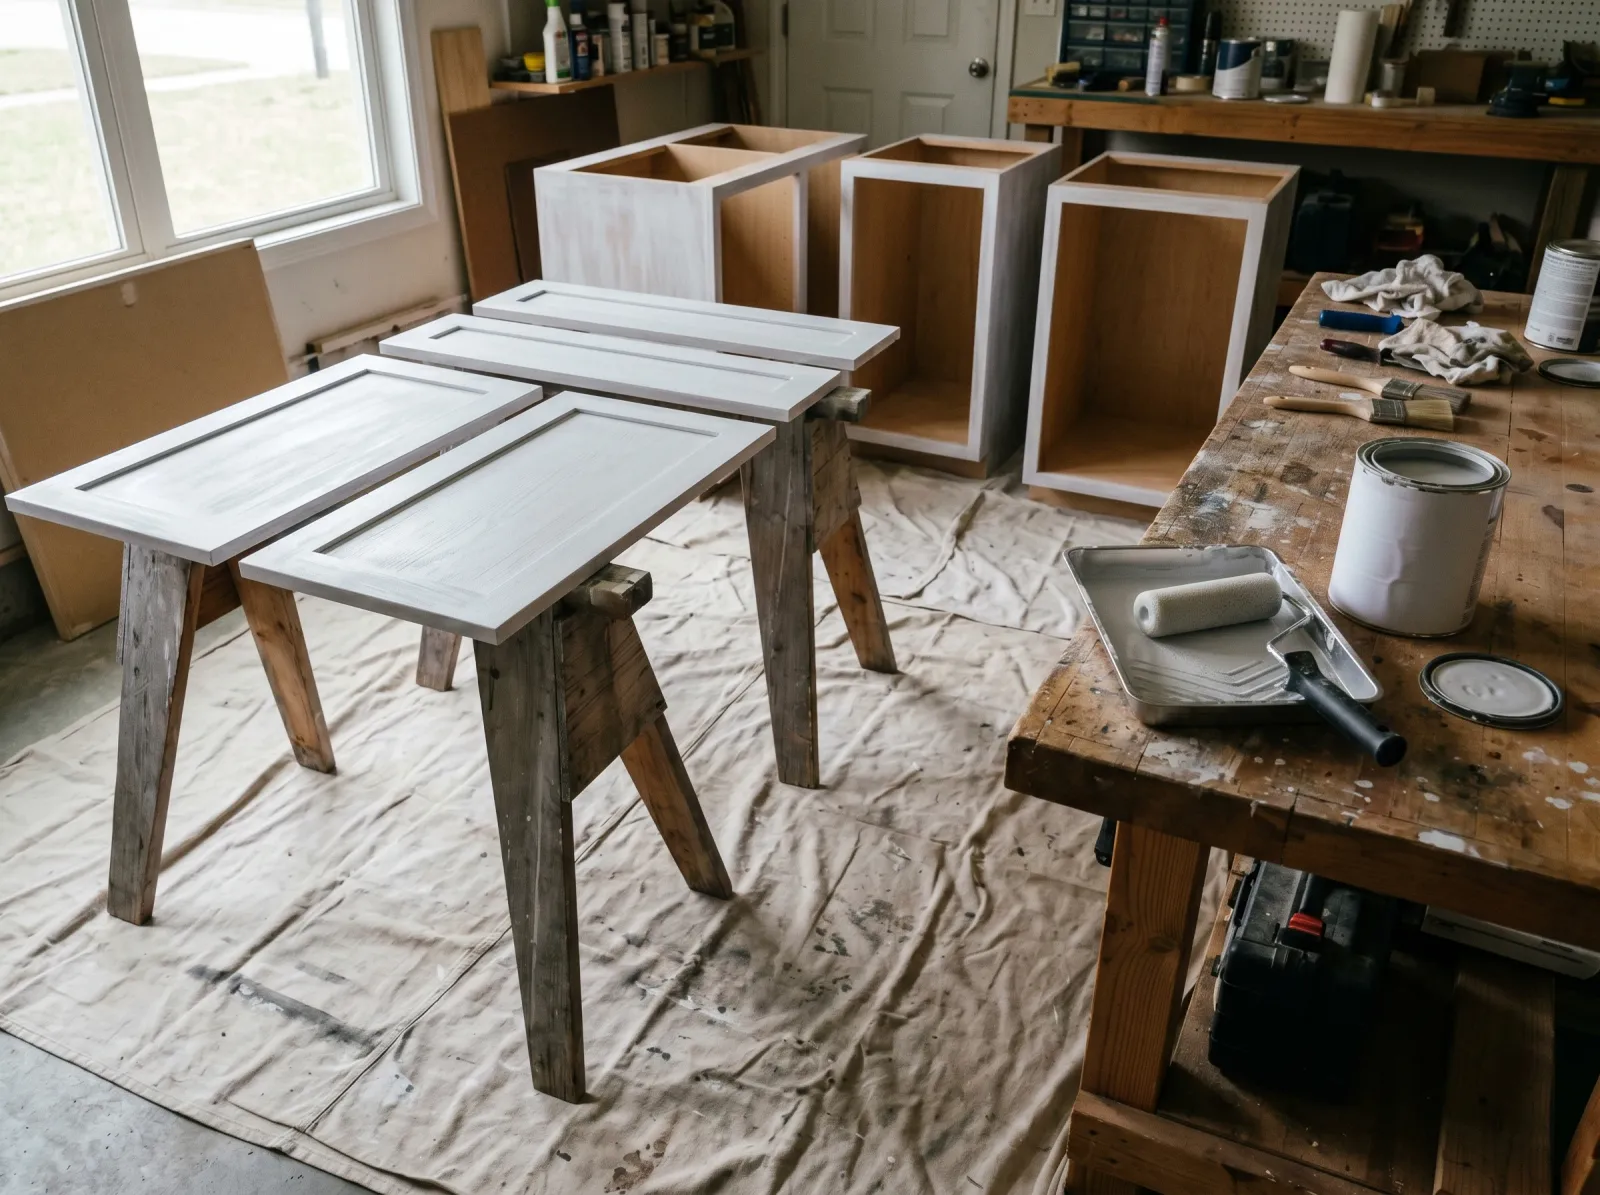
Step 1 — Take the Doors Off and Label the Hardware
Unscrew every door and drawer front, and pull the hinges and knobs. Drop the screws and hinges into a baggie and write which door they came from. Put a strip of painter’s tape inside each cabinet opening and number it, then write the matching number on the back of the door where it won’t show. Laundry cabinets look identical until you try to rehang them, and then they suddenly don’t line up.
You can paint in place if the cabinets are fixed to the wall and there’s no taking them down. But the doors always come off. Painting a door flat is the difference between a self-leveled finish and a row of drips along the bottom rail.
Watch out for hidden screws behind adjustable shelves or inside the box. Empty the cabinets completely before you start, or you’ll be fishing a screwdriver around a stack of detergent pods.
Step 2 — Degrease, Then Figure Out What You’re Painting
This is the step the laundry room punishes you for skipping. Wipe down every surface with a degreaser, Krud Kutter or a TSP substitute. The film here isn’t kitchen grease; it’s powdered detergent dust, fabric-softener residue, and dryer lint, and it’s invisible until paint refuses to stick to it. Wipe, rinse with clean water, let it dry fully.
Now check what the cabinets actually are. Run a fingernail across an inside edge. Real wood catches a little grain. Melamine and laminate feel slick and uniform, like a hard plastic skin over particleboard. Most laundry cabinets, especially anything from the last thirty years, are melamine.
It matters because melamine is the slickest surface in the house to paint, and it’s the reason bonding primer is non-negotiable here. If you’ve got the slick plastic feel, you’re priming with a bonding primer no matter what. If it’s real wood with a sound finish, you’ve got more room, but a coat of primer still helps the enamel grab.
Step 3 — Scuff and Prime
Scuff every surface lightly with the 220-grit sponge. You’re dulling the gloss, not sanding anything off. The primer bonds to a roughed-up surface far better than a shiny one, even the bonding primers that claim they don’t need it. Vacuum the dust, wipe with a tack cloth.
One coat of bonding primer is what makes enamel stick to slick melamine. Skip it and the topcoat peels.
One full coat of bonding primer. Roll the flat door faces with the foam-mini, brush the routed edges and the cabinet boxes with the angled brush. INSL-X Stix needs one coat and dries fast. Let it dry overnight to be safe in a humid room, then knock down any nibs with a light 220 pass and tack it clean.
Watch out for rushing the primer in a damp laundry room. Humidity slows drying. If the primer still feels even slightly tacky, give it another few hours before the first color coat.
Step 4 — Paint Two Coats of Enamel
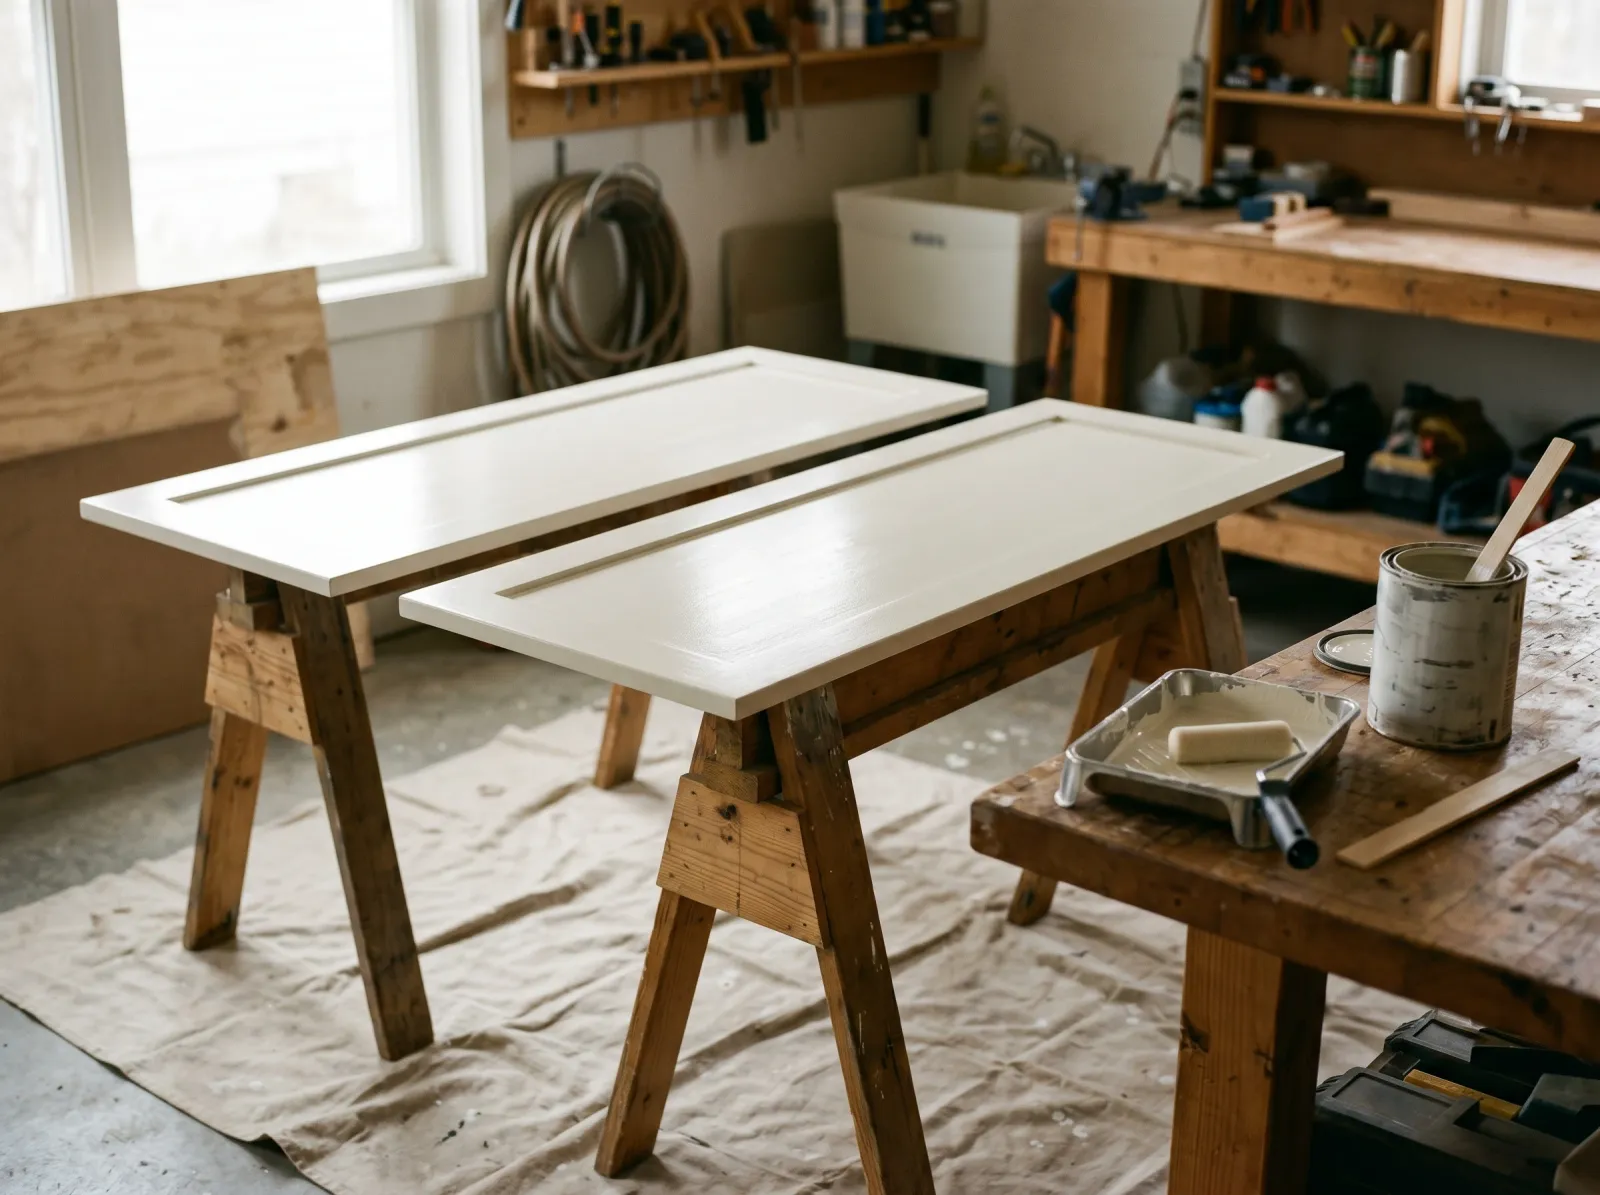
Doors painted flat self-level into a smooth finish. The boxes get brushed and rolled in place.
Stir the enamel, don’t shake it (shaking whips in air bubbles that dry as tiny craters). Stir in Floetrol at about 5%, roughly 1 ounce per quart, which extends the wet edge and lets the brush marks flow out flat. Roll the flat faces with the foam-mini, then lightly tip off with the brush in one direction. Brush the boxes and edges.
Two thin coats, always. One thick coat sags, dries unevenly, and never cures as hard as two thin ones. Paint the doors flat on the sawhorses, faces up, and leave them there to level. Do the cabinet boxes in place. Let the first coat dry the full time on the can (BM Advance wants 16 hours; read your label), scuff lightly, then the second coat.
Watch out for the over-loaded brush on a horizontal door. A drip that dries on a flat face becomes a hard bump you can’t sand out without going back to primer. Dip the brush a third of the way, tap once inside the can.
Step 5 — Cure, Then Reinstall
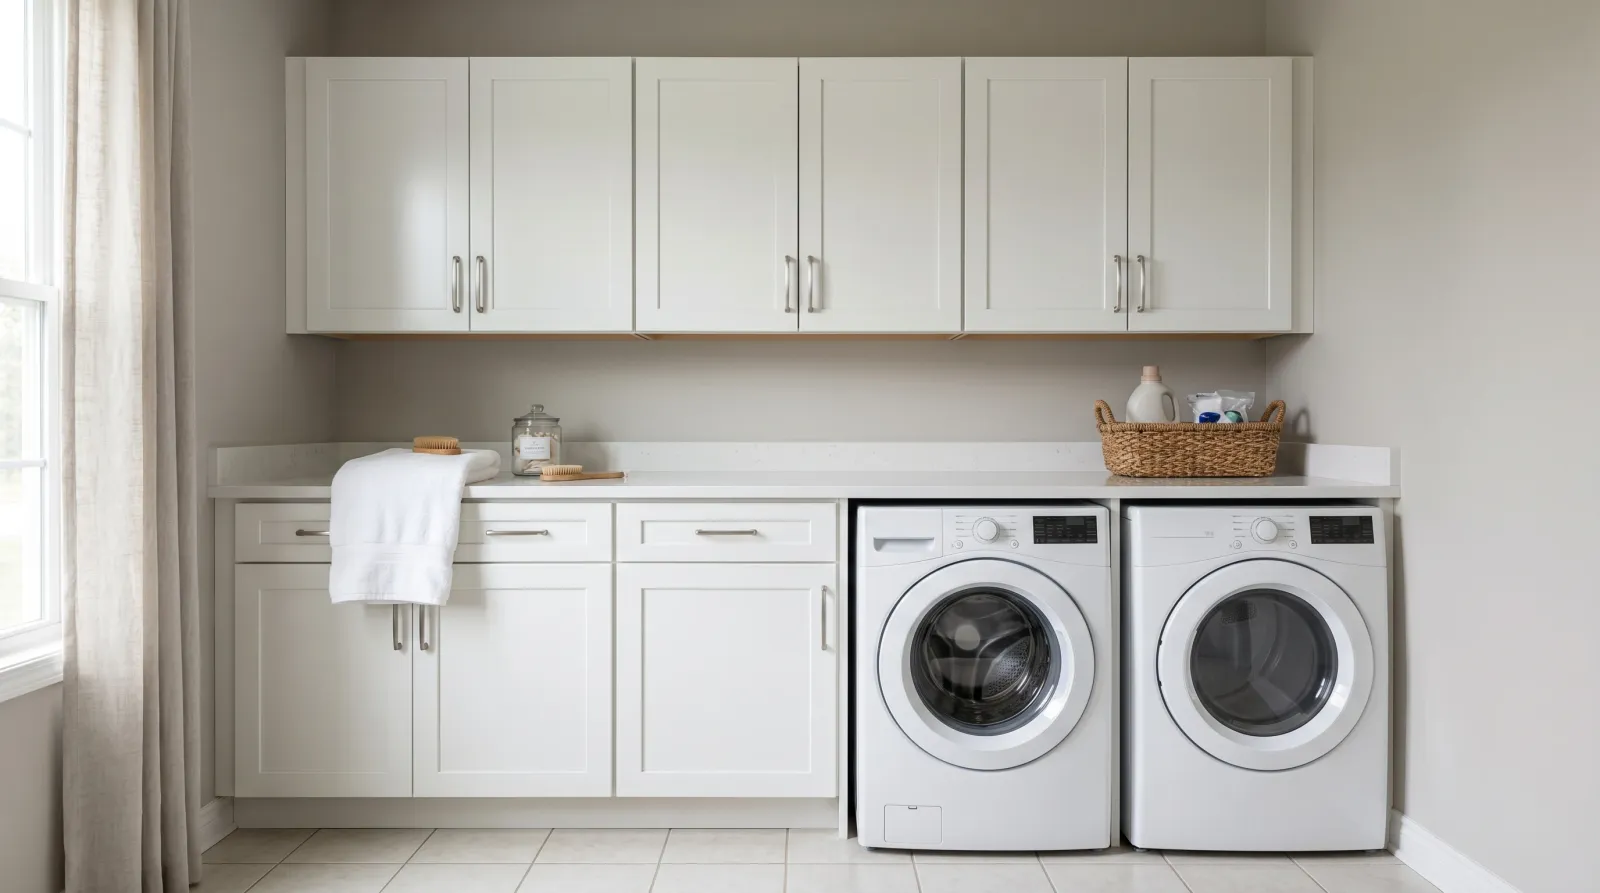
Hardware goes back on last, and the doors rehang on their numbered openings.
Here’s where patience pays off. Cabinet enamel is touch-dry in hours but soft for days. Let the doors sit a full 24 hours before you rehang them, longer if the room’s humid. Reinstall the hinges first, then the pulls, then hang the doors on their numbered openings.
Don’t load the shelves back up for a week, and treat the finish gently for the first month. Enamel keeps hardening the whole time. A detergent bottle sliding across a shelf in week one leaves a scratch that the same bottle wouldn’t make at day thirty.
Common Mistakes
- Painting over the detergent film. The number-one reason laundry cabinet paint peels. Degrease and rinse first. Paint bonds to the cabinet, not to a layer of invisible powder.
- Skipping bonding primer on melamine. The slick factory surface gives latex and enamel nothing to grip. Your topcoat lifts off in sheets within months. INSL-X Stix or Zinsser 1-2-3 Plus is the only thing that grabs it.
- Using wall paint instead of cabinet enamel. Flat and eggshell wall paint scuffs and absorbs the room’s humidity. Cabinets need a hard semi-gloss enamel that wipes clean.
- Recoating before the first coat is dry. The brush drags, the under-coat lifts, and you get wrinkles. Cabinet enamel has a long recoat window for a reason. Set a timer for the number on the can.
- Rehanging doors too soon. Soft uncured enamel sticks to the hinge side and to anything it touches. Give it 24 hours minimum before the doors go back up.
Cure Schedule
| Time after final coat | What’s safe |
|---|---|
| 4 hours | Touch dry; don’t touch |
| 24 hours | Rehang doors gently; reinstall hardware |
| 7 days | Load shelves; light daily use |
| 30 days | Full cure; wipe down with mild soap |
Maintenance and Touch-Ups
Cabinet enamel on laundry cabinets holds up 8 to 12 years before it needs a refresh, sometimes less right next to a dryer that runs daily, since the heat and lint work on the finish. Wipe scuffs with a damp microfiber cloth first; most marks are detergent residue, not paint damage.
For a real chip, dab a little leftover enamel on with a small artist’s brush. Don’t feather it across the whole door, or the touch-up reads slightly brighter than the cured paint and you’ll see the seam. Keep the leftover quart labeled with the room name.
Cost Breakdown
| Item | $ |
|---|---|
| Cabinet enamel, 1 quart | $25–$45 |
| Bonding primer, 1 quart | $15–$20 |
| Brush + foam-mini roller | $25 |
| Degreaser, tack cloth, Floetrol | $15 |
| Tape, drop cloth, sponge | $20 |
| Total | $60–$140 |
Compared to a cabinet refacing quote, this is the cheapest upgrade a laundry room gets.
A Specific Recommendation
Melamine laundry cabinets, first time: degrease with Krud Kutter, scuff with 220, prime with INSL-X Stix, then two coats of Benjamin Moore Advance in semi-gloss. Doors off, painted flat, Floetrol stirred in. Prep and prime Saturday, two coats Sunday, rehang the following weekend. The whole room reads new for the price of two quarts.