What Is Feathering an Edge?
Feathering tapers a paint stroke to zero film thickness so a touch-up blends into the existing wall. Here's the technique, the tools, and why it works.

Most people notice it without naming it. You patch a nail hole, dab the same can of paint over it, step back the next morning, and the spot is still visible. A faint disc where the wet brush sat. The color matches. The sheen looks right up close. Step back six feet and the patch reads as a halo, slightly shinier or duller than everything around it. That halo is film thickness, not color.
Feathering an edge means tapering the wet film from its full thickness (4-6 mils for a normal latex coat) down to zero across an inch or two of overlap with the dry surrounding paint. Do it right and the touch-up has no edge for raking light to catch. Square edges and a fully loaded brush, and you’ve painted a slightly raised rectangle on the wall.
The Reason for That Halo
A cured paint film is 1-2 mils thick per coat. Two coats is 2-4 mils dry. When you touch up with a brush, you’re adding another 1-2 mils on top of that, sitting on the existing film as a small plateau. Light hits the plateau at a slightly different angle than the wall around it. The eye reads the change in reflection as a patch, even when the pigment is identical to the can the original came from.
The other reason for that is film formation. A fresh latex coat dries to a slightly different sheen than the same paint cured for six months. The original wall has had time for the binder to cross-link and for the surfactants to migrate. The fresh patch hasn’t. You’re comparing a young film to an old one, side by side, with a hard edge between them.
Feathering attacks both problems. Tapering the thickness to zero kills the plateau. Spreading the new paint across a wider overlap moves the optical transition from a hard line to a gradient your eye can’t resolve.
When to Feather
Use it for:
- Touching up nail holes, screw holes, or anchor patches after the spackle is sanded flush.
- Blending a drywall repair (a patched gouge, a sanded popped seam) into the surrounding wall.
- Touching up scuffs, scrapes, and small chips on interior walls in the same color.
- Spot-priming a stain block before the topcoat. Same logic, primer also needs a tapered edge.
- Any small repair where repainting the whole wall isn’t worth the time.
The technique earns its keep on small patches inside a larger painted field. Below a 12-inch area, feathering will hide the touch-up. Above that, the halo gets too wide to disappear and you’re better off rolling the whole wall corner to corner.
When Not to Feather
- High-sheen finishes. Semi-gloss trim and high-gloss enamel break at every brushed edge no matter how well you taper. Sand the existing piece and recoat it whole.
- Dark or saturated colors. Pigment density amplifies any change in film thickness, so even a perfect taper reads. Repaint corner to corner.
- Faded, chalked, or sun-bleached paint. The cured color has drifted from the can; no taper hides a color mismatch.
- Different brand, different batch, or paint older than 18 months. Color drifts between batches and on the shelf. Test on a hidden spot first.
- Textured walls (knockdown, orange peel, popcorn). The texture itself catches light at every peak. You need texture matching, not just feathering.
How Feathering Compares to Other Touch-Up Approaches
| Feathering | Square edge touch-up | Repaint corner to corner | |
|---|---|---|---|
| Hides small patches | yes | no | yes |
| Time required | 5-10 min | 2 min | 2-4 hours |
| Works on high gloss | weak | weak | yes |
| Risk of visible halo | low | high | none |
| Paint used | tablespoon | tablespoon | quart-plus |
For a deep look at why patches read as shinier or duller spots, see the flashing explainer. For the underlying drywall fix that usually triggers a feathered touch-up, see patching a hole in drywall.
How to Actually Feather
The chemistry says taper the film to zero. The technique is how you get the brush to do that.
Step 1 — Sand and prime the repair first. A patched area is more porous than the surrounding wall. Without primer, it pulls water out of the topcoat at a different rate, and you get flashing on top of whatever halo the touch-up leaves. Spot-prime with a quick-dry latex primer like Zinsser Bulls Eye 1-2-3. Let it dry an hour.
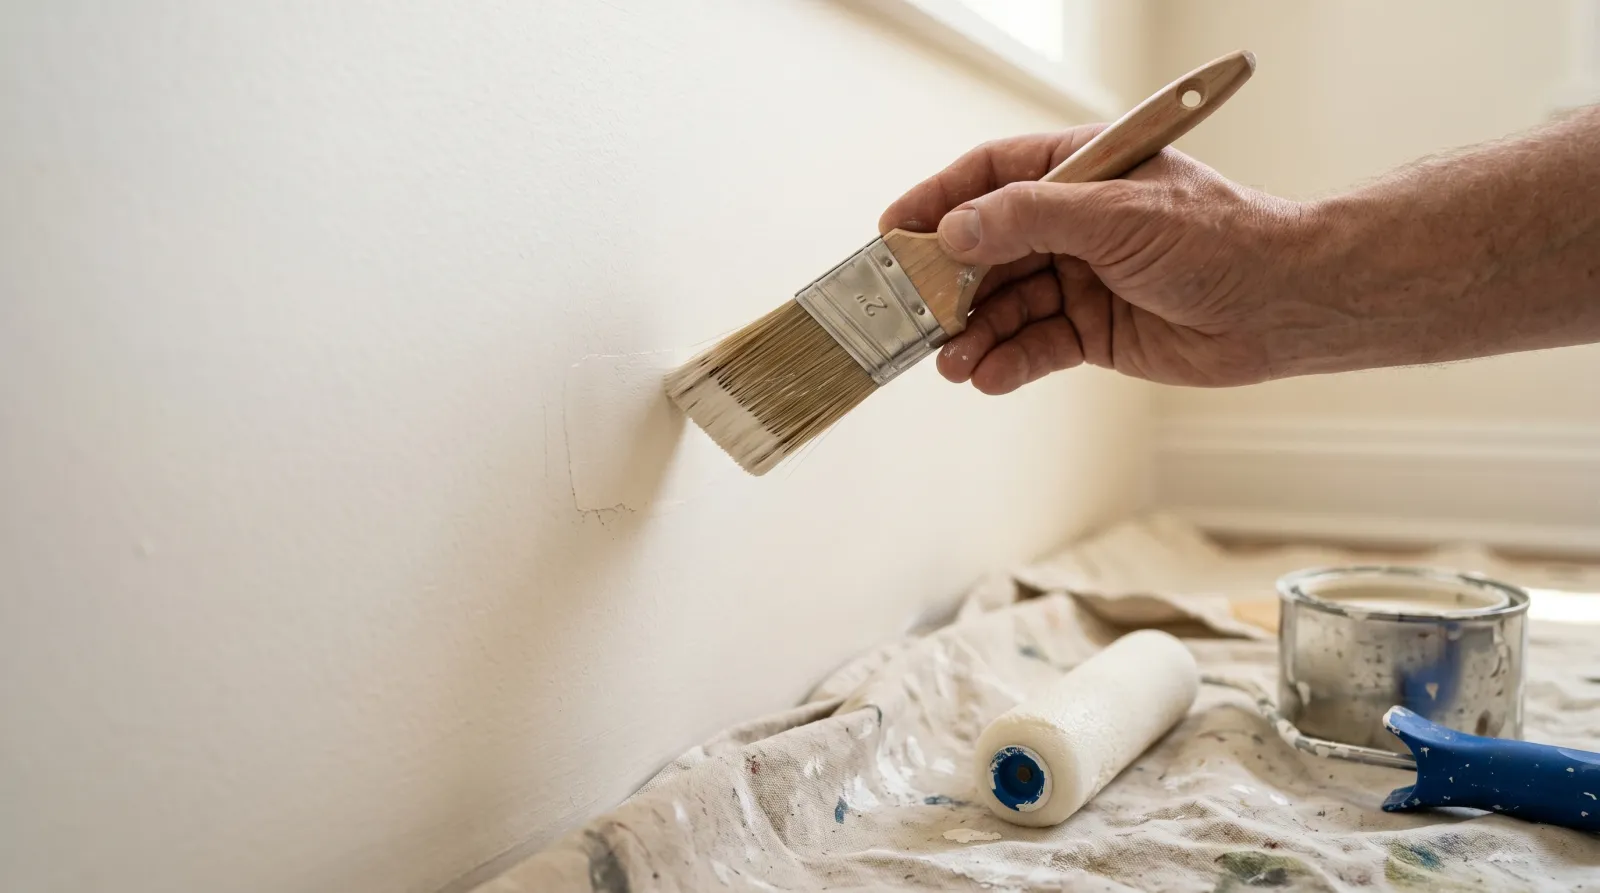
Step 2 — Load the brush, then off-load it. A 2-inch angled sash brush. Dip the tip half an inch into the paint, then drag both sides across the rim of the can until the brush is noticeably underloaded. You want about a quarter of what a normal cut-in brush would carry. A loaded brush deposits a full-thickness film. A near-dry brush deposits a tapering one.
Step 3 — Lay the paint on the repair, not past it. Cover the actual patched area with normal pressure, working outward toward (but not into) the dry surrounding paint.
Step 4 — Feather out with a dragging stroke. Lift the brush so only the bristle tips touch the wall, and drag outward into the surrounding dry paint for an inch or two beyond the patch. The bristles fan out and deposit less paint as you go. The end of the stroke should leave almost nothing.
Step 5 — Repeat from the opposite side. Same drag from the other direction so the patch is feathered on all sides. Two crossing strokes blend better than one.
For a 6- to 12-inch patch, swap the brush for a 4-inch mini foam roller. Same logic: load it, roll it out on a scrap until it’s nearly dry, then run the empty end into the dry paint with light pressure.
Common Mistakes
- Brush loaded too heavy. The single most common reason touch-ups flash. A wet brush deposits full-thickness paint right up to the edge of the stroke. Off-load until it feels almost dry before you touch the wall.
- Stopping the stroke at a hard edge. Lifting straight up at the end of a pass leaves a square edge at full thickness. Feather means the stroke trails off, not stops. Keep moving and lift gradually.
- Skipping the primer on bare patched compound. Joint compound and spackle are porous. The topcoat sinks in faster on the patch than on the surrounding sealed paint, and you get a duller spot even after a perfect feather. The fix isn’t a better brush. It’s spot-primer first.
- Touching up with paint from the wrong can. Last year’s quart and this year’s gallon, same color code, look identical wet. Cured side by side, the older paint reads warmer. If the wall is more than a year old, mix a small batch from a new gallon and test on a hidden corner before you commit.
Where to Buy the Right Tool
A 2-inch Purdy XL Glide or Wooster Silver Tip angled sash brush for small touch-ups, and a 4-inch foam mini roller for anything larger than a fist. Both available at any paint store for under $20 combined. For the wall paint itself, color match matters more than brand. See the best wall paint round-up for repaint-worthy options and the patching drywall guide for what to do before the brush comes out.
Related
One last thing the chemistry won’t tell you: feathering is the difference between a touch-up that lives on the wall forever and one you stare at every time you walk past. Off-load the brush. Drag it out. Let the stroke die into the old paint, don’t stop it.