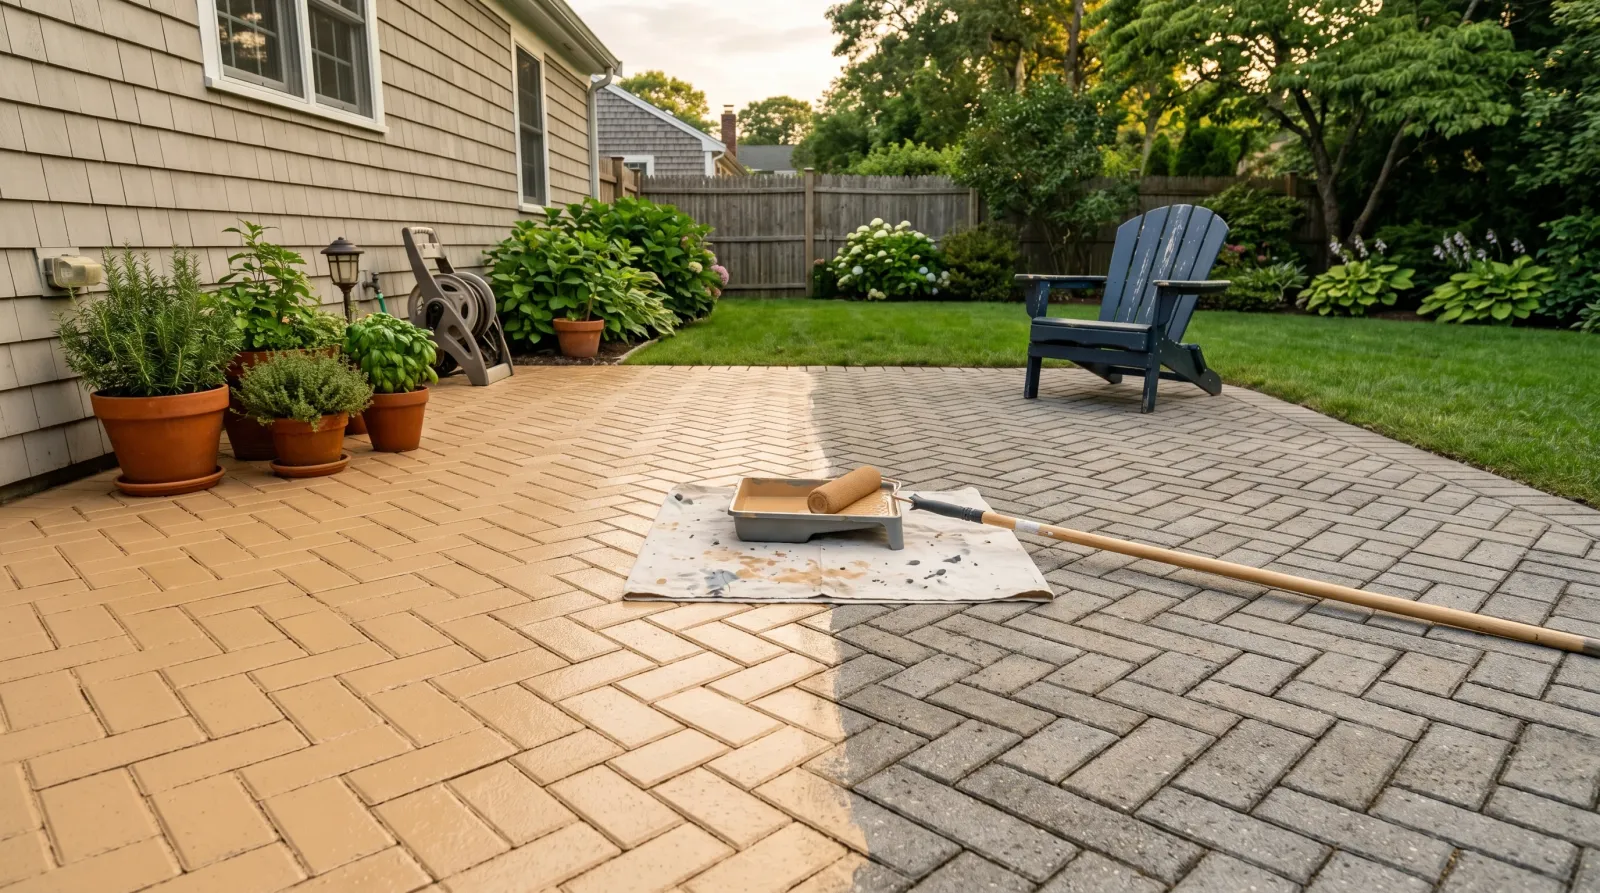
How to Paint Concrete Pavers
Painting concrete pavers the right way — power wash, strip the old sealer, masonry primer, then a UV-stable concrete floor coating. What actually holds up outdoors, and what peels by spring.

Painting pavers looks like painting a patio. It isn’t. A patio is one slab with one prep job. A paver field is eighty or a hundred small slabs sitting on a sand bed, every one of them ringed with a joint that moves, drains, and sheds your coating if you handle it wrong. The shortcut nobody tells you about: most existing paver fields already have a sealer on them, and that sealer fights your new paint to the death. Strip it first, or don’t bother starting.
TL;DR
- First job: strip any existing sealer. If you skip this, the coating peels in sheets.
- Prep: pressure-wash, degrease, re-sand the joints, etch or scuff.
- Primer: masonry bonding primer (Behr Concrete & Masonry or Loxon by SW).
- Paint: Behr Premium Concrete & Garage Floor Paint or Rust-Oleum EpoxyShield Patio. Both UV-rated.
- Topcoat: UV-resistant clear urethane on anything in full sun.
- Cure: 24 hours to walk on, 7 days for furniture, 14 before a hose-down.
What Concrete Pavers Actually Are
Concrete pavers are pre-cast units of dense, vibrated concrete, usually 2 to 2 3/8 inches thick, set onto a compacted base of crushed stone and a 1-inch leveling layer of bedding sand. The joints between pavers are filled with sand — plain or polymeric — and that joint is what lets the field flex with frost heave instead of cracking through the units. They’re tougher than a poured slab in some ways (no slab cracks) and weaker in others (eighty separate edges where water and weeds get in).
That joint detail is the whole reason painting pavers is harder than painting a patio. Every joint is a place where the coating breaks, where the joint sand can wash out from under the paint, and where movement opens a hairline crack in the film. Plan for it.
Why Pavers Are Trickier than a Concrete Slab
Two issues come up on every paver job that don’t come up on a slab.
The existing sealer. Almost every paver patio over five years old has a wet-look acrylic sealer on it. Those sealers were sold as no-maintenance enhancers and they were sprayed on by the installer or the previous owner. They form a film. New paint won’t stick to that film. You either strip the sealer chemically, or you accept that your coating will fail by the first winter. There’s no third option, no matter what the can label promises about “bonds to most surfaces.”
The joints. Painting the joint sand together with the pavers feels efficient. It isn’t. Sand is loose; paint bridges across it; the bridge cracks; the sand washes out the next time it rains hard. Either commit to polymeric sand (the kind that activates with water and locks up) before you paint, or sweep in fresh joint sand after the paint cures and topcoat over the whole thing. Mid-Atlantic and Midwest patios with freeze-thaw cycles need the polymeric. Southern installs with no freezing can get away with the sweep-and-topcoat method.
A third smaller issue: pavers crown slightly at each unit and dip at the joint, which means a roller skims the high spots and starves the low ones. Two coats, minimum, with the second coat back-rolled across the joints to drive paint into the dips.
Step 1 — Pressure-Wash and Strip
Power-wash first to find out what you’re dealing with. 3,000 PSI, 25-degree tip, held 12 inches off the surface. Walk it in overlapping passes. Pay attention to the joints — they collect crud nobody can see, and the wash often lifts loose joint sand you’ll need to replace anyway.
After the wash, look at the wet surface. If it beads water or shows a sheen, there’s still sealer on top. That sealer comes off with a chemical stripper, not more pressure. Behr Concrete Sealer Stripper and Defy Paver and Concrete Stripper both work. Spray on with a pump-up sprayer, wait 20 minutes, scrub with a stiff brush, pressure-wash off. Repeat the wet-surface test. Bare concrete absorbs water in a dark wet patch within five seconds. If it’s still beading, strip again.
Wear chemical goggles, a respirator with organic-vapor cartridges, and rubber boots. The strippers are methylene-chloride-free now but they’re still aggressive. Rinse twice when you’re done. Leftover stripper kills your primer.
Step 2 — Degrease and Etch
Degrease with Krud Kutter or a TSP substitute. Apply wet, scrub in with a push broom, rinse. Grease ghosts hide near the grill and around outdoor seating. Hit those spots twice.
Etching is judgment-call territory on pavers. Factory pavers come with a slight texture from the mold; a power-trowel-smooth top is rare. If your fingernail catches the surface when you drag it across a dry paver, the profile is workable. If it glides, you need to etch. Muriatic acid diluted 4:1 with water or pre-packaged etching crystals, applied with a pump-up sprayer, scrubbed until the foaming dies (about 10 minutes), rinsed twice. Run a litmus strip — surface should read 6–7 before you prime.
Step 3 — Re-Sand the Joints
Skip this step and the coating cracks at every joint by the second freeze.
Sweep polymeric sand into the joints with a soft broom, fill flush to about 1/8 inch below the paver top, mist with a fine spray until the surface is saturated, let cure 24 hours. Polymeric sand activates with water and locks the joints into a flexible filler that moves with the pavers without washing out. Quikrete PowerLoc and Sakrete Paver Set are the widely stocked options at home centers, $25–35 per 50-pound bag, enough for about 150 square feet of standard paver joint.
Old joint sand is fine to leave if it’s still dense and packed below the paver top. It’s the empty or half-empty joint that fails. Walk the field on hands and knees, fill the gaps, mist the polymeric, then leave it for the day.
Step 4 — Masonry Bonding Primer
A masonry-rated bonding primer is non-negotiable on bare paver concrete. The dense, low-porosity surface of a factory paver doesn’t drink primer the way a poured slab does, and a generic interior bonding primer won’t grip.
Behr Concrete & Masonry Bonding Primer. Widely stocked at Home Depot, water-based, $35/gal, covers 200–300 square feet per coat on pavers. The default if you’re staying in the Behr system. Pairs cleanly with their concrete and garage floor topcoat.
Loxon Conditioner by Sherwin-Williams. The pro option, $55–70/gal at SW pro stores. Handles residual surface alkalinity better than the Behr if your pavers were power-washed recently and haven’t fully dried.
One coat, full coverage, roll in two directions and feather the edge across joints to keep the film thickness consistent. Holiday spots — places where the coating skipped — will telegraph through the topcoat, so a flashlight at a shallow angle finds them. Cure 4 hours at 70°F before the color coat.
Step 5 — Paint, Two Coats
The paint chemistry that actually works on pavers is an acrylic-urethane concrete and garage floor coating. Behr Premium Concrete & Garage Floor Paint is the default; Rust-Oleum EpoxyShield Patio is the upgrade where UV exposure is brutal. The deeper SKU breakdown lives in the masonry paint round-up — this guide is about how to apply, not which can to buy.
Cut in the perimeter and around any planter beds, raised bedding edges, or steps with a 2.5-inch angled sash brush. Roll the field with a 1/2-inch nap microfiber on a 9-inch frame and an extension pole long enough to keep you off your knees. Back-roll the second coat across the joint direction to push paint into the dips.
Anti-slip additive goes into the second-to-last coat. Broadcast glass beads or aluminum-oxide grit into the wet film, then roll the topcoat over it. Pool surrounds, shaded walkways with morning dew, anything sloped — all get the additive without exception.
Two coats. Always two coats. Pavers eat the first coat at every joint dip; the second coat is what you actually see.
Step 6 — UV Clear Topcoat
The UV story is what separates pavers that look good in year four from pavers that look chalky in year two.
Direct sun breaks down most one-part acrylic-urethane floor coatings inside 18 months. The pigment chalks, the gloss dies, and the color reads dusty even when the film is structurally fine. A UV-resistant clear urethane sealer on top extends service life by 2–3 years and keeps the color true. Rust-Oleum Concrete Saver clear is $40/gal at most home centers, one coat with a microfiber roller, applied after the color coat has cured 48–72 hours. Re-seal every two years on a sunny patio; it’s a one-hour Saturday job that pays off in years of finish life.
Covered patio, deep shade, or a north-facing courtyard? The topcoat is optional. Open sun? Put it on.
Cure — Real Numbers
- Touch-dry: 4–6 hours at 70°F.
- Foot traffic, soft soles: 24 hours.
- Furniture back on the field: 7 days. Chair feet bite a green coating and leave dents.
- Hose-down or rain exposure: 14 days.
- Grill back on the patio: 14 days, on a heat mat for the first month.
Slab temperature drives all of this, not air. A paver in late September is cold overnight even when daytime air is 70°F. Use a surface thermometer; below 50°F the coating doesn’t crosslink. Above 85°F your wet edge is gone before you finish the cut-in.
Common Mistakes
- Painting over the old sealer. The single biggest reason paver paint fails inside a year. Strip first, every time.
- Skipping the joint sand refresh. The coating cracks at every joint by the second freeze.
- Using deck stain or porch enamel. Both flex with wood, not with concrete. They lift at the joints within a season.
- One coat to save time. Pavers absorb the first coat unevenly at every dip. The second coat is the one you see.
- No UV topcoat in full sun. Chalking and fading by month 18, guaranteed.
- Charcoal in full sun. Same heat math as a slab. Dark coatings on a paver field run 30–50°F hotter than light ones at 2 PM in July.
Maintenance and Longevity
A paver coating done right lasts 4–6 years before a full recoat, with a UV-topcoat re-seal every 2 years. Done wrong — no strip, no joint sand, no UV topcoat — it fails in one season and looks worse than weathered bare pavers on the way out.
Sweep monthly. Pressure-wash at low PSI once in spring after pollen drops. Spot-treat grease near the grill with a degreaser, not bleach; bleach softens the coating. Walk the joints every fall and look for any gaps where the polymeric sand has shifted; re-sweep and mist as needed. Touch up chips at chair-leg corners before the bare patch grows.
Save the can, the color match, and the topcoat brand. The year-5 recoat is a one-day refresh if you’ve got the product info. Without it, you’re guessing. And the guess is what’ll bite you in two years — a stripper job, a re-prime, and a Saturday you wanted back.