How to Fix Paint Bleeding Under Painter's Tape
Paint bleeding under tape leaves a fuzzy ragged trim line. Here is why it happens and how to fix the bleed, touch up the edge, and tape the next wall so it stays crisp.

Paint doesn’t bleed because the tape is bad. It bleeds because there was a gap under the tape and the paint found it. Seal the gap and the line stays sharp. Skip that step and it doesn’t matter what’s printed on the roll.
Does This Match What You’re Seeing?
Pull the tape and look at the line under good light. You’ll see one of these.
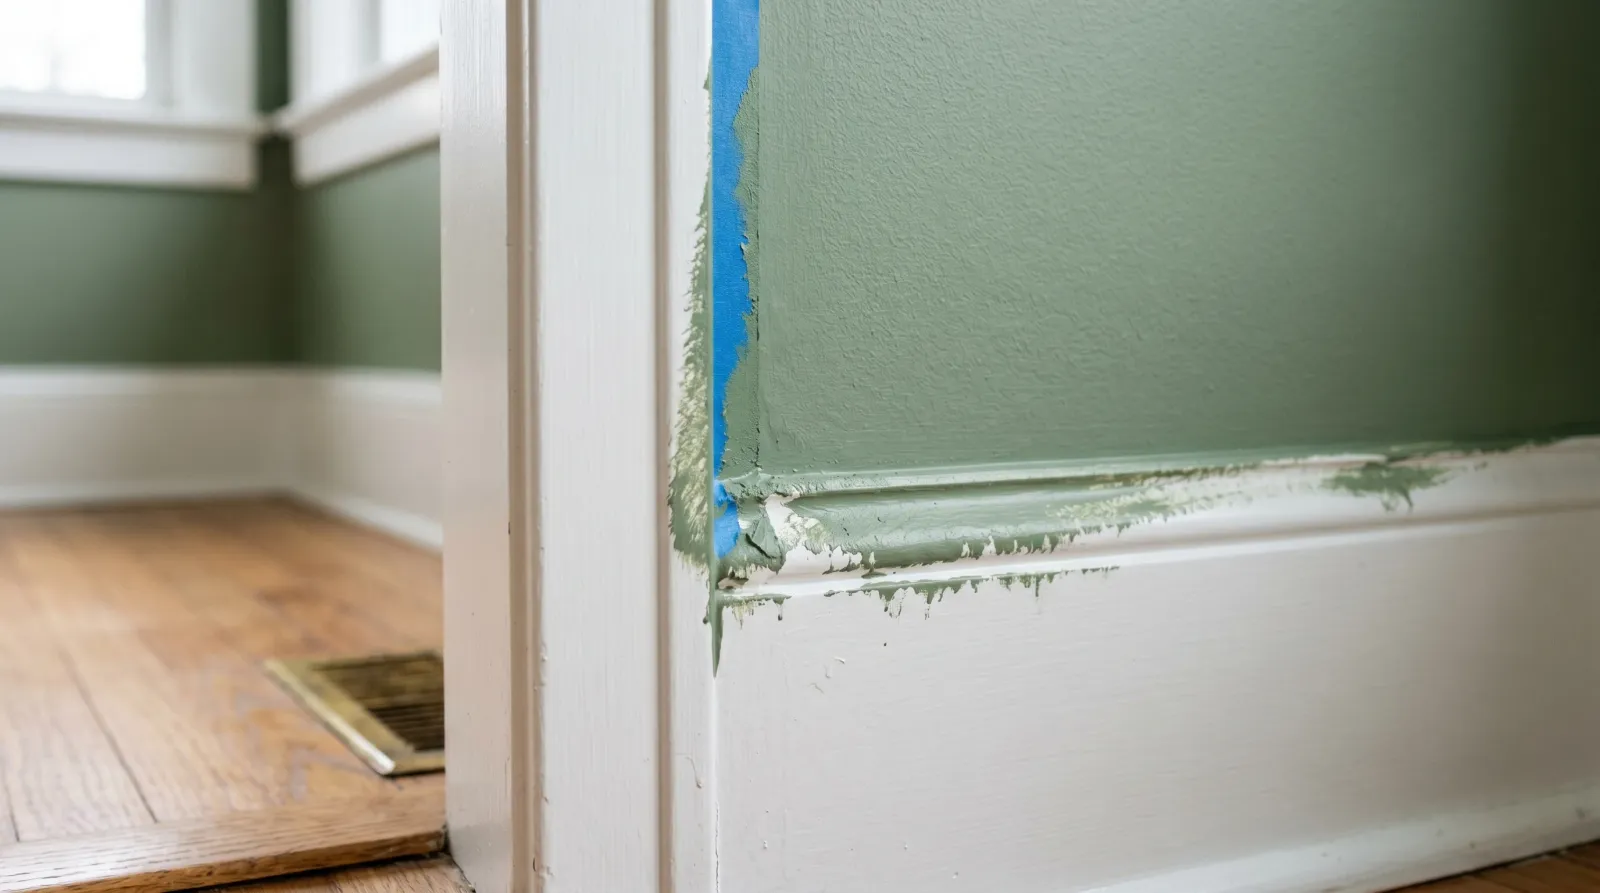
 Tape pulled back on a wall-to-baseboard joint. Wall color crept under the edge and left a ragged feathered line on the trim.
- A fuzzy, feathered line that fades from solid to nothing. Classic bleed. Paint wicked under the tape edge by capillary action.
- Sharp solid blobs poking past the line at intervals. The tape lifted in spots. Bad press, or dust under the adhesive.
- A continuous heavy ridge of color past the tape. You flooded the brush and pushed a wave of paint into the edge.
- Paint pulled off WITH the tape, leaving bare patches. Opposite problem. The tape was stickier than the bond underneath, or you left it on too long. That’s a tape-removal failure, not bleed.
- A jagged torn line, paint stretched and ragged. You pulled tape off half-cured paint. The film was rubbery and tore instead of cutting clean.
If the line is fuzzy on textured wall and sharp on smooth trim in the same room, the texture is your culprit. The tape couldn’t seat in the valleys.
How Serious Is This
Cosmetic. The film is bonded and doing its job. Nobody’s house is failing because the trim line is fuzzy. This is a finish-quality problem, not a durability one.
It’s also the most-seen flaw on any DIY repaint. The eye goes straight to the line where two colors meet. A wall with minor roller marks reads fine. A crisp wall with a ragged trim line reads amateur. The fix is local. You’re repairing the line, not repainting the wall.
Why Paint Bleeds Under Tape (root Cause)
Four causes, and most bled lines are a combination of the first two.
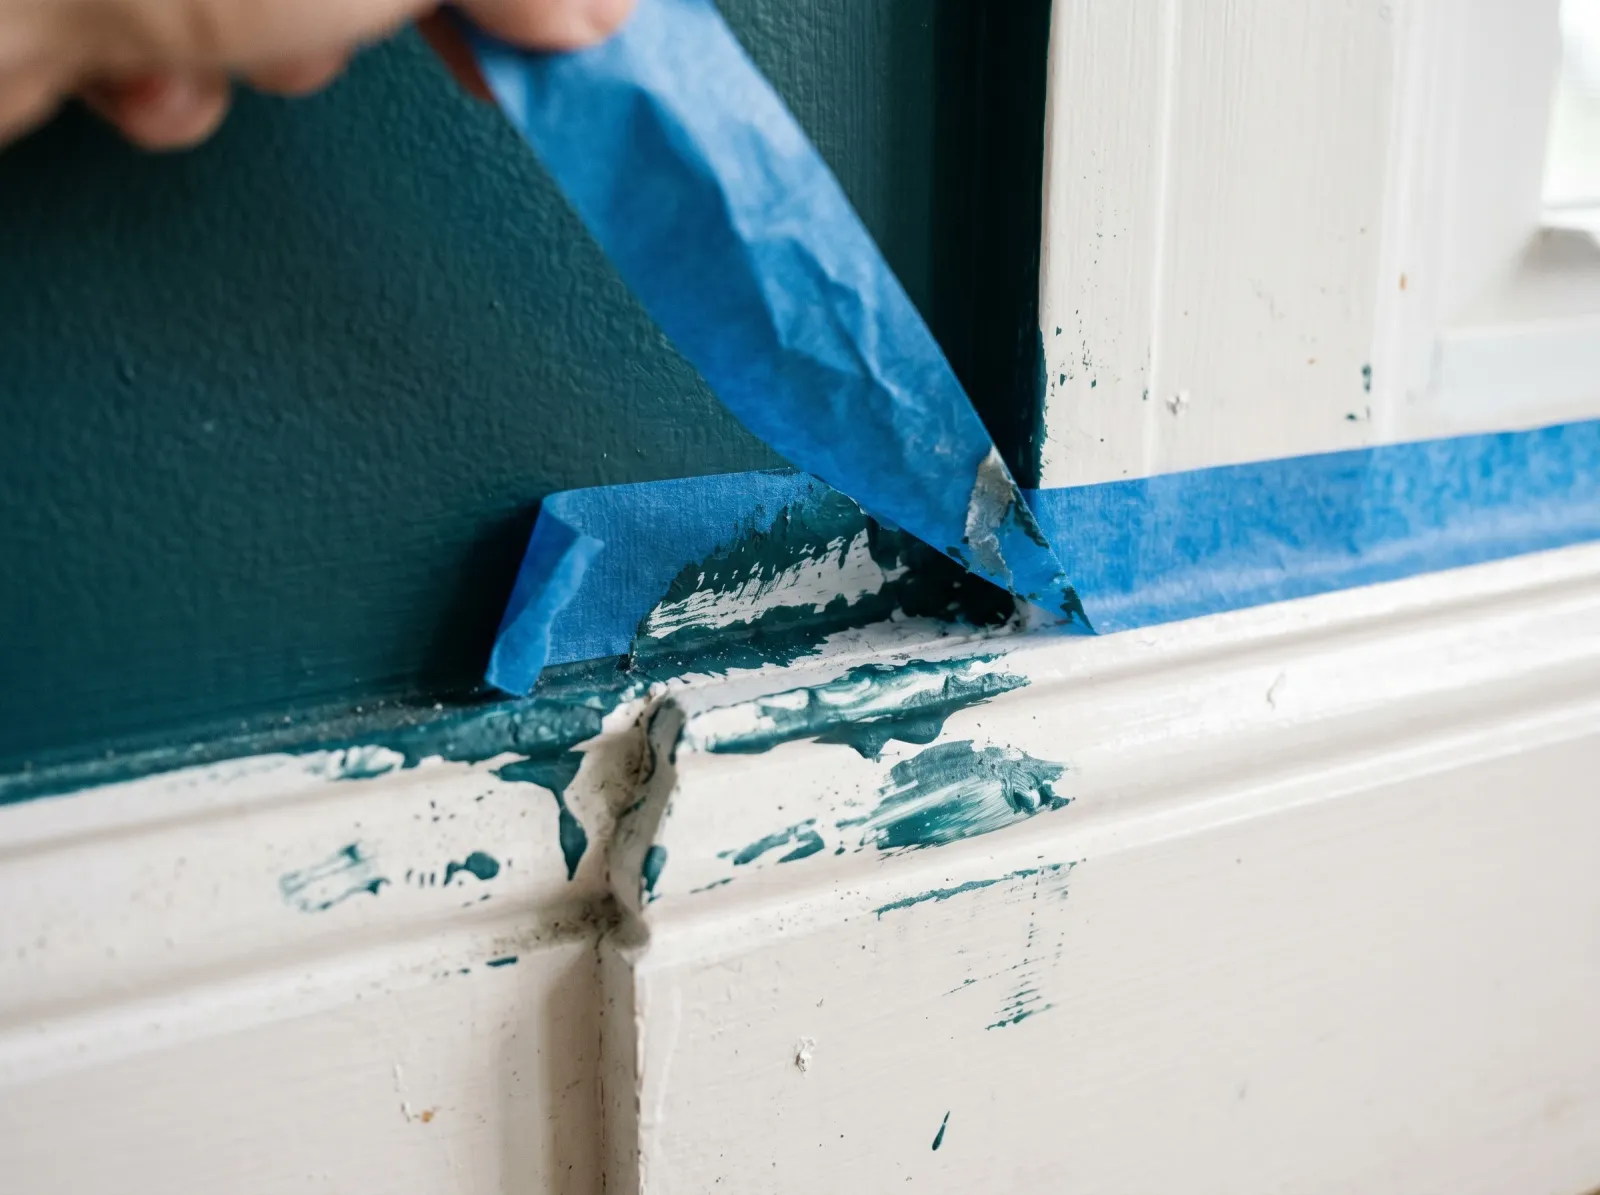
1. The tape edge wasn’t sealed to the surface. Tape laid down by hand leaves micro-gaps along the edge, especially where the surface isn’t dead flat. Wet paint is a liquid, and a liquid runs into any gap it can reach. This is the cause behind most bleed on smooth walls. The tape looks pressed down. Under a brush load of wet paint, the edge is a series of tiny channels.
2. Texture under the tape. Knockdown, orange peel, popcorn, heavy brush stipple, even a sanded-but-not-skimmed patch. The tape bridges the high spots and can’t reach the valleys. Every valley is an open tunnel for paint to run through. This is why a wall that taped clean by the door bled badly over the textured patch six feet down.
3. Too much paint, too fast. A flooded brush or a roller run right up to the tape pushes a wave of liquid against the edge with enough volume to force it under. Heavy coats bleed more than thin ones. The paint sits wet against the edge longer and has more to give.
4. Wrong tape, or tape left on wrong. Cheap beige masking tape has aggressive adhesive and no bleed barrier. It’s made for holding paper, not for clean lines. And any tape pulled at the wrong moment tears the line. Pull while wet, or pull fully cured. The half-set middle is where lines rip.
A fifth one shows up on dirty walls. Dust and chalk under the adhesive. The tape sticks to the dust, the dust doesn’t stick to the wall, and the edge lifts. Wipe the line down first.
The Fix for an Existing Bled Line
Same repair regardless of which cause did it.
Step 1. Sand the Bled Edge Flat
The dried bleed is a thin raised film on the trim. Knock it down with 220 grit on a folded piece or a sanding sponge. Light pressure, work just the fuzzy zone until your fingertip can’t feel a ridge. Don’t sand a trench into the trim. You’re leveling a film, not removing wood. Wipe with a damp microfiber and let it dry.
If the bleed is heavy and on a glossy trim, the color won’t fully sand off. That’s fine. You’ll cover it in the touch-up. The goal here is flat, not white.
Step 2. Caulk the Seam If There’s a Gap
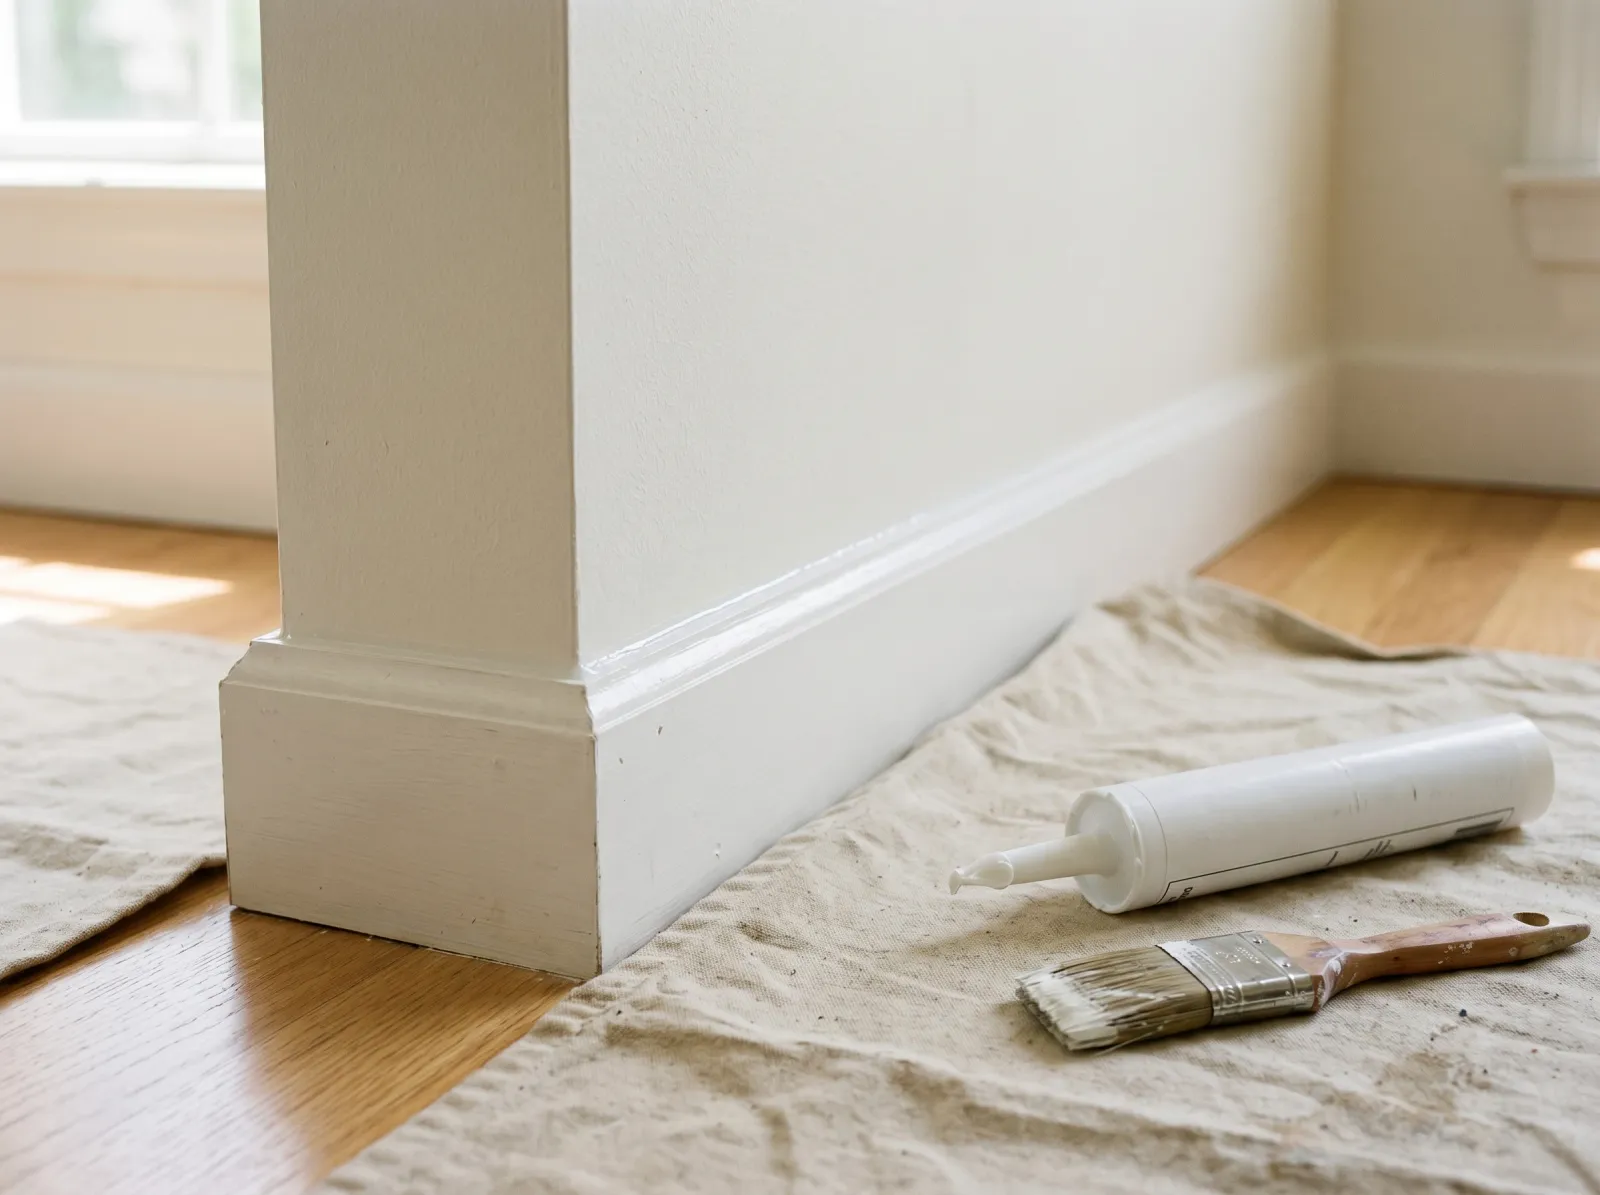 A thin bead of paintable caulk run into the wall-to-trim seam and smoothed flat. This kills the gap that bled in the first place.
Most wall-to-trim bleed happens because there’s an actual gap at the joint, and tape can’t bridge a gap. Run a thin bead of paintable acrylic-latex caulk (DAP Alex Plus or similar) along the seam, smooth it flat with a wet fingertip, and wipe the excess. Let it skin over per the tube, usually 30 to 60 minutes before paint. This single step eliminates most repeat bleed at baseboards and casing.
Skip caulk on a flat wall-to-wall line. There’s no seam to fill there. This step is for inside corners and trim joints only.
Step 3. Re-Cut the Line
Two ways to put a clean line back.
By hand, no tape. Load a 2 or 2.5-inch angled sash brush, wipe most of it off so it’s damp not dripping, and cut the line freehand. A good angled brush and a steady hand beat tape on a straight run once you’ve done a few feet.
Re-tape and seal. If your hand isn’t steady, re-tape, then seal the edge before you paint. See the technique section below. Seal first, then touch up, then pull while wet.
Step 4. Touch Up
One coat on the repaired zone, feathered out past the sanded area so it blends. Match the original sheen. A satin touch-up over an eggshell line will flash a different reflectance under raking light even in the same color. If you don’t know the original sheen, the sheen guide walks through how to tell.
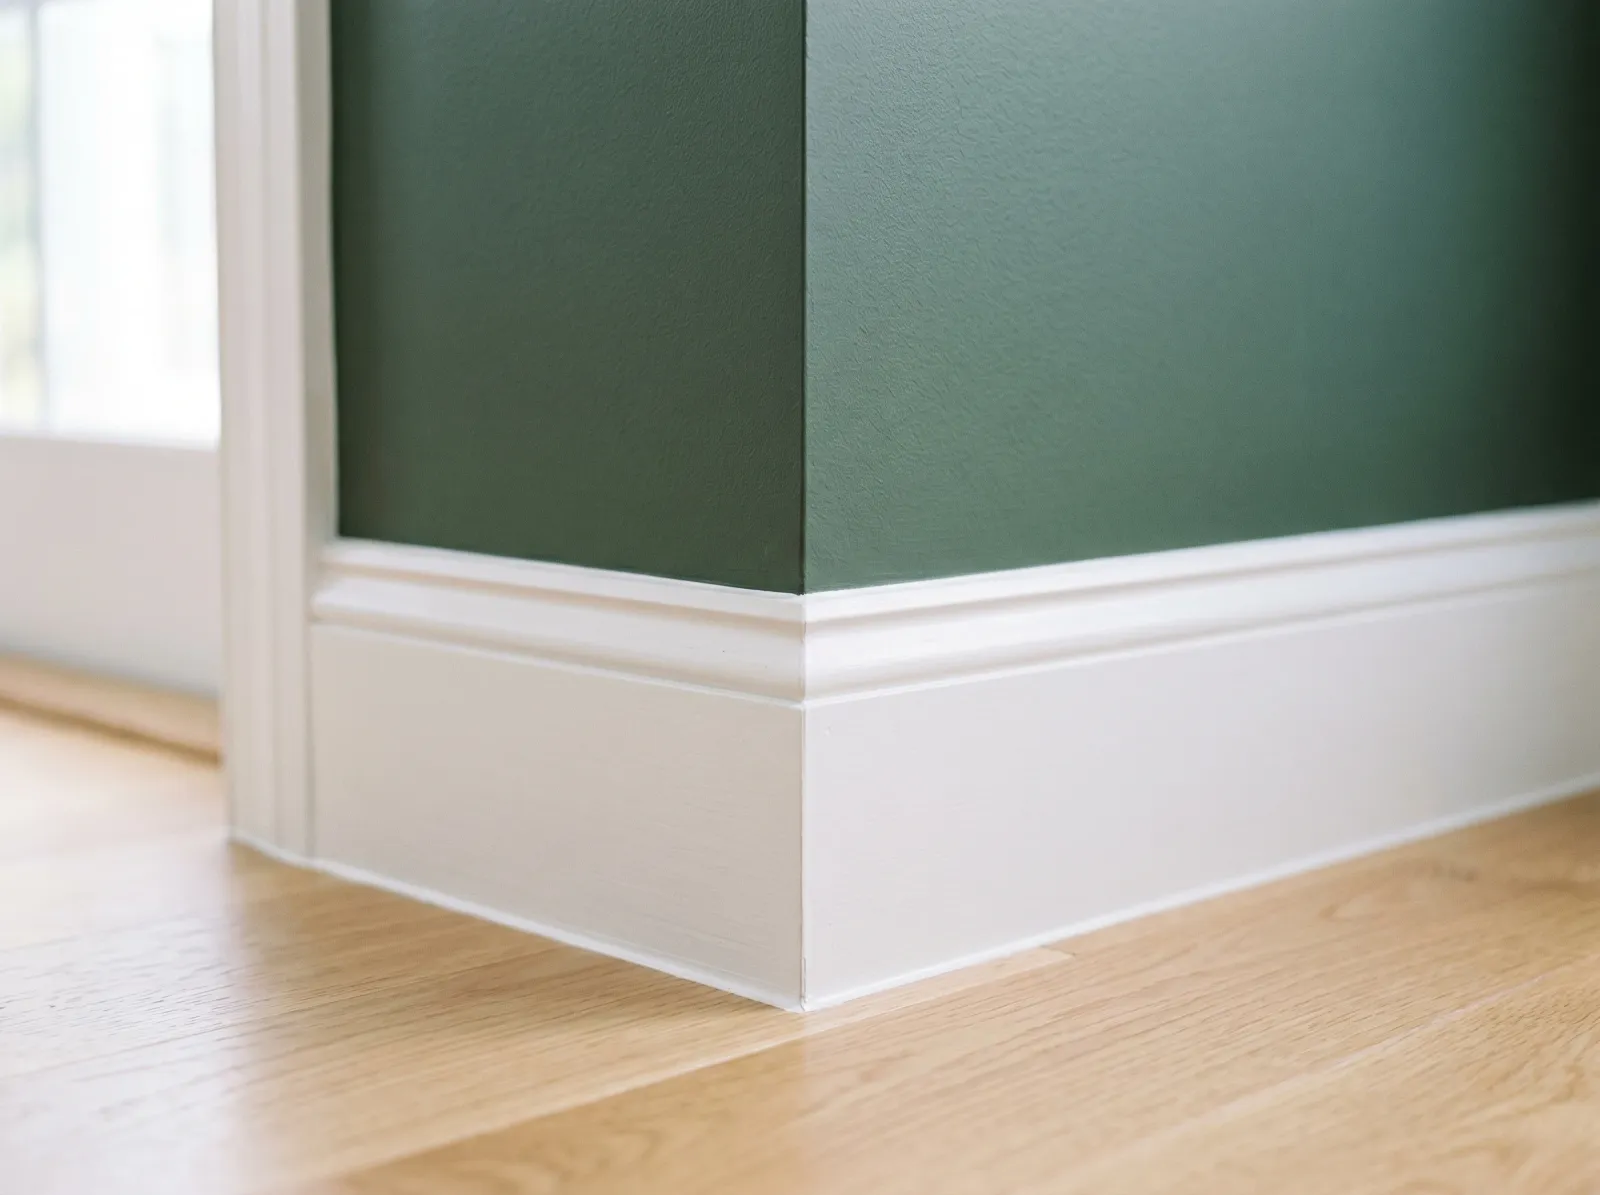 The repaired corner. Sanded flat, caulked, re-cut, and touched up to a crisp line.
How to Tape So It Can’t Bleed (the Technique)
The seal is the whole fix. Numbered because the order matters.
- Wipe the line first. Dust and chalk kill adhesion. A dry line on a clean wall holds the tape; a dusty one lifts it.
- Press the edge hard. Lay the tape, then run a flexible putty knife or a credit card down the painting edge with real pressure. Don’t just press with a fingertip. The whole edge has to make contact.
- Seal the edge with the base color. This is the move that stops bleed cold. Run a thin coat of the EXISTING wall or trim color (whatever’s already under the tape) along the tape edge first. Any bleed that happens is the same color as what’s there, so it’s invisible. Let it set 30 minutes.
- Then paint your new color. Now the tape edge is sealed shut by the dried base-color coat. The new color rides on top and can’t find a gap.
- Don’t flood the brush. Damp, not dripping. Lay paint, don’t push a wave into the edge.
- Pull the tape while the last coat is still wet, at a 45-degree angle back over itself, slow and steady. If the paint already skinned, score the line first with a utility blade so the dried film doesn’t tear.
The base-color seal trick works on texture too, where nothing else does. On a heavily textured wall, the seal coat fills the valleys with matching color before the new color ever touches them.
Which Tape Actually Holds a Line
Tape brand matters less than technique, but it’s not nothing.
FrogTape (green, Multi-Surface). Has a treatment that gels when it contacts water-based paint and chokes the edge. It bleeds less than anything else off the shelf. Best default for sharp lines on smooth walls.
ScotchBlue (the 2090 / Original). Solid all-rounder, clean removal up to 14 days on the delicate-surface version, no gel barrier. Pair it with the seal technique and it cuts as clean as FrogTape.
Cheap beige masking tape. For masking paper and holding drop cloths. Not for clean lines. Aggressive adhesive, no bleed barrier. Don’t use it where you care about the edge.
The seal technique makes any blue or green tape cut clean. No tape makes up for a flooded brush over a textured wall with no seal coat. See the full painter’s tape breakdown for the lineup.
Common DIY Mistakes
- Pressing the tape with a fingertip and calling it sealed. The edge has gaps you can’t see. Run a putty knife down it.
- Skipping the base-color seal coat. This one step is the difference between a sharp line and a fuzzy one on 90 percent of jobs.
- Flooding the brush. A dripping brush pushes paint under the edge by sheer volume. Wipe it down.
- Taping over a textured wall and expecting a sharp line. The valleys are open tunnels. Seal them with base color or cut freehand.
- Pulling the tape after it’s dry to the touch but before it cures. The film tears. Pull wet, or score and pull cured.
- Caulking a flat wall line. Caulk is for the seam at a trim joint. On a flat surface it just makes a ridge.
When to Call a Pro
Bleed is a DIY fix in almost every case. A few jobs aren’t worth your weekend.
- Whole-house repaint where every room needs sharp two-tone or wall-to-trim lines and your freehand cut isn’t there yet. A pro cuts lines faster than you can tape.
- High stairwell or vaulted walls where the bled line is 14 feet up and you’d be cutting it off a ladder.
- Heavily textured walls (heavy knockdown, popcorn) where you want crisp lines anyway. Pros spray and back-cut these; taping them is a losing fight.
Prevention
- Seal the tape edge with the base color, every time. Half a minute per run, and it kills bleed at the source.
- Buy FrogTape or ScotchBlue, not beige masking tape. The bleed barrier and clean-removal window pay for themselves on the first room.
- Press the painting edge with a putty knife, not a finger. Full contact along the whole line.
- Caulk wall-to-trim seams before you paint. A filled joint can’t tunnel paint underneath. This also makes baseboards and casing read finished instead of DIY.
- Pull tape while the paint’s wet, or wait for full cure and score the line first.
- Practice cutting freehand on a hidden run. A good angled brush beats tape on straight lines, and there’s no tape to bleed under. The right brush does half the work.
What’ll Bite You in Two Years
You’ll repaint and re-tape the same line. If you sealed the first line with the wall color and never caulked the gap underneath, the gap’s still there. Next paint job, fresh tape, same tunnel, same bleed. Caulk the seam once and it’s gone for good. Tape over an unfilled joint forever and you’ll cut the same fuzzy line every repaint, in a different color each time. While you’re at the joints, fix any brush strokes in the trim itself so the whole edge reads clean, not just the line.