How to Remove Chalky Oxidation From Aluminum Siding
Chalky oxidation on aluminum siding is dead, powdery factory finish. How to wash it off, test if you're done, and decide whether to seal or repaint.

That white powder coming off your aluminum siding isn’t dirt. It’s the factory paint dying. Wipe it off, figure out what’s left underneath, and you’ll know whether this is a Saturday wash or a repaint.
Does This Match What You’re Seeing?
Run a dry hand down the siding and look at your palm. What you find tells you which problem you have.
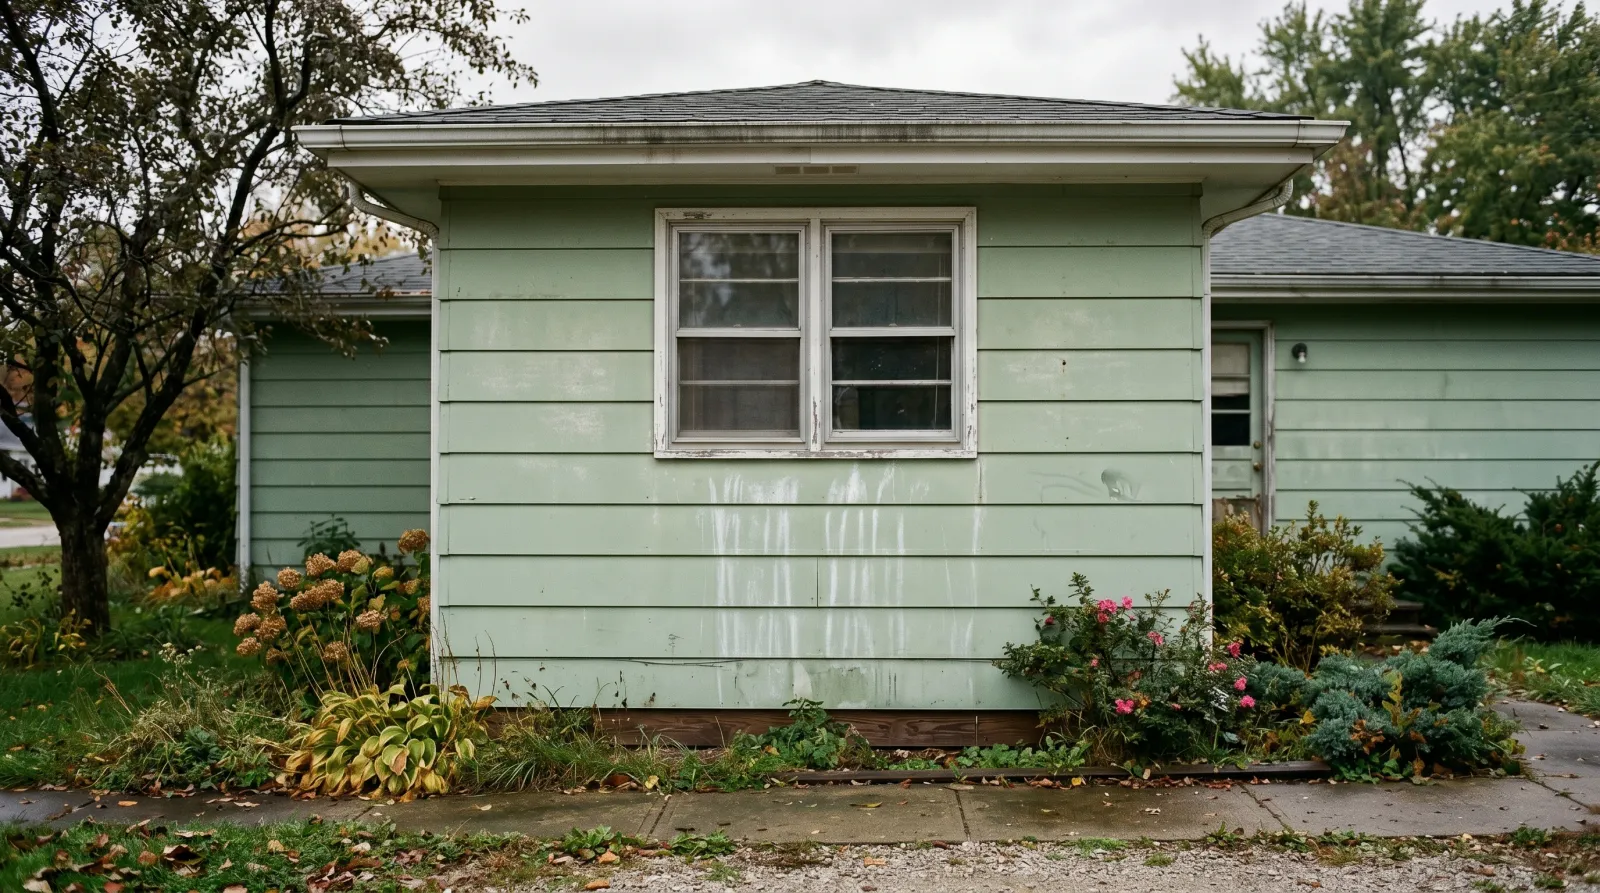
- White or pale powder on your hand, color underneath still decent: chalking. Normal end-of-life for old baked enamel. Cosmetic. This page fixes it.
- Chalk plus white streaks running down below windows and seams: the chalk is washing down with rain and staining the courses below. Same fix, just more of it.
- Dull faded color, almost no powder: UV fade without much chalk. A wash brightens it; a repaint restores it.
- Bubbling, flaking, or white crusty pitting in the metal itself: that’s aluminum corrosion, not chalk. Different animal. Spot-treat the metal before any paint.
- Black or green spotting that doesn’t wipe to white: mildew, not oxidation. Treat it with bleach first.
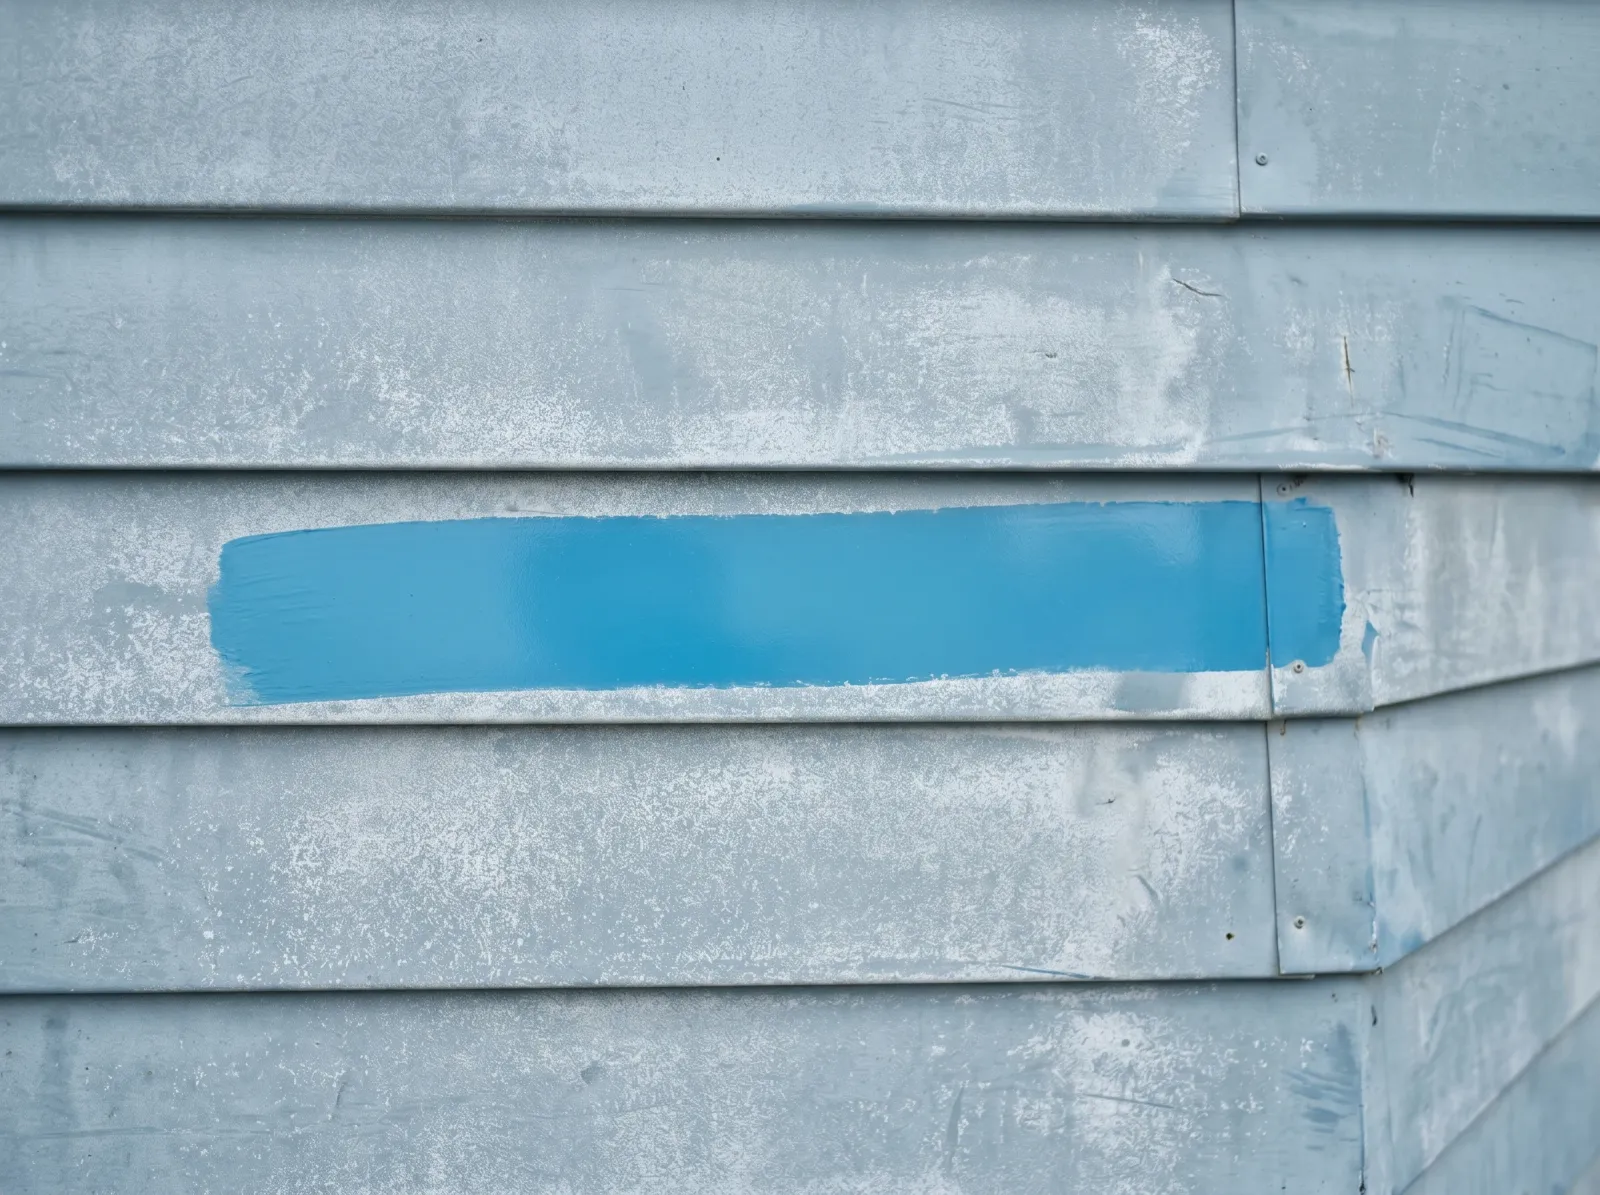
Wipe a dry hand across the siding. If it comes away white, that band is the color underneath the chalk.
If your hand comes away white but the wiped band shows a brighter, even color, good news. Most of what looks like dead siding is chalk sitting on top of sound paint.
How Serious Is This?
Low. Chalking is cosmetic almost every time. The aluminum under the finish doesn’t rust the way steel does, so the metal is usually sound even when the color looks dead.
Three things bump it up the ladder:
- Streak staining onto brick, concrete, or a lower roof. The runoff carries pigment and it sets. Wash sooner.
- Actual metal corrosion. White crusty pitting means the paint is gone and the aluminum is reacting. Treat the metal, not just the finish.
- You’re about to sell. Chalky streaked siding reads as neglect from the curb even when it’s fine. A wash is the cheapest curb-appeal hour you’ll spend.
A wash is a same-day job. A full repaint is a two-weekend job. You don’t decide which until after the wash, because the wash tells you how much color is left.
Why This Is Happening (root Cause)
Aluminum siding from the ’60s through the ’80s came coated with a baked-on enamel at the factory. That finish is tough, but it isn’t immortal. Sun is what kills it.
UV breaks down the resin that holds the pigment together. As the binder fails at the very surface, it releases the pigment as a fine loose powder. That powder is the chalk. Run your hand over it and you’re literally wiping off dead paint, one microscopic layer at a time.
It happens fastest on the sides that take the most sun. I see the heaviest chalk on south and west walls in zones 5 and 6, while the north wall of the same house still looks half-decent. Darker colors chalk worse than light ones because they absorb more heat and more UV.
The streaking is just gravity. Rain hits the chalky surface, picks up loose pigment, and carries it down. It pools at the bottom of each course and dries as a white stripe. The siding above looks faded; the siding below looks dirty. Same cause.
None of this means the siding is bad. Baked enamel chalking after 30 or 40 years is the finish doing exactly what it does. The fix is to clear the dead layer and decide whether the color left under it is worth keeping or worth painting over.
The Fix
Step 1. Test How Bad the Chalk Is
Before you decide anything, measure it. Press a piece of dark cloth or your bare palm flat against a dry, shaded section and drag it a foot.
- Light dusting, barely visible: wash and you may be done.
- Heavy white coating: wash hard, and plan on a primer if you’re repainting.
- Comes off in a thick film: the finish is fully spent. Repaint is the only fix that lasts.
This is the single test that decides your whole weekend. Do it first.
Step 2. Wash Off the Chalk
Mix TSP or a TSP substitute per the label in warm water. Work bottom to top so the runoff doesn’t streak dry chalk, then rinse top to bottom. Scrub with a soft car-wash brush on a pole. Aluminum is soft; a stiff wire brush leaves swirl marks.
For mildew or green spotting, add a 1-to-3 bleach-to-water solution to the wash. Let it dwell 10 minutes, scrub, rinse.
Never mix bleach with TSP that contains ammonia, or with vinegar or hydrogen peroxide. Read the cleaner label. Bleach plus ammonia makes toxic chloramine gas. If you bleach, rinse the wall fully before any other cleaner touches it.
Rinse until the runoff water runs clear, not milky. Milky water means chalk is still coming off. Keep going.
Step 3. Confirm It’s Clean
Let the wall dry, then run your hand over it again. Still white on your palm? Wash that section again. Paint will not bond to a surface that still chalks. This is the step everybody rushes and the reason most aluminum repaints fail.
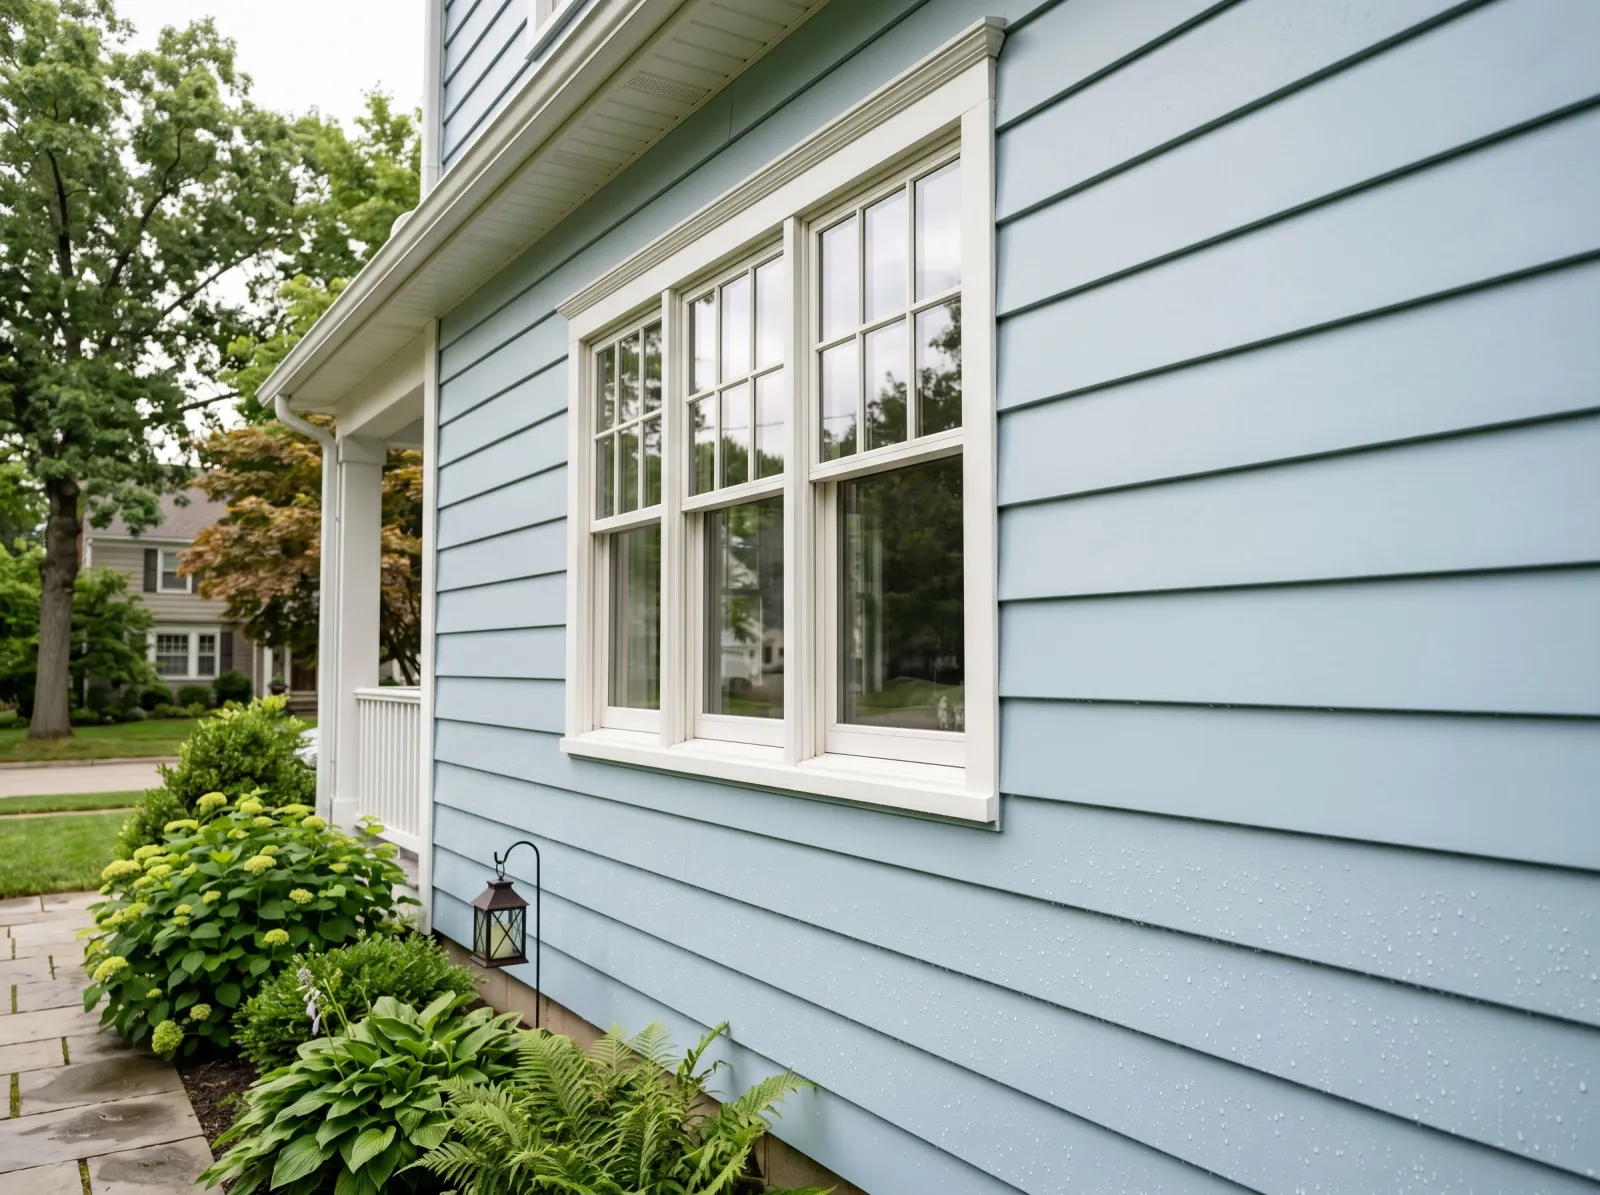
Same wall, washed and rinsed. Most of the dull look was chalk sitting on top of sound color.
If the washed siding looks even and the color is acceptable, you can stop here. A clean wash with no repaint is a legitimate outcome on lightly chalked siding.
Step 4. Pressure Wash Carefully (optional)
A pressure washer speeds the wash on a big house. Keep it under 1,500 PSI with a wide 25- or 40-degree tip, and stay 18 inches off the surface. Aluminum dents and the seams will drive water behind the siding if you blast straight up under the laps. Angle down and across, not up.
A pressure washer rinses. It doesn’t replace the detergent and the brush on heavy chalk.
Step 5. Prime the Bare and Chalked Areas
If you’re repainting, prime. Aluminum is a tight, slick surface and chalked aluminum is worse. The topcoat needs a primer to grab.
- General repaint over clean, sound siding: a bonding primer like INSL-X STIX or Zinsser Bulls Eye 1-2-3 Plus.
- Bare or corroded metal showing through: a self-etching metal primer with corrosion inhibitors. Spot the bare areas, then full-coat.
- Stubborn residual chalk you can’t fully remove: an alkali-resistant masonry-and-metal binding primer glues the last of the dust down so the topcoat has something solid under it.
One coat, cut in your edges, let it flash off per the label before topcoat. For a deeper read on which primer grabs what, see what bonding primer does.
Step 6. Repaint With Exterior Acrylic
Two coats of 100% acrylic exterior, satin or low-gloss. Acrylic flexes with the metal through hot-cold cycles where a cheaper paint cracks. Sherwin-Williams Resilience, Benjamin Moore Aura Exterior, and Behr Marquee all hold on primed aluminum.
Don’t paint in direct sun or above 90°F. Aluminum gets hot to the touch and the paint flashes before it can level, and you’ll fight lap marks the whole wall. Work the shaded side. For the full prep-and-coat walkthrough on this substrate, see the aluminum siding painting guide.
Wash, Seal, or Repaint?
| Chalk level | Color left | Best move | Lasts |
|---|---|---|---|
| Light dusting | Good | Wash only | Few years, re-wash as needed |
| Moderate | Faded but even | Wash, then optional clear sealer | 3 to 5 years |
| Heavy | Dull, blotchy | Wash, prime, repaint | 10 to 15 years |
| Comes off in a film | Gone | Repaint is the only durable fix | 10 to 15 years |
A clear acrylic siding sealer is the middle option people forget. It locks the remaining chalk and adds a few years without committing to a full color change. It won’t restore faded color the way paint does.
Common Mistakes
- Painting over chalk. The number-one cause of peeling aluminum repaints. The paint bonds to powder and peels in sheets the first winter.
- Skipping the primer. Aluminum is too slick for most topcoats to grip alone. No primer, no adhesion.
- Using a stiff or wire brush. Aluminum is soft. You’ll leave swirl marks that show through the new paint.
- Pressure washing too hard or aiming up. Over 1,500 PSI dents the metal and drives water behind the laps. Angle down.
- Painting the sunny side at noon. Hot metal flashes the paint. Chase the shade around the house.
- Calling streaks “dirt” and scrubbing forever. The streaks are chalk runoff. Clear the chalk above and the streaks stop coming back.
Prevention
- Wash the siding once a year. A garden hose and a soft brush clears chalk before it streaks. Cheapest maintenance on the house.
- Direct downspouts and splash so runoff doesn’t sheet across the worst-faded walls.
- Once repainted, the acrylic topcoat resists chalking far better than the old baked enamel did. A repaint is also the long-term prevention.
- Lighter colors chalk slower. If you’re recoloring anyway, going a shade lighter on the sun-beaten walls buys years.
When to Call a Pro
- Two-story siding where the chalked, streaked walls are above safe ladder reach.
- Widespread metal corrosion, bubbling, or pitting, not just surface chalk. That’s a metal repair or panel replacement question.
- Pre-1978 home where the siding or trim might carry lead-based finish under the chalk. Test before you sand or scrape. See the lead-paint rules in the peeling-paint fix.
- Whole-house spray repaints. Spraying aluminum evenly and masking the windows, brick, and roof is a different skill set than rolling a wall.
What’ll Bite You in Two Years
Rush the wash and the new paint peels. That’s the whole story with aluminum. The metal doesn’t fail, the prep does. If your hand still comes away white when the primer goes on, you’re not priming siding, you’re priming dust, and dust lets go. Wash it twice if you have to. The wall that takes the most sun is the one that’ll tell on you first, and it always does it in front of the street.