Best Paint Pails and Bucket Systems
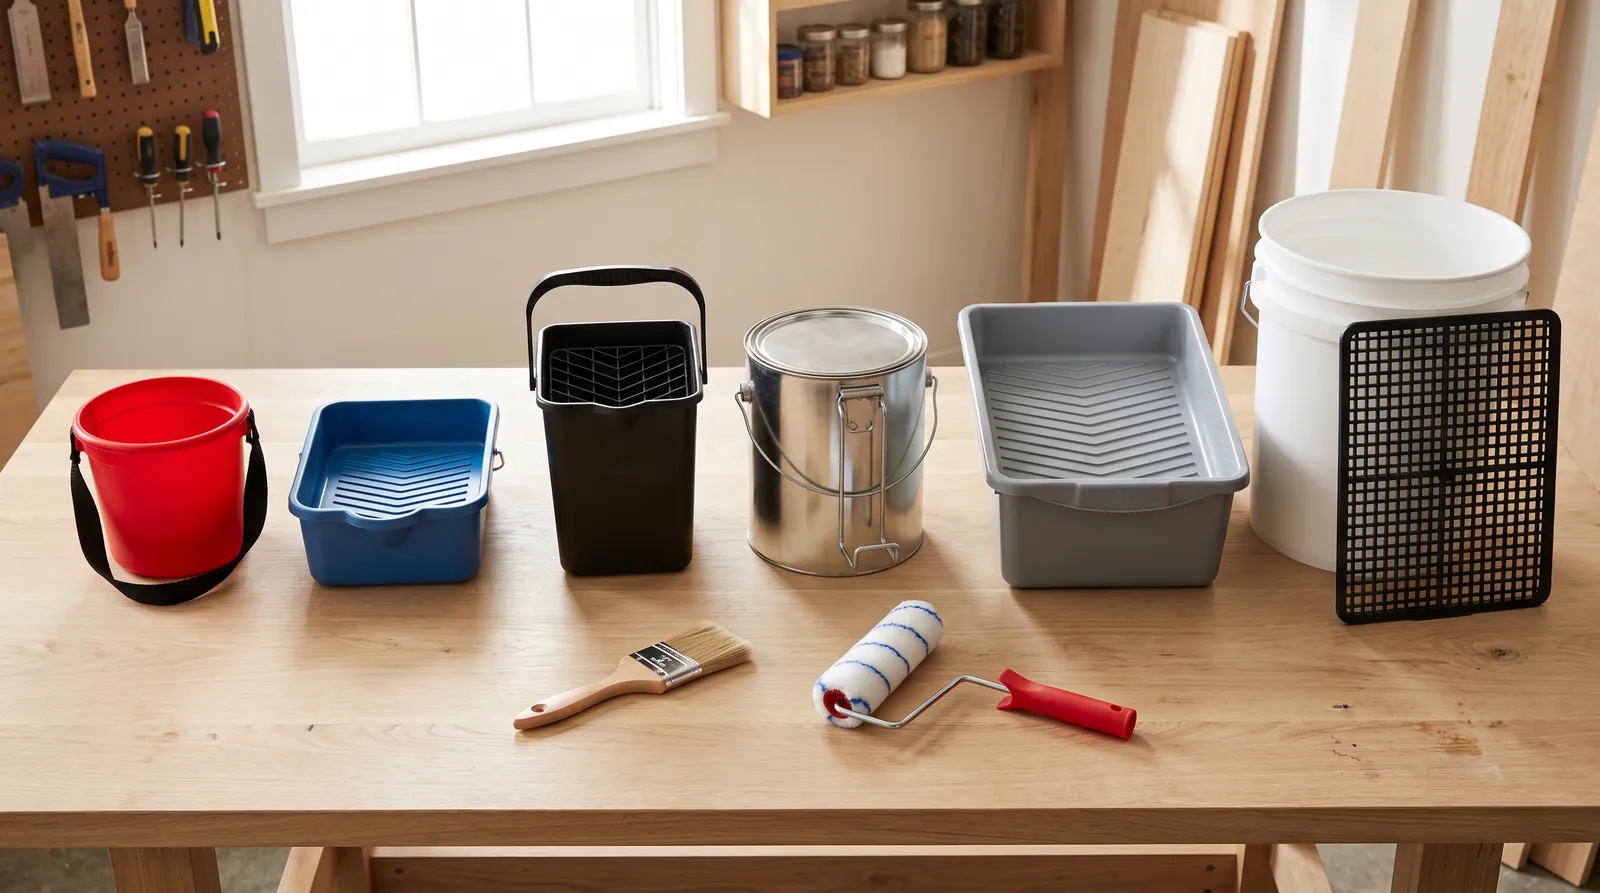
Six paint pails and bucket systems tested across cut-ins, trim, ladder work, and a full repaint. Top pick: the HANDy Paint Pail, plus where each one runs out of capacity.

Disclosure: Some links below are affiliate links. We earn a commission if you buy through them, at no extra cost to you.
Top pick: the Bercom HANDy Paint Pail. Around $8, holds a quart, and the adjustable strap moves the load to the back of your hand so your fingers grip nothing. It wins on the thing that decides a long cut-in day, which is hand fatigue, and on the magnetic rest that parks a loaded sash brush on the rim instead of sinking the ferrule. It falls short on capacity; a quart is roughly forty minutes of baseboard before you refill. For brush-and-mini-roller work from one container, the Wooster Pelican 8619 is the smarter buy. For a gallon that hangs off a ladder rail, the HANDy Ladder Pail. For a whole-house repaint out of one batch, the Wooster Wide Boy. And if you already own a 5-gallon bucket, a $3 Wooster Snap Screen converts it.
A paint pail is the cheapest thing in the kit and the one that changes your day the most.
Not because it applies paint. Because it decides how your hand feels at hour three, and a tired hand is what makes a cut line wander.
The Six on the Bench, and Why
I bought these at retail, the same shelves anyone else buys from, and ran them through six weeks of real jobs. A 13 x 16 ft living room, two coats of Benjamin Moore Regal Select eggshell. Sixty-four linear feet of baseboard and door casing in Sherwin-Williams ProClassic waterborne alkyd, which is where the brush-hours add up. Ten cabinet doors back-rolled with a 6.5-inch mini roller. And a covered porch ceiling cut in and rolled off a step ladder and then a 20-foot extension ladder, which is the job that separates a pail from a cup.
The category splits cleanly in two, and most buying mistakes come from not noticing the split.
Hand pails are one-quart containers you wear or carry. They serve the brush. Bucket systems are 5-gallon containers with a grid or a roll-off ramp. They serve the roller and the pole. The HANDy Pro Pail is the one product here that tries to be both, and it does the job at the cost of being bulkier than either.
The keyword people search is “handy paint pail” and the reason is simple: Bercom got there first and the strap is genuinely a better idea than a bail handle. It’s still the pail I hand to someone painting their first room.
What Separates a Good Pail from a $3 One
Five things, in the order they mattered on the bench.
Carry method. A bail handle keeps a quart in your fingers. A strap moves it to the back of your hand and the load spreads across your knuckles. On the timed 90-minute cut-in, my grip hand cramped at about minute 50 with the Pelican’s handle and never cramped with the HANDy strap. Both pails hold the same quart. The strap is the whole difference.
Usable capacity. Nobody prints this. Stated capacity is what the pail holds to the brim; usable capacity is what it holds before it slops when you tilt it to load a brush. I filled each to its own recommended line and poured it back into a graduated pitcher. The standard HANDy pail gave up about 30 ounces. The Pro Pail, whose internal grid eats volume, gave about 24. That gap is a refill trip every hour.
Brush park. The magnet has to hold a loaded 2.5-inch angled sash. Every pail here does that. Only the Pro Pail held a loaded 3-inch, and none of them held a loaded 3-inch flat wall brush with a thick handle. If you brush wide, plan to lay the brush across the rim rather than trust the magnet.
Roll-off geometry. A mini roller needs a ramp long enough to squeeze it, and the ramp length is a hard spec. The Pelican tops out at a 4.5-inch cover. The Pro Pail takes 6.5 inches. Put a 6.5-inch roller in a Pelican and you will wear the excess.
Solvent resistance. Waterborne paint is easy on plastic. Alkyd enamel and mineral spirits are not. The branded pails came through an oil cycle clean. I have had two off-brand pails go cloudy and slightly tacky at the base, and a softened seam leaks down your forearm without warning.
Cheap pails fail on the last one first. That’s why the off-brand five-packs look like a bargain and aren’t.
Side by Side
| Product | Type | Capacity | Roller support | Brush magnet | Price tier |
|---|---|---|---|---|---|
| Bercom HANDy Paint Pail | Hand pail, strap | 1 quart | None (brush only) | Yes, to 2.5 in | $ |
| Wooster Pelican 8619 | Hand pail, handle | 1 quart | Roll-off to 4.5 in | Yes | $ |
| Bercom HANDy Pro Pail | Hand pail, strap | 1 quart+ | Grid to 6.5 in | Yes, to 3 in | $$ |
| Bercom HANDy Ladder Pail | Ladder-mounted pail | Over 1 gallon | Built-in grid | Yes | $$ |
| Wooster Wide Boy 8614 | Bucket system | 5 gallons | 19 in roll-off | No | $$$ |
| Wooster Snap Screen R007 | Grid for any bucket | Bucket dependent | Full grid | No | $ |
1. Bercom HANDy Paint Pail, Top Pick
The HANDy Paint Pail is the one I reach for on any job where a brush is in my hand for more than an hour. A quart of paint, a wide adjustable strap across the back of the hand, a magnetic rest on the rim, and a ribbed scraper lip cast into the inside front edge so you can unload a brush without wiping it on the rim and building a crust.
The strap is the product. Everything else here is competent, and plenty of pails have magnets. What the strap does is take the quart off your fingers. During the 90-minute continuous cut-in on the porch ceiling, working overhead off a 6-foot step ladder, I could still open a paint can with my pail hand at the end. With the handled pails I could not, and I noticed the cut line getting less certain around minute 60.
The scraper lip earns its place too. Wiping a loaded 2.5-inch sash on the rim of a can leaves a ridge that dries, flakes, and drops into your paint two hours later. The molded lip strips the excess into the pail instead.
Capacity is the honest weakness. Thirty usable ounces gets you about forty minutes of baseboard or one ceiling perimeter in a mid-size room. On the 64-foot trim run I refilled six times. The magnet loses a loaded 3-inch brush, so if you cut with a wide brush, the Pro Pail is the right pail in this family. And the fitted liners are a recurring cost; the generic liners marketed as compatible fit loose enough to float when the pail is half empty, which is worse than no liner.
| Spec | Value |
|---|---|
| Capacity | 1 quart stated, about 30 oz usable |
| Carry | Adjustable hand strap |
| Brush support | Magnetic rest, to 2.5-inch sash |
| Roller support | None |
| Material | Solvent-resistant plastic, lifetime warranty |
| Approx. price | $7–$10 |
Buy it if: you cut in ceilings, paint trim, or work off a ladder with a brush. It is the correct first pail for almost everyone. Skip it if: you want to roll from the same container, or you brush with a 3-inch or wider.
2. Wooster Pelican 8619, Best for Brush and Mini Roller Together
Same quart, different philosophy. The Pelican gives up the hand strap and spends the space on a molded roll-off area, so you can cut a corner with a brush and immediately roll the field with a 4.5-inch mini without setting anything down or walking to a tray. On the cabinet-door job that saved real minutes per door.
The rim design is smarter than it looks. There’s a magnet, and there’s a hooked lip, so the brush parks on whichever side matches the hand you’re working with. Wooster also sells a lid (8659) and fitted liners (8629). The lid is the underrated part: half a quart of ProClassic sealed overnight was still workable the next morning, which meant one pour instead of three across the two-day trim job.
You hold this one by the handle. Above shoulder height that gets old, and it’s why the HANDy takes the top slot for overhead cut-ins. The roll-off ribs are also on the short side, so a fully loaded mini roller sheds some paint straight back into the pail rather than getting properly squeezed on the ramp. Two passes instead of one.
Buy it if: your work is trim plus small roller sections and you want one container for both. About $8–$12, and buy the lid with it.
3. Bercom HANDy Pro Pail, Best for Mini-Roller Work
The Pro Pail is what happens when you put a real roller grid inside a strap pail. It swallows a 6.5-inch mini roller, which is the size most people actually use on cabinet doors, closet interiors, and the strip of wall behind a toilet. There’s a docking notch on the rim that stands the loaded roller frame upright, and that detail matters more than it sounds: a loaded mini roller laid on a step-ladder shelf rolls off about one time in four.
It also holds a 3-inch brush on the magnet, which no other hand pail here does.
The costs are volume and bulk. The grid eats interior space, so a stated quart behaves like 24 usable ounces. The body is taller and heavier than the standard pail, and on a brush-only cut-in run all that structure is dead weight strapped to your hand. Cleanup is the other tax; dried paint packs into the base of the grid ribs and a wire brush is the only thing that gets it out. Use a liner or rinse it before the paint sets.
Buy it if the job is cabinets, doors, or anywhere a mini roller does most of the work. Skip it if you mostly cut in. See the kitchen cabinet painting guide for how the back-roll fits into the sequence.
4. Bercom HANDy Ladder Pail, Best for Ladder Work
Different problem, different tool. Everything above assumes a quart in your hand. The Ladder Pail assumes you are twelve feet up and you do not want to come down.
It holds over a gallon and clamps to the rail with a metal bracket. On the porch ceiling I set it at chest height on the extension ladder, loaded a gallon of ceiling white, and cut and rolled the entire perimeter without descending once. There’s a roller grid inside, a magnet on the rim, and a slot for a rag. Nothing balances on the ladder shelf, which is where most spilled paint starts.
Loaded with a gallon it changes how the ladder feels, and that’s a real caution rather than a nitpick. Set the bracket, climb, then have someone hand it up or pour into it from a smaller container. Never carry it up loaded. The bracket also fouls on wide-flange fiberglass rails, so measure before you buy. Indoors on a step stool it’s more pail than the job needs.
Verdict: the right pail for exterior soffits, porch ceilings, stairwell walls, and anything that puts you on an extension ladder for hours. Pair it with a stable setup from the painting ladder round-up. About $25–$35.
5. Wooster Wide Boy 8614, Best 5-Gallon Production System
Now the other half of the category. Once a job passes about two gallons, hand pails stop being the answer and a bucket does two things a tray can’t: it holds the entire batch so your color stays consistent wall to wall, and it feeds a pole roller without you bending over.
The Wide Boy is the wide rectangular 5-gallon with a 19-inch roll-off area along one side. An 18-inch cover loads in a single pass. A 9-inch cover loads in half of one. The footprint is the underrated feature: lean a loaded pole roller against the rim of a round 5-gallon bucket and it walks, then tips. The Wide Boy doesn’t. Across the two-coat living room I never once caught it.
Liners (R479) are what make it a system rather than a bucket. Pull the spent liner, drop a fresh one in, pour the next color, keep rolling. On the timed cleanup runs a color change with a liner was under fifteen seconds. Washing a bare bucket to the point where you’d trust it with a lighter color took the better part of ten minutes and a hose.
It’s big. On a drop cloth in a hallway or a small bathroom it’s in the way for the entire job, and five gallons of paint plus the bucket is a two-hand carry that isn’t going anywhere near a ladder. Liners and the 8624 lid are separate purchases that push the real cost past what the bucket looks like on the shelf.
| Spec | Value |
|---|---|
| Capacity | 5 gallons |
| Roll-off area | 19 inches |
| Roller support | To 18-inch covers |
| Liner | R479 or R472, sold separately |
| Lid | 8624, sold separately |
| Approx. price | $30–$40 bucket only |
Buy it if: you’re painting more than two gallons at a time and using a pole. Skip it if: your jobs are one room at a time out of a single gallon.
6. Wooster Snap Screen R007, Best Budget Upgrade
The cheapest useful thing in this article. A flat polypropylene grid that hooks over the rim of a 5-gallon bucket and turns it into a roller station. A couple of dollars. Snap two together if you want a longer screen.
Polypropylene beats the old steel grids on one axis that matters: it doesn’t rust, and dried latex peels off it in sheets after a day in the sun. Steel grids rust at the hook and bleed orange into your next light color.
It’s a grid, not a bucket, so you inherit whatever bucket you own. Round 5-gallon buckets tip under a loaded pole roller and the Snap Screen doesn’t fix that. In some off-brand buckets it sits high enough that the roller rides above the paint line, and you compensate by dunking deeper than you should, which floods the cover.
Verdict: buy it. Two dollars, and it makes the empty bucket in your garage into a real tool. Just don’t expect it to solve the tipping.
What I Tried and Left Out
- Unbranded 5-packs of quart pails. Tempting at $12. Two hazed and went tacky at the base after an alkyd cycle, and the magnets are weak enough to drop a loaded brush.
- HANDy Paint Cup. A genuinely good small cup for touch-ups and detail work, but it’s a different job than a pail. Not enough capacity for a cut-in run.
- The Wooster Bucket-Tray BR414. Excellent 1-gallon tray built for 14-inch covers. If you run 14-inch rollers you already know about it; most people don’t, and the Wide Boy covers more ground.
- A cut-down milk jug. People do this. It works for about twenty minutes, then the handle flexes and you wear the paint.
- Bucket lids with a spout. Useful for pouring, useless as a work surface, and they add a step every time you reload.
Liners, Cleanup, and How Long These Last
Liners are worth it when you change colors more than once, and close to pointless on a single-color weekend.
Waterborne cleanup. Scrape the pail back into the can with a 5-in-1 while the paint is wet. Rinse under warm water until it runs clear, wipe the magnet dry (the housing is plastic but the magnet itself will corrode if you leave it wet), and stand it upside down. Dried latex peels off polypropylene in one piece if you let it cure fully in the sun first, so a forgotten pail is recoverable.
Oil-based cleanup. Use a liner and throw it away. A mineral-spirits rinse leaves you with a jar of contaminated solvent to dispose of properly, and it’s more hassle than the liner costs. If you skip the liner, rinse fast; alkyd sets in the grid ribs and doesn’t come out.
Grids and screens. Let them dry hard, then flex the plastic. Latex sheets off. Do not scrape a grid with a metal blade; you’ll burr the ribs and the burrs shred roller nap.
Life expectancy. The hand pails outlast the strap. Bercom warrants the pail for life and the strap webbing is the part that frays, usually somewhere past the two-year mark on regular use. The Pelican’s plastic held up fine over the test; the liners are consumables by design. The Wide Boy is basically permanent unless you drop it loaded on concrete. The Snap Screen is the one part here I’d call disposable, and at two dollars that’s fine.
Mistakes I Still See
- Cutting in straight from the gallon can. The rim fills, the lid never reseals, the paint skins, and eventually the can goes off the ladder shelf. Pour a quart into a pail and close the can.
- Buying a pail that doesn’t fit the roller you own. A 6.5-inch mini in a 4.5-inch pail wears you out and paints your knuckles. Check the roll-off spec against your cover, not against the picture.
- Trusting the magnet with a 3-inch brush. It will hold for ten minutes and then let go into the paint. Lay a wide brush across the rim instead.
- Filling a hand pail to the brim. You lose the tilt room you need to load a brush, and the first real tilt slops paint over the strap and onto your wrist. Fill to the line.
- Using a round bucket with a pole roller and no plan. It tips. Either use a wide-footprint bucket or set the round one inside a milk crate.
- Washing a pail with hot water and dish soap after oil-based paint. It doesn’t work, it emulsifies a mess, and you’ll still have alkyd in the grid. Liner, or solvent, or nothing.
- Skipping the box-and-mix step because the bucket is big. A 5-gallon bucket lets you combine cans, which is the point, but you still have to stir the combined batch before the first pour. See how much paint you actually need to work out how many gallons go in.
The Kit I’d Buy
For a homeowner who paints a couple of weekends a year: one HANDy Paint Pail ($8) and one Wooster Snap Screen ($3) for the bucket already in the garage. Eleven dollars covers cut-ins, trim, and rolling a room. Add a box of liners only when you start switching colors mid-job.
For someone doing cabinets or a lot of small-roller work, swap the standard pail for the Pro Pail and add the Pelican’s lid to whatever quart pail you settle on. A sealed half-quart overnight saves a pour and a wash.
For exterior work, ceilings, or a stairwell: add the Ladder Pail. It’s the only item here that changes what’s possible rather than what’s comfortable.
For a whole-house repaint, the Wide Boy plus a sleeve of R479 liners and a pole. Pair it with a good cover from the roller round-up and a 2.5-inch angled sash from the brush picks.
Don’t spend the money on a five-pack of unbranded pails. Buy one good one and a liner box.
Ask a Question