How to Paint Aluminum Siding
Painting aluminum siding the right way: how to kill the chalk, which primer grabs old oxidized metal, and the acrylic topcoat that lasts 15 years instead of two.

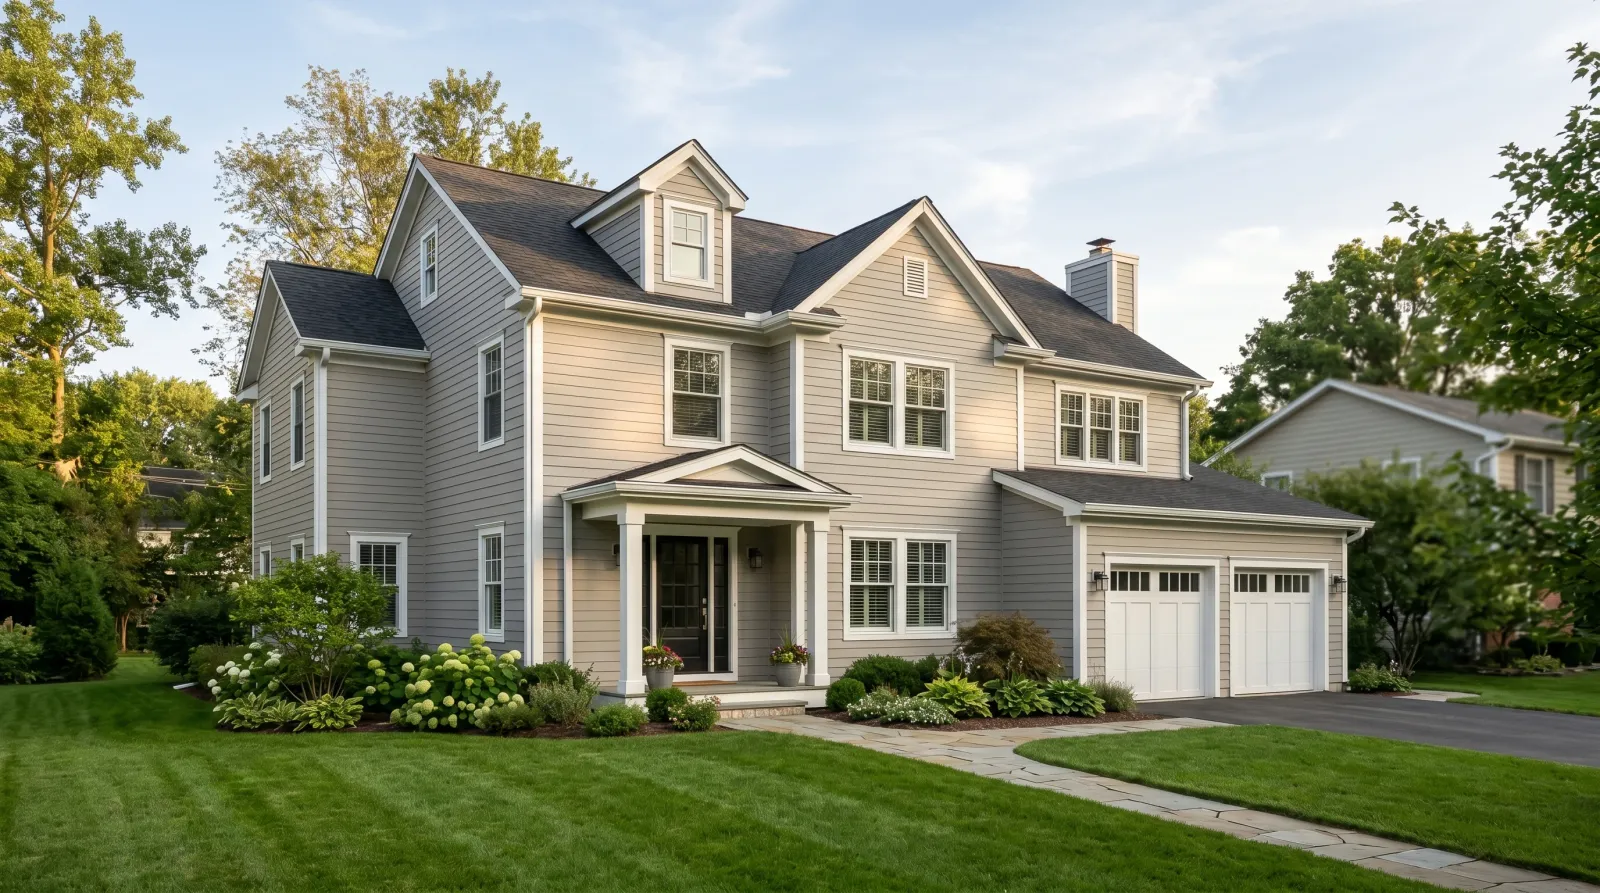
Aluminum siding doesn’t rot and it doesn’t rust. That’s the good news, and it’s why a 1970s house still has perfectly sound siding under a finish that looks chalky and tired. The bad news is the chalk. That powdery film is the old factory paint breaking down, and fresh paint will not stick to it. Skip the wash, skip the chalk test, and your expensive new coat comes off in sheets by the second summer.
I’ve repainted a lot of these houses across the Midwest. The metal is almost never the problem. The prep is.
What You’ll Get
A repainted exterior that reads clean and even, holds its color for 12 to 15 years, and costs a fraction of new siding. The faded chalky look goes away. The dents and the lap lines stay; paint doesn’t fix dents.
Honest Take on Difficulty and Time
This is a medium job, not a beginner one. The painting is easy. The ladder work, the wash, and the patience to let everything dry are what make it real work.
Figure one long weekend per side of an average two-story house if you’re spraying and back-brushing solo. A full house is most of a week of working days. Add a dry day after the wash before you put any paint down. Aluminum holds water in the lap grooves, and paint over a damp groove blisters.
If a contractor quotes you a four-day job and you’re doing it weekends alone, plan on three weekends. The wash is half the job and nobody counts it.
What You’ll Need
Paint and Primer
The topcoat is 100% acrylic exterior latex in satin or low-luster. Acrylic flexes when the metal expands in the afternoon sun and contracts overnight, so it won’t crack along the laps. Sherwin-Williams Resilience, BM Aura Exterior, and Behr Marquee all qualify. The cheap contractor-grade exterior chalks again in five years; you’re already doing the prep, don’t cap it with bad paint.
Primer is spot work, not a whole-house coat. Bonding exterior primer (Sherwin-Williams Extreme Bond, INSL-X Stix, or KILZ Adhesion) goes on bare metal, glossy patches, and anywhere old paint failed. Sound chalk-free siding takes the acrylic directly. The one place you never skip primer is bare aluminum, because raw metal is slick and the topcoat slides right off it.
For the material-level detail on why bare aluminum needs a self-etching or bonding primer, see the aluminum siding prep guide. For full topcoat picks, the best exterior paint round-up has the SKU comparison.
Tools
An airless sprayer with a 0.013 to 0.015 tip lays paint down fast. Rent one if you don’t own it. You’ll also want a 4-inch brush for back-brushing, a pump garden sprayer and a pole scrub brush for the wash, a pressure washer, drop cloths, caulk, and a stable extension ladder. Sprayer picks live in the best paint sprayers round-up.
No sprayer? A 9-inch roller with a 3/8-inch nap and a brush will do a one-story house. Slower, but the back-brushing comes free.
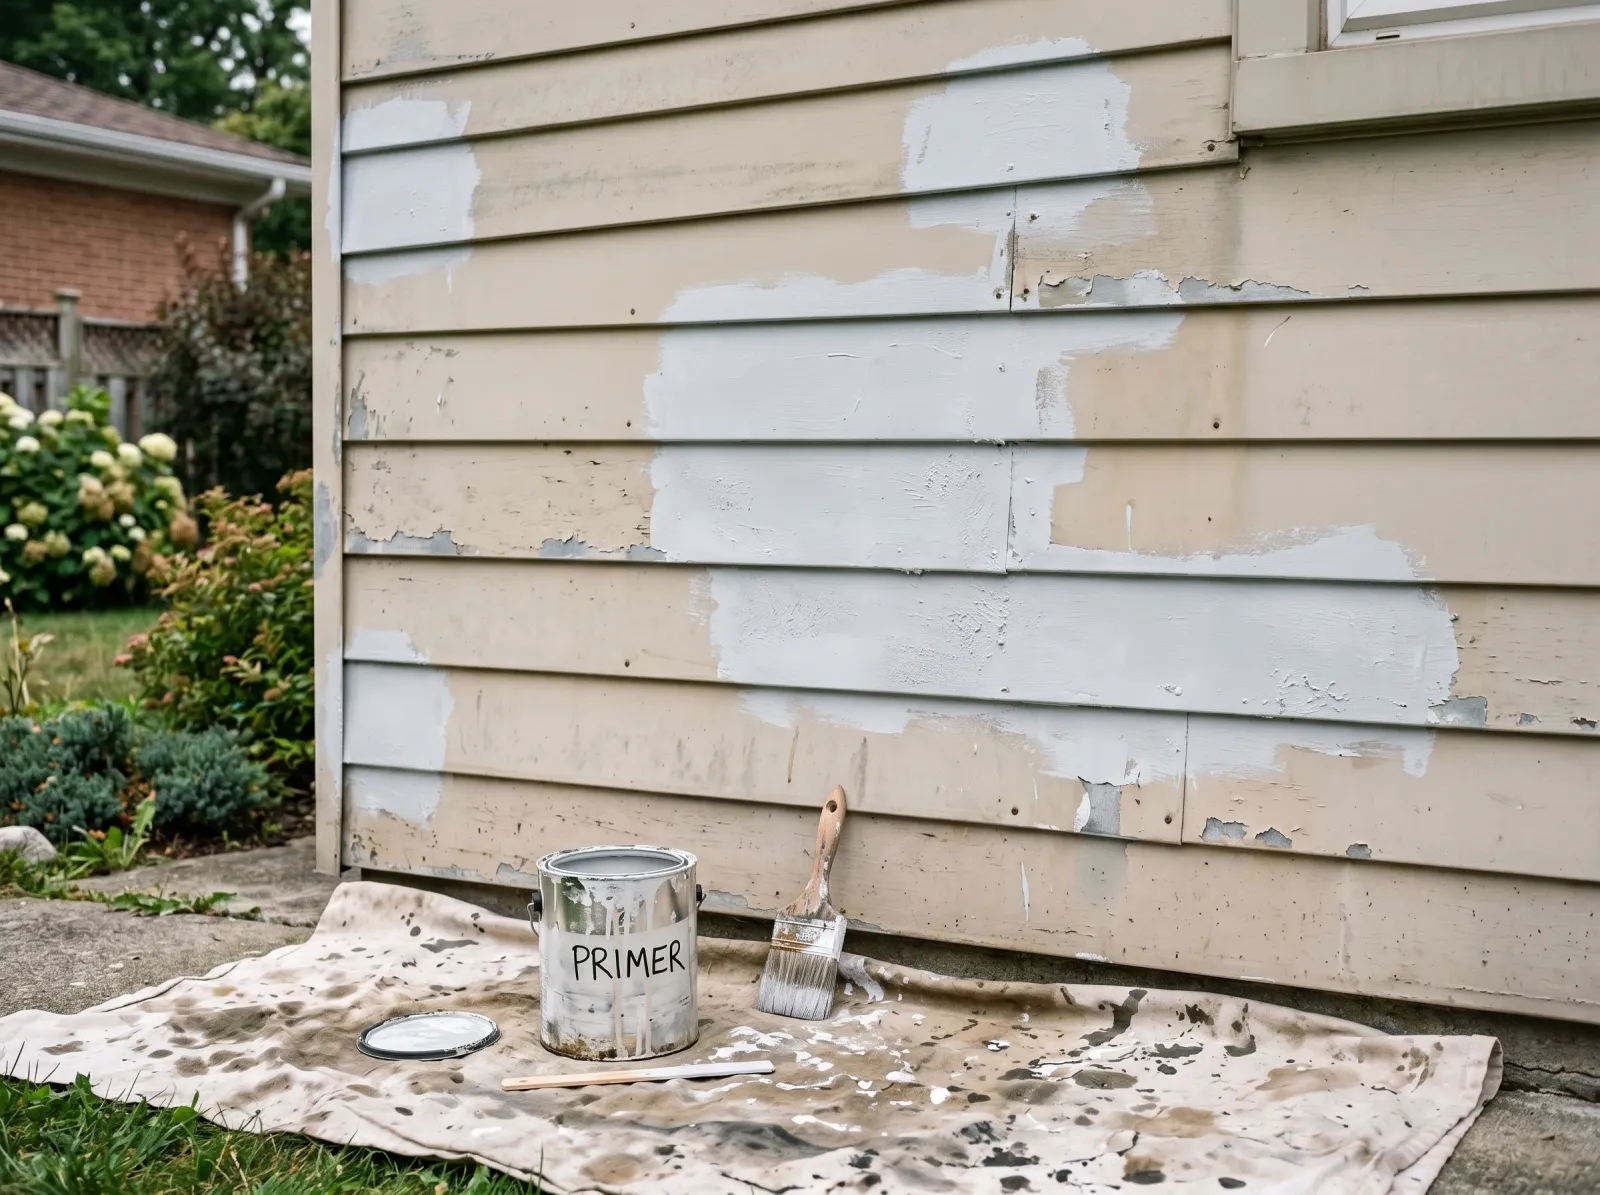
Step 1 — Wash the Whole House and Run the Chalk Test
 Washed down, rinsed, and ready for the chalk test once it dries.
Mix a TSP substitute or a dedicated siding wash in the pump sprayer. Wet the siding from the bottom up (top-down leaves streaks in dry chalk), scrub with the pole brush, then rinse with the pressure washer held back from the panel at a wide angle. Don’t blast straight in. Aluminum dents and water drives up behind the laps.
Let it dry a full day. Then wipe a dark cloth or your bare palm across the siding. Powder on the cloth means chalk is still there. Wash again. No powder means you’re ready.
Watch out for chalk hiding under the lap shadows where the wash water didn’t reach. Check the bottom edge of each course, not just the flat face.
Step 2 — Scuff, Caulk, and Spot-Prime
 Bare and glossy spots primed, rust converted, caulk gaps sealed before any topcoat.
Scuff any glossy patches with a maroon abrasive pad so the primer has a tooth to grab. Where old paint has peeled to bare metal, the bare spot gets bonding primer. Any steel fastener or accessory showing rust gets a rust-converting primer first, because rust will bleed through acrylic and stain your new color.
Run a bead of exterior acrylic caulk into the gaps where siding meets trim, corner boards, and J-channel. Don’t caulk the lap joints themselves. Those need to breathe and drain.
Watch out for caulking the weep gaps shut. Sealing the bottom of the laps traps water behind the panel, and trapped water is how a good paint job fails from the inside.
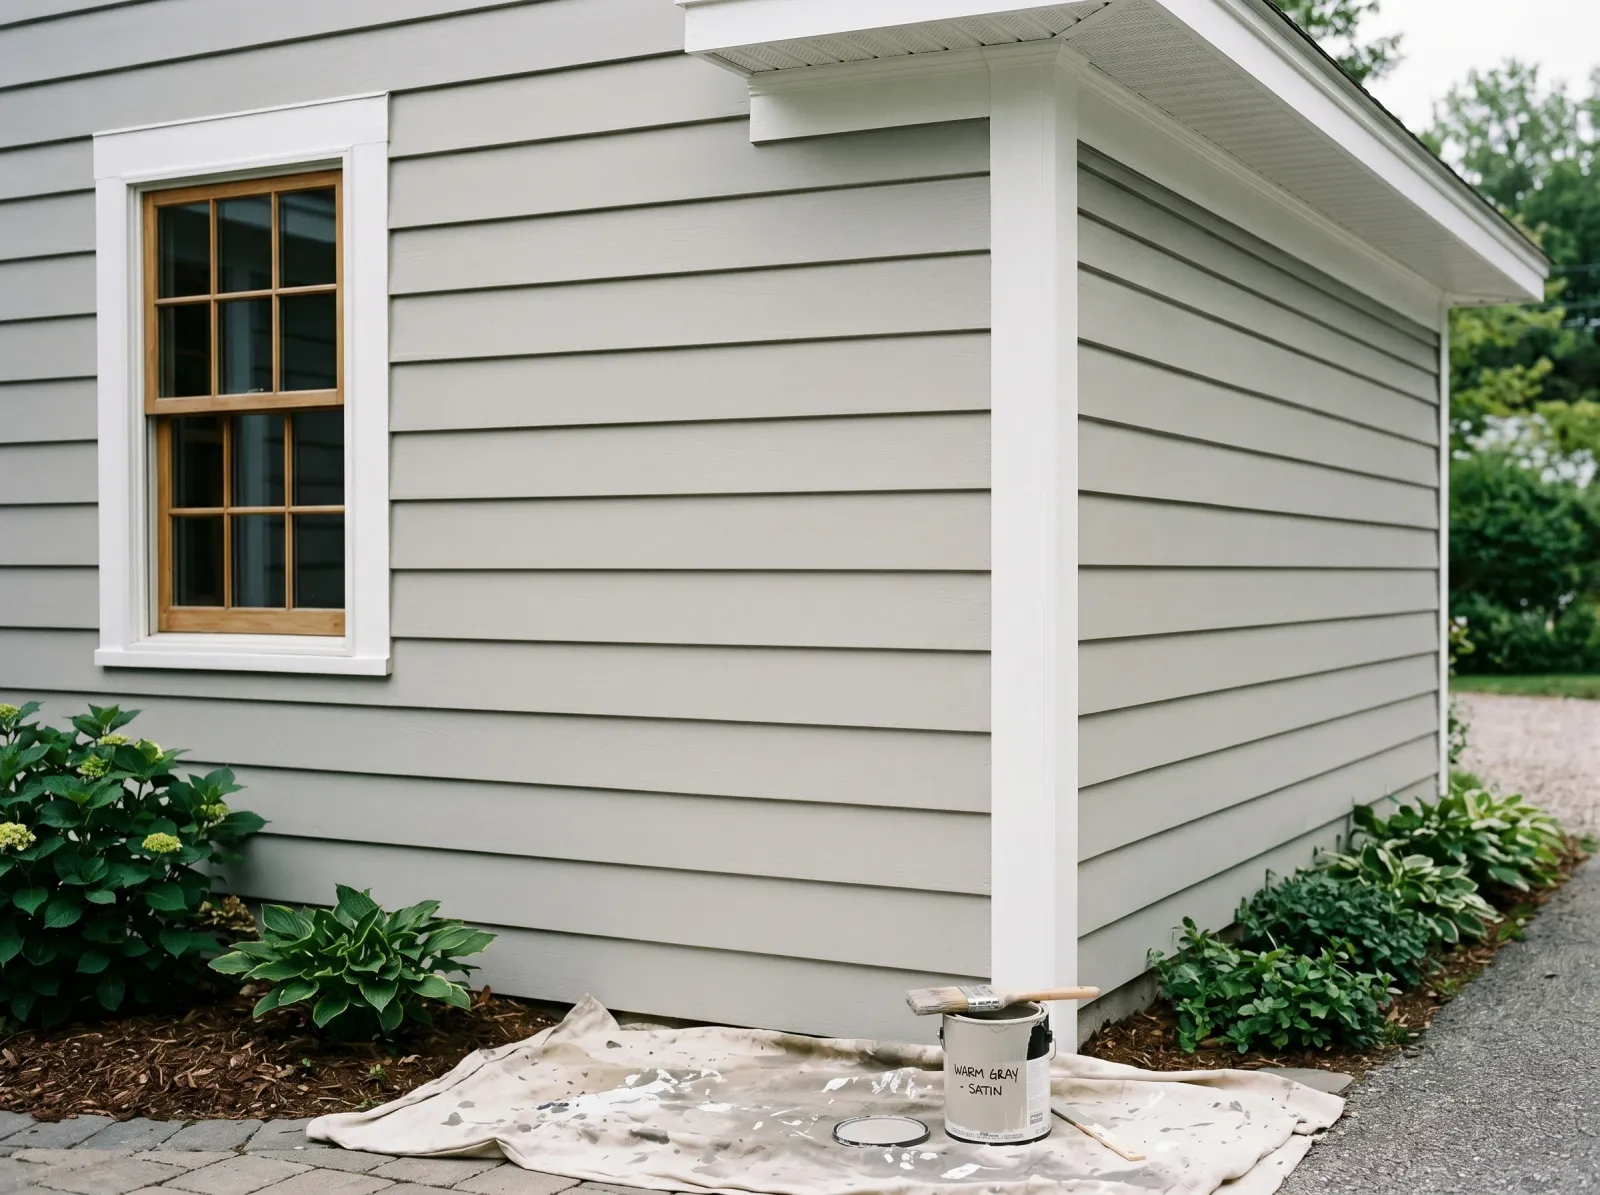
Step 3 — Spray and Back-Brush the First Coat
 First coat sprayed in even passes, then back-brushed into every lap groove.
Pick a still, dry, overcast day or work the shaded side. Paint baking in direct sun flashes before you can back-brush it, and that’s how you get lap marks. Mask the windows and trim, set your drop cloths, and check the forecast for no rain in the next 24 hours.
Spray in even horizontal passes, keeping the gun parallel to the wall and feathering the edge of each pass into the last. Then take the 4-inch brush and back-brush while it’s still wet. Back-brushing drives the paint into the lap grooves and the texture so it grips the metal instead of sitting on top as a skin. This is the step that buys you the extra ten years.
Watch out for spraying alone in wind. Overspray drifts onto cars and the neighbor’s house faster than you’d believe. If it’s gusting, switch to brush and roll.
Step 4 — Second Coat and Cut In the Trim
 Even second coat down, then the trim and corner boards cut in by brush in the contrast color.
Let the first coat dry the time on the can, usually 4 hours at 70°F and longer if it’s humid. Then lay the second coat the same way: spray, back-brush, keep a wet edge, don’t stop in the middle of a wall. Two coats. Always two coats. One-coat coverage on faded metal is a fairy tale the can tells you.
Once the field is done, cut in the trim, corner boards, and J-channel by brush in the contrast color with the 2.5-inch angled sash. Brush the gutters and downspouts too if they’re aluminum and need it; same paint, same prep.
Watch out for recoating too soon in cool or damp weather. Acrylic needs the first coat to set before the second goes on, or the brush drags it up and you get a streaky mess.
Spray or Brush? Pick Before You Start
| Method | Best for | Speed | Catch |
|---|---|---|---|
| Spray + back-brush | Two-story, full house | Fast | Needs a sprayer, masking, and a calm day |
| Brush and roll | One-story, tight to neighbors | Slow | Back-brushing is built in; no overspray risk |
Spray-only with no back-brush is the one method I’d steer you away from. It looks great the day you finish and lets go early, because the paint never worked its way into the metal.
Common Mistakes
- Painting over chalk. The single most common failure on these houses. The new coat peels in sheets by the second summer. Wash, dry, wipe-test, and only then paint.
- Skipping primer on bare metal. Raw aluminum is slick. Acrylic slides off it within a year. Spot-prime every bare patch with a bonding primer, no exceptions.
- Using vinyl-safe or oil paint. Vinyl-safe formulas are tuned for vinyl, and oil goes brittle and cracks along the laps as the metal moves. 100% acrylic latex is the answer.
- Caulking the weep gaps. Sealing the bottom of the laps traps water behind the panel. The paint job fails from behind. Caulk the trim joints, leave the laps open.
- Spraying without back-brushing. Paint sits on the surface as a skin and releases early. Back-brush every pass, even on the second coat.
- Going five shades darker. Dark colors run hotter, the metal expands harder, and cheap paint checks. If you want dark, buy the best acrylic and accept that the south wall fades first.
Cure Schedule
| Time after final coat | What’s safe |
|---|---|
| 4 hours | Touch dry; don’t lean a ladder on it |
| 24 hours | Pull tape, light rain won’t hurt it |
| 7 days | Hose-rinse dust off gently |
| 30 days | Full cure; scrub stains, full weathering resistance |
Cure time stretches in cool or humid weather. A 55°F damp October day can double these numbers. Read the can and trust the slower figure.
Maintenance and Touch-Ups
A 100% acrylic coat on properly prepped aluminum holds for 12 to 15 years before it needs another go. The south and west sides fade first because that’s where the sun lives. Expect to see it there before the north side shows anything.
Rinse the house with a garden hose once a year to keep grime and the start of new chalk off the finish. For a scratch or a ding, sand the spot, spot-prime the bare metal, and dab your leftover paint with a small brush. Keep a quart labeled with the color name and code from the lid; you’ll want it for the touch-ups.
If you start seeing peeling before year five, the prep failed somewhere, usually chalk that didn’t come off. See how to fix peeling paint for the diagnosis before you repaint the whole wall.
Cost Breakdown
| Item | $ |
|---|---|
| Acrylic exterior paint, 8 gallons (average house, two coats) | $320 |
| Bonding primer, 1–2 gallons (spot work) | $70 |
| Wash, caulk, masking, drop cloths | $60 |
| Sprayer rental (weekend) | $80 |
| Brushes, roller, sleeves | $40 |
| Total | $570 |
That’s mid-to-top-shelf acrylic on an average two-story house. A small one-story with cheaper paint runs closer to $250. New aluminum or vinyl siding on the same house is $10,000 and up, which is the whole reason you’re painting.
FAQ
Can you paint aluminum siding? Yes, and it takes paint well. The metal under the faded finish is almost always sound. The job lives or dies on the wash and the chalk test.
Do I need to prime the whole house? No. Sound chalk-free siding takes acrylic directly. Spot-prime bare metal, glossy patches, and failed spots with a bonding primer.
What paint goes on aluminum siding? 100% acrylic exterior latex in satin or low-luster. Not vinyl-safe, not oil.
Spray or brush? Spray and back-brush for speed on a big house. Brush and roll for a one-story tight to the neighbors.