How to Paint Porch Railings
Painting porch railings the right way: how to strip the flaking old finish, prime bare spots, and pick a finish that survives sun and weather for years.

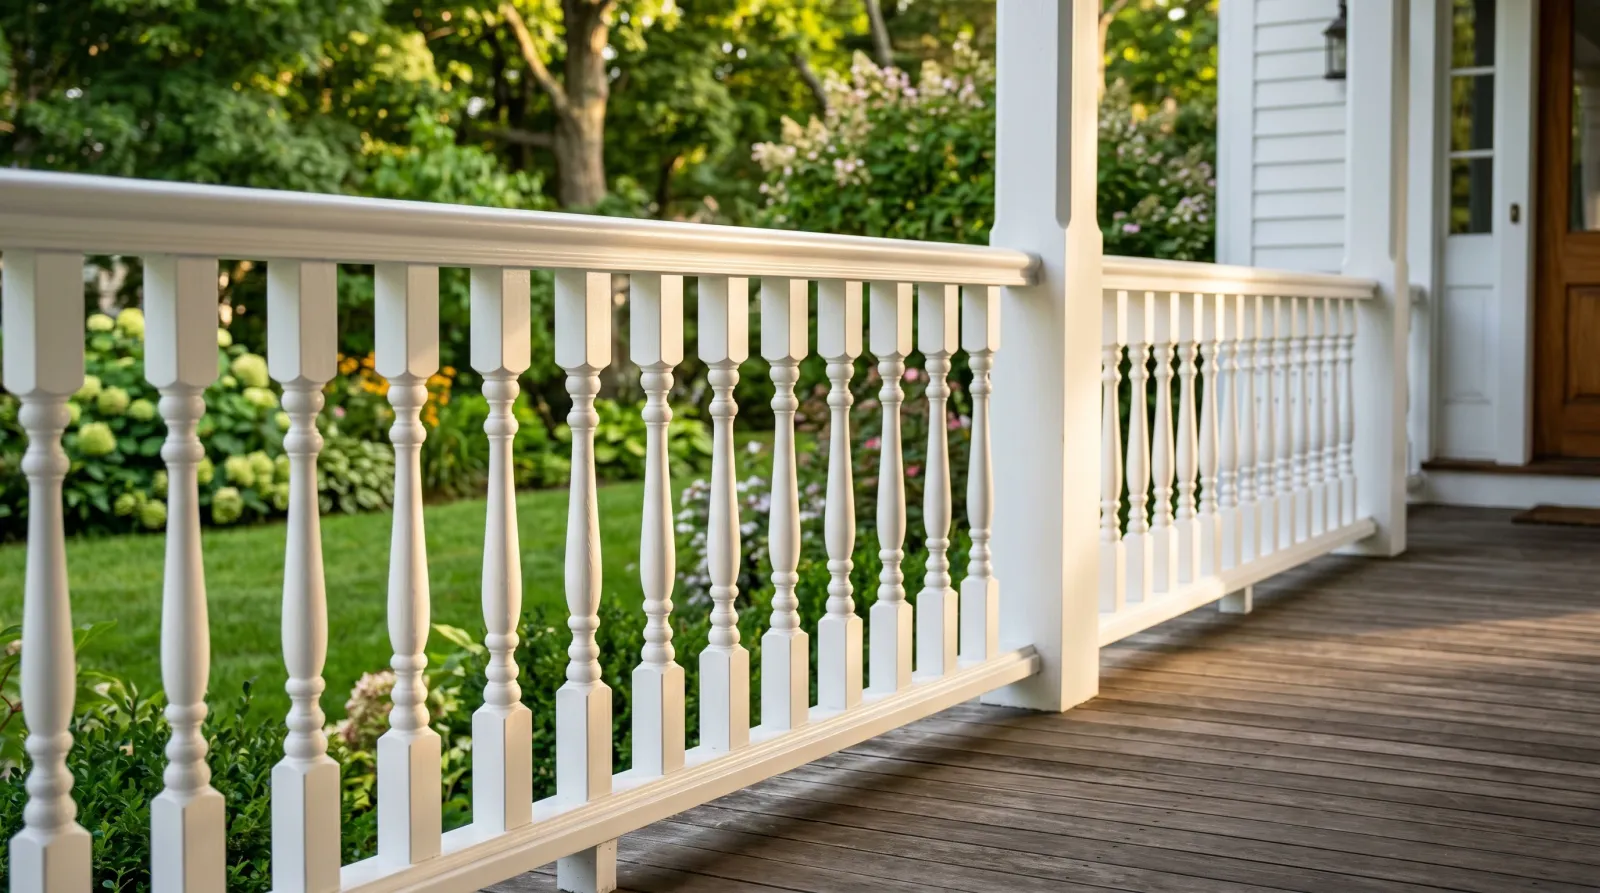
Porch railings are the worst-painted thing on most houses. Not because they’re hard. Because everybody rushes them. You can see the whole railing from the sidewalk, the sun hits it all day, and people’s hands rub it every time they climb the steps. So it fails fast, and a fast-failing paint job looks worse than no paint at all.
Here’s the rule: a railing lives outside and gets touched. That means scrape what’s loose, prime what’s bare, and use a real exterior enamel. Skip any of those and you’ll be back up here next spring scraping again.
What You’ll Get
A railing that looks crisp from the curb and holds up for five-plus years instead of peeling by next summer. One weekend of work, then a week of dry days to cure.
Honest Take on Difficulty and Time
The painting is easy. The prep is the job. On an average front porch railing — two runs of rail, twenty or thirty balusters, a couple of posts — figure half a day scraping and sanding, an hour priming, and most of a second day for two brushed coats. The balusters eat time. Every spindle has four sides and a bunch of curves, and you have to hit all of them.
Weather is the other variable. You need two dry, mild days back to back, and ideally a dry week after. Paint a railing in the morning dew or before a rainstorm and the finish never cures right. If you’re brushing in full afternoon sun on a south-facing rail, the paint skins over before you can level it and you get lap marks. Work in the shade, or follow the shade around the porch.
What You’ll Need
Paint and Primer
A gallon of 100% acrylic exterior enamel in satin or semi-gloss. Acrylic flexes when the wood swells and shrinks with the seasons; it won’t crack the way a hard oil enamel does outdoors. Satin and semi-gloss shed water and wipe clean. Flat holds dirt and you can’t scrub a flat railing without burnishing it. For SKU picks, see the best exterior paint round-up, and the sheen guide if you’re stuck between satin and semi-gloss.
Don’t use interior trim paint outside. It looks identical in the can. It chalks and fails in one season of UV and freeze-thaw.
Primer is spot-only. An exterior primer (Zinsser Cover Stain for bare wood and stain bleed, KILZ Adhesion for slick old finishes that won’t take paint) goes on the bare patches and nothing else. Sound old paint gets scuffed and painted over.
Tools
A 2.5-inch angled sash brush for the rails and posts, a 1.5-inch angled brush for the gaps between balusters, a 5-in-1 tool and putty knife for scraping, sandpaper, exterior caulk, and drop cloths. Lay a tarp over any shrubs or flower beds under the railing. Paint kills plants and scraped lead-paint chips don’t belong in the dirt.
The brush is where you don’t cheap out. A good Purdy or Wooster holds a clean edge against a baluster all day. A bargain brush sheds bristles into your finish and you’ll be picking them out with tweezers. Picks live in the best paint brushes round-up.
Step 1 — Scrape and Sand
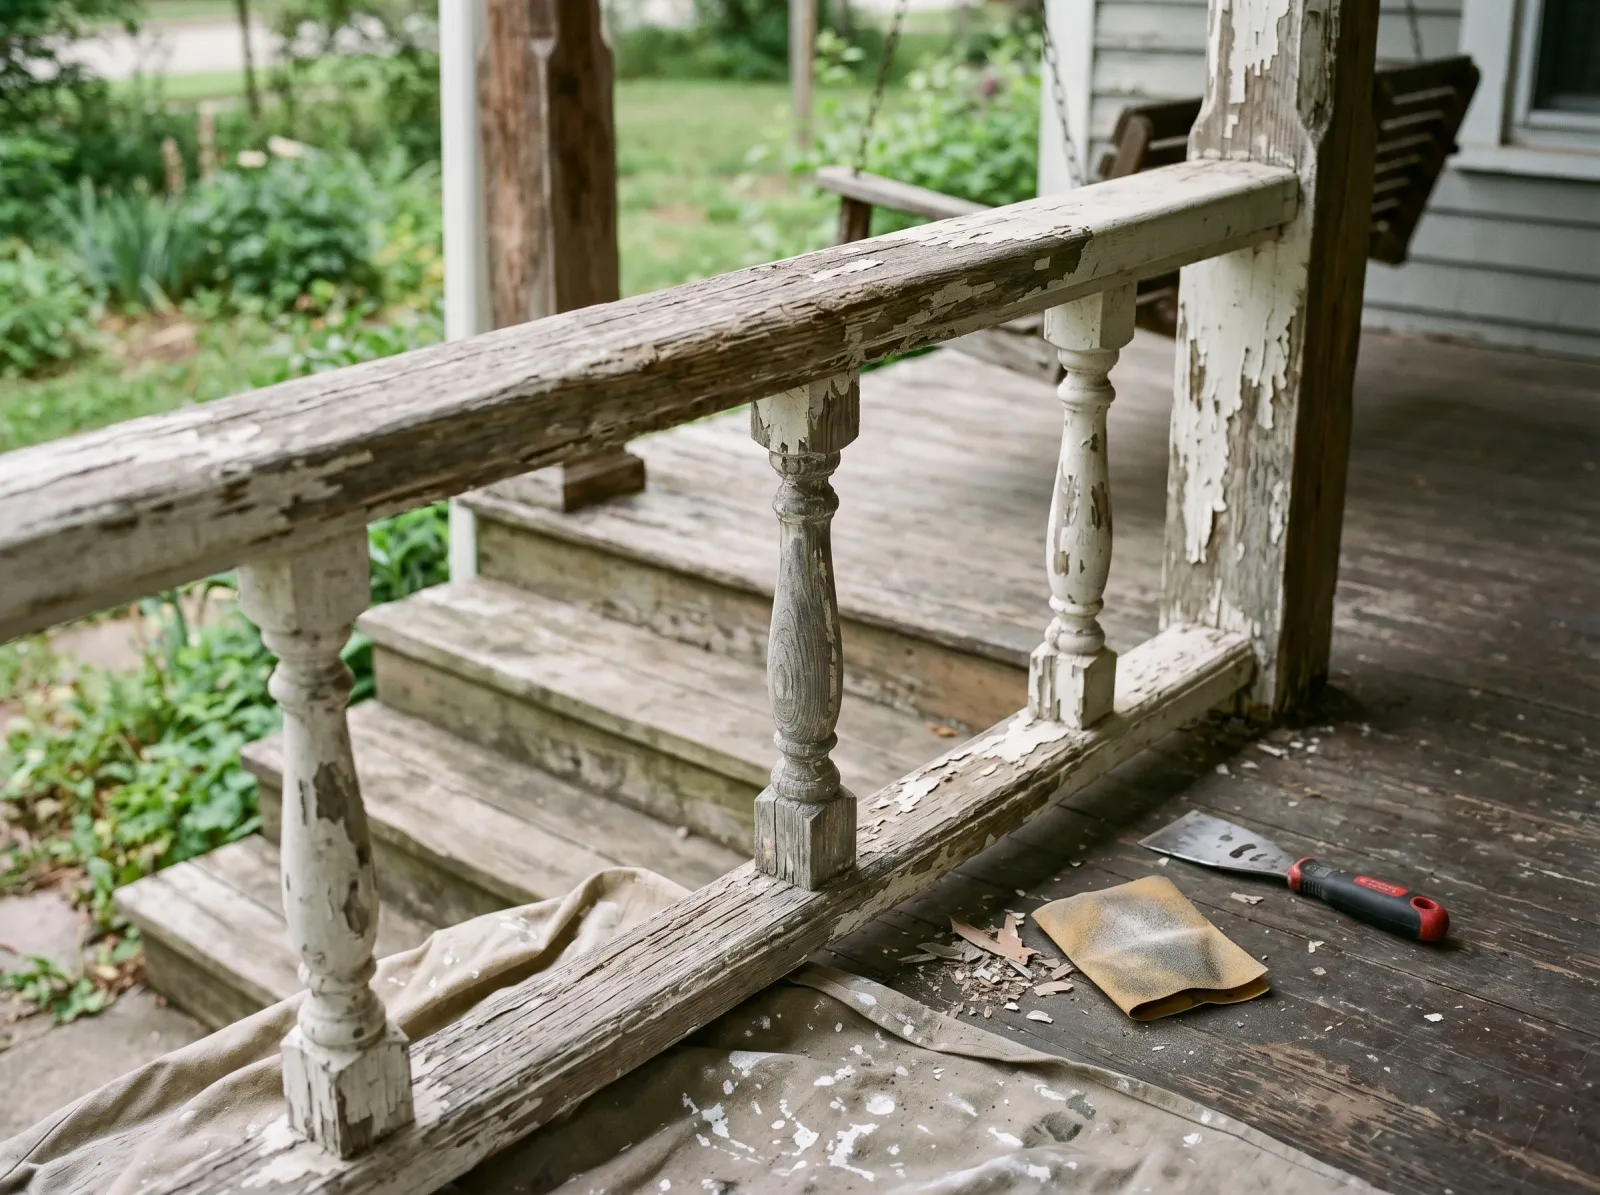 Scrape every flaking edge back to paint that’s stuck tight. You don’t have to go to bare wood everywhere, just remove what’s failing.
Run the 5-in-1 tool under every lifted edge. Anything that flakes off with light pressure was going to take your new paint with it, so get it now. You don’t have to strip the whole railing to bare wood. You have to remove everything that isn’t bonded tight.
Where you scraped down to wood, you’ve left a ridge between bare wood and old paint. Feather-sand that ridge with 80-grit so it’s not a hard step, then smooth it with 120. Scuff the rest of the sound paint with the 120 or a sanding sponge so the new coat has tooth to grab. Glossy old paint that you skip sanding is the number-one reason a recoat peels.
Watch out for lead paint on anything built before 1978. Don’t dry-sand it. Mist it with water, scrape wet, and bag the chips. A lead test kit from the hardware store costs a few bucks and tells you in minutes.
Step 2 — Fill, Caulk, and Prime
 Spot-prime the bare wood, fill the splits, and caulk the gaps where balusters meet the rail. Sound paint stays untouched.
Press exterior wood filler into any gouges and split baluster ends. Soft, punky wood needs a two-part epoxy like Abatron, not regular filler — filler over rot just falls out next year. Let it cure, then sand flush.
Caulk the seam where each baluster meets the top and bottom rail with a paintable exterior caulk. Water sits in those joints and rots the wood from the inside. Caulk keeps it out.
Now spot-prime. Brush exterior primer onto the bare-wood patches and any spot where old stain or a knot might bleed through. Bare wood drinks up the first finish coat unevenly and that’s exactly where the paint peels first. Sound, dull old paint doesn’t need primer. For the deeper version of priming weathered exterior wood, see the exterior wood guide.
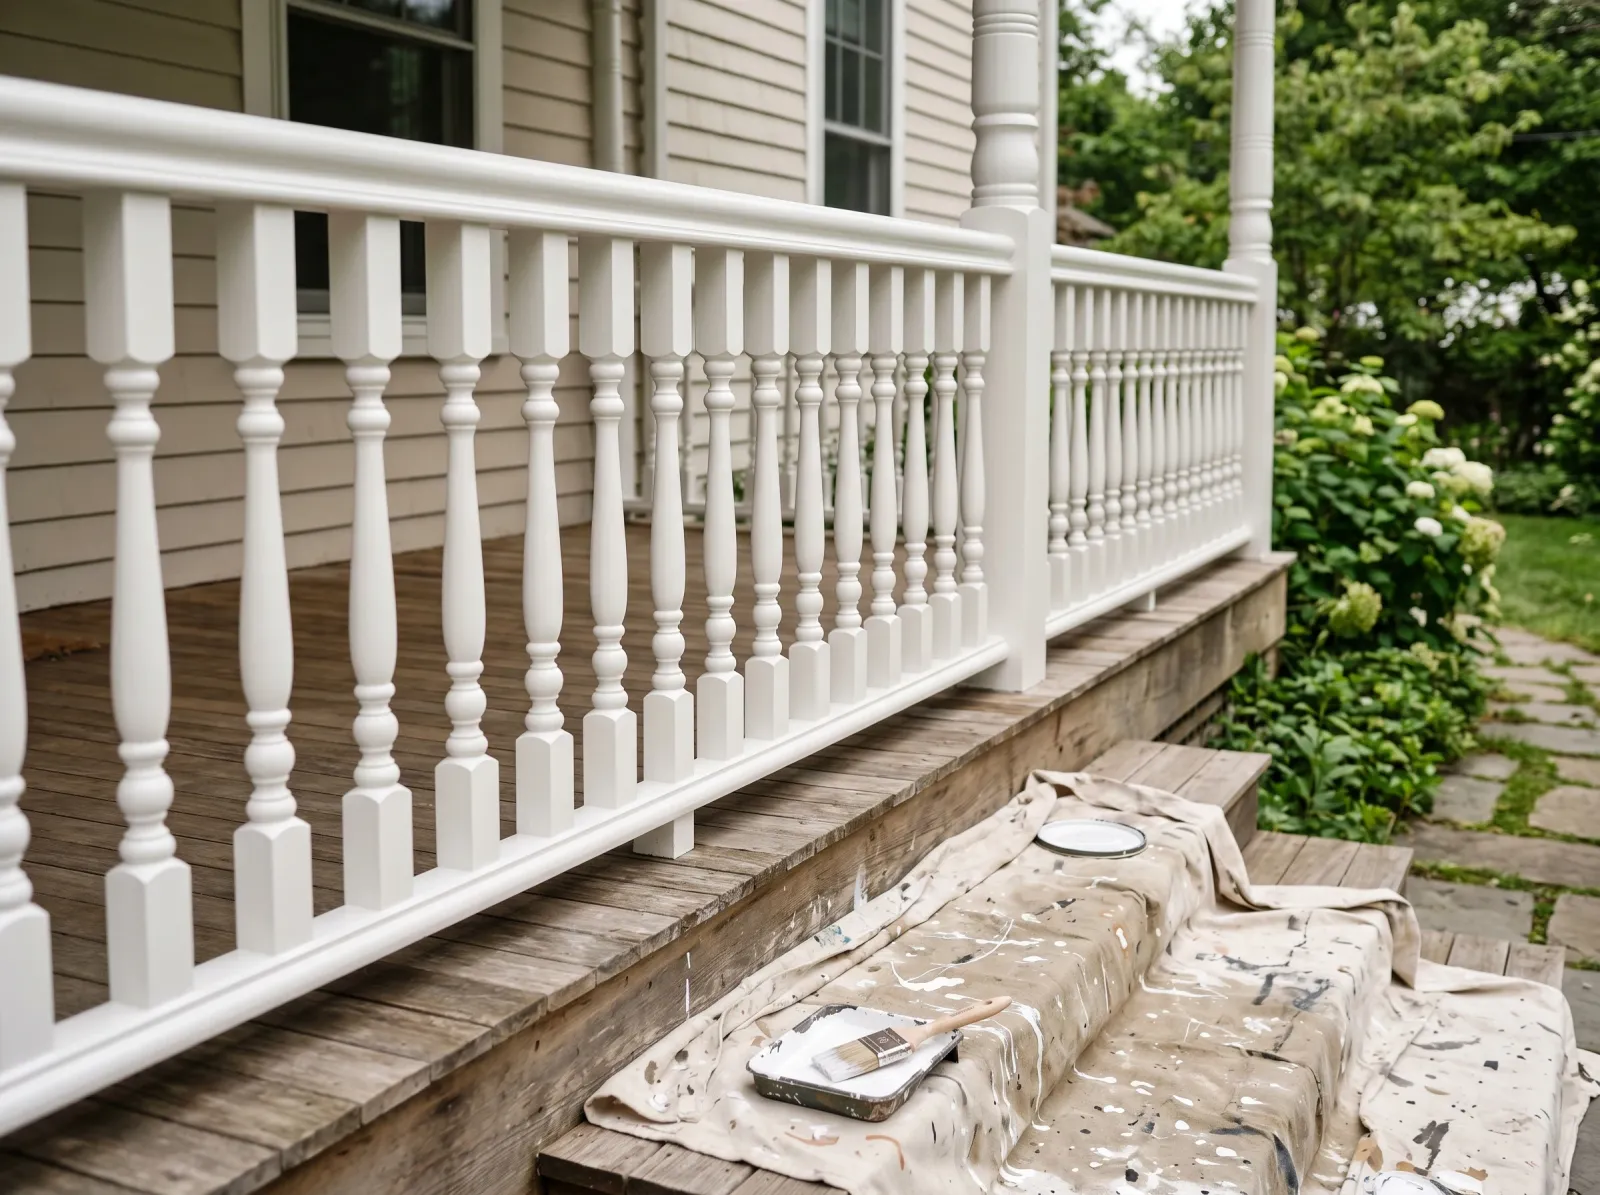
Step 3 — First Coat
 First coat goes on thin and even. Work the top rail first, then down the balusters, so any drips get caught on the way down.
Stir the paint, don’t shake it. Dip the brush a third of the way in. Start at the top rail, then the posts, then work down each baluster, hitting all four faces and the curves. Brush in the direction of the grain, long strokes on the rails, short controlled strokes on the spindles.
Keep the coat thin. Exterior enamel wants two thin coats, not one thick one. A thick coat sags on the vertical balusters and never cures as hard. Thin coats flash off fast and build a tougher film.
Watch out for drips and runs on the underside of the top rail and at the bottom of each baluster. Paint pools there. Check every few minutes for the first half hour and brush out any run while it’s still wet. A dry run has to be sanded flat and recoated.
Step 4 — Second Coat
 Second coat brings full color and a film thick enough to shed water for years. Check every baluster for runs before you walk away.
Let the first coat dry the time on the can, usually 4 to 6 hours for exterior acrylic in mild weather. Longer if it’s humid. Then go again, same order: rail, posts, balusters.
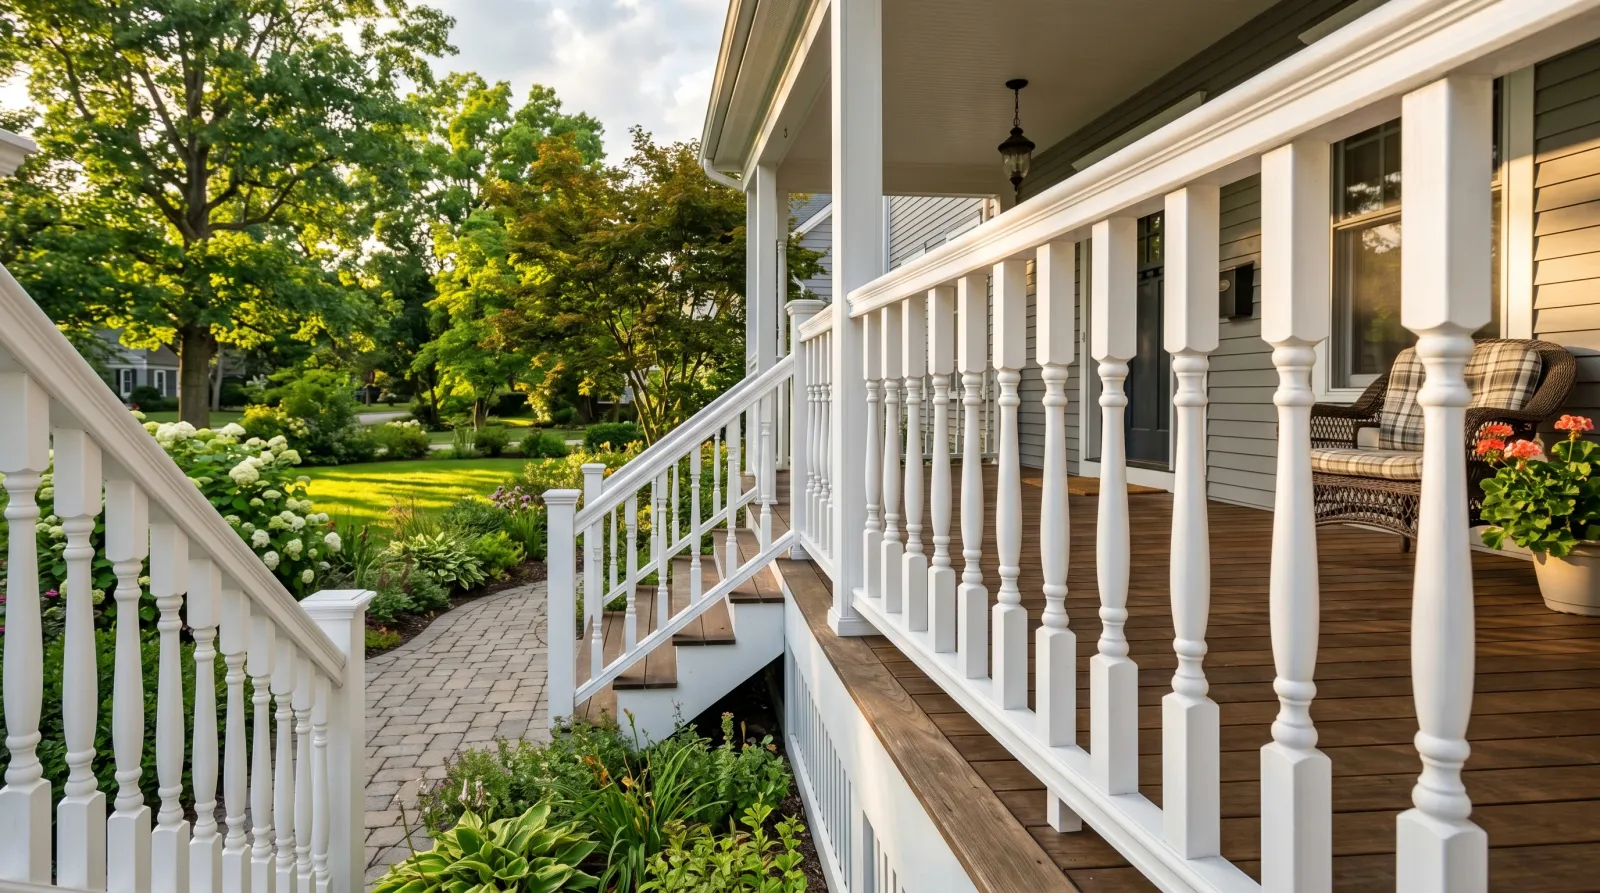
The second coat is what makes a railing last. One coat looks done and fails in two years because the film is too thin where water hits it. Two coats build the mil thickness that sheds rain off the top rail and the post caps. Those horizontal surfaces are where every railing fails first, so don’t starve them.
Work the shade. Brushing a south rail in direct sun makes the paint skin before you can level it, and you’ll see lap marks the first morning the low sun rakes across it.
Step 5 — Pull Tape and Cure
 Tape off, drop cloths gone, dry to the touch. Give it a week of dry weather before it’s back to taking real hand traffic.
Pull any tape while the last coat is still slightly tacky, not bone dry, at a 45-degree angle. Dry paint can chip along the tape line. Take up the drop cloths and uncover the shrubs.
The railing is dry to the touch in a few hours. It isn’t cured. Don’t lean on it, don’t let the dog brush past it, and pray no rain hits it for the first 24 hours. Full cure takes about two weeks of dry weather, and that’s when the finish reaches its real hardness and water resistance.
Common Mistakes
- Painting over loose paint. New paint can’t stick to old paint that’s already letting go. It peels with it inside a year. Scrape everything that flakes, every time.
- Skipping the spot-prime on bare wood. Bare wood soaks up the finish unevenly and peels there first. It costs ten minutes to prime the patches. Do it.
- Using interior trim paint outside. Looks the same in the can, chalks and cracks in one season of sun. Buy exterior enamel.
- One coat to save time. The film is too thin on the top rail where water sits, and that’s where it fails. Two thin coats, always.
- Brushing in full sun. The paint skins before it levels and you get lap marks. Follow the shade around the porch.
- Ignoring the joints. Uncaulked baluster-to-rail seams hold water and rot the wood from the inside. Caulk them before you paint.
Cure Schedule
| Time after the second coat | What’s safe |
|---|---|
| 1 hour | Pull the tape |
| 4 hours | Touch dry, don’t lean on it |
| 24 hours | Light hand use, keep it out of the rain |
| 7 days | Normal hand traffic |
| 14–30 days | Full cure, full water resistance |
Maintenance and Touch-Ups
A brushed exterior enamel on a railing holds for five to eight years before it needs a full repaint. The top rail and post caps go first because water sits on them, so check those at year three or four. A quick scuff-sand and a fresh coat on just the horizontal surfaces buys the rest of the railing several more years.
For a chip, scrape the loose edge, sand it smooth, spot-prime the bare wood, and dab on your leftover paint with a small brush. Keep a labeled quart in the garage so the color matches when you do. A railing that catches a lot of sun fades a little every year; if the touch-up reads brighter than the rail, that’s why.
Cost Breakdown
| Item | $ |
|---|---|
| Exterior enamel, 1 gallon satin | $55 |
| Exterior primer, 1 quart | $18 |
| Wood filler / epoxy, caulk | $25 |
| Brushes (2.5-inch and 1.5-inch) | $30 |
| Sandpaper, drop cloths, tape | $20 |
| Total | $148 |
Mid-tier paint (Behr Marquee) runs the gallon around $50. Top-shelf (BM Aura Exterior, SW Emerald) closer to $80, and on a railing that bakes in the sun it’s worth the jump.
What’ll bite you in two years: the top rail. Everybody coats the faces of the balusters twice and gives the flat top one quick pass. Water pools on that flat, works into the film, and the top rail starts checking and peeling while the spindles still look fine. Hit the top rail like it’s the only part that matters, because outdoors, it nearly is.