How to Fix Cracks in Stucco
Diagnose hairline, map, and structural cracks in stucco, then caulk, patch, and recoat so they hold. The honest fix from a 22-year contractor, with prevention.

Cracks in stucco are normal. Stucco is cement, and cement shrinks as it cures and moves with the weather. Most of what you’re looking at is cosmetic. The trick is telling the harmless hairlines from the ones that mean water is getting behind the wall, then filling each kind with the right material so it doesn’t open right back up.
TL;DR
- Hairline cracks (thinner than a business card) are shrinkage. Brush clean, fill with elastomeric crack filler or just bridge them with elastomeric paint.
- Medium cracks (up to 1/4-inch) get a flexible urethane or elastomeric sealant, textured to match, then painted.
- Wide or diagonal cracks (over 1/4-inch, or running off a window corner) can be structural. Stop and get an engineer before you patch.
- Caulk flexes, patch dries hard. Moving cracks get flexible sealant. Broken-away chunks get rigid stucco patch.
- Cement-based repairs need 28 days to cure or a high-pH masonry primer, or the paint burns and peels.
- Always topcoat with elastomeric paint on a cracked wall. Rigid flat paint cracks again the first cold night.
Does This Match What You’re Seeing?
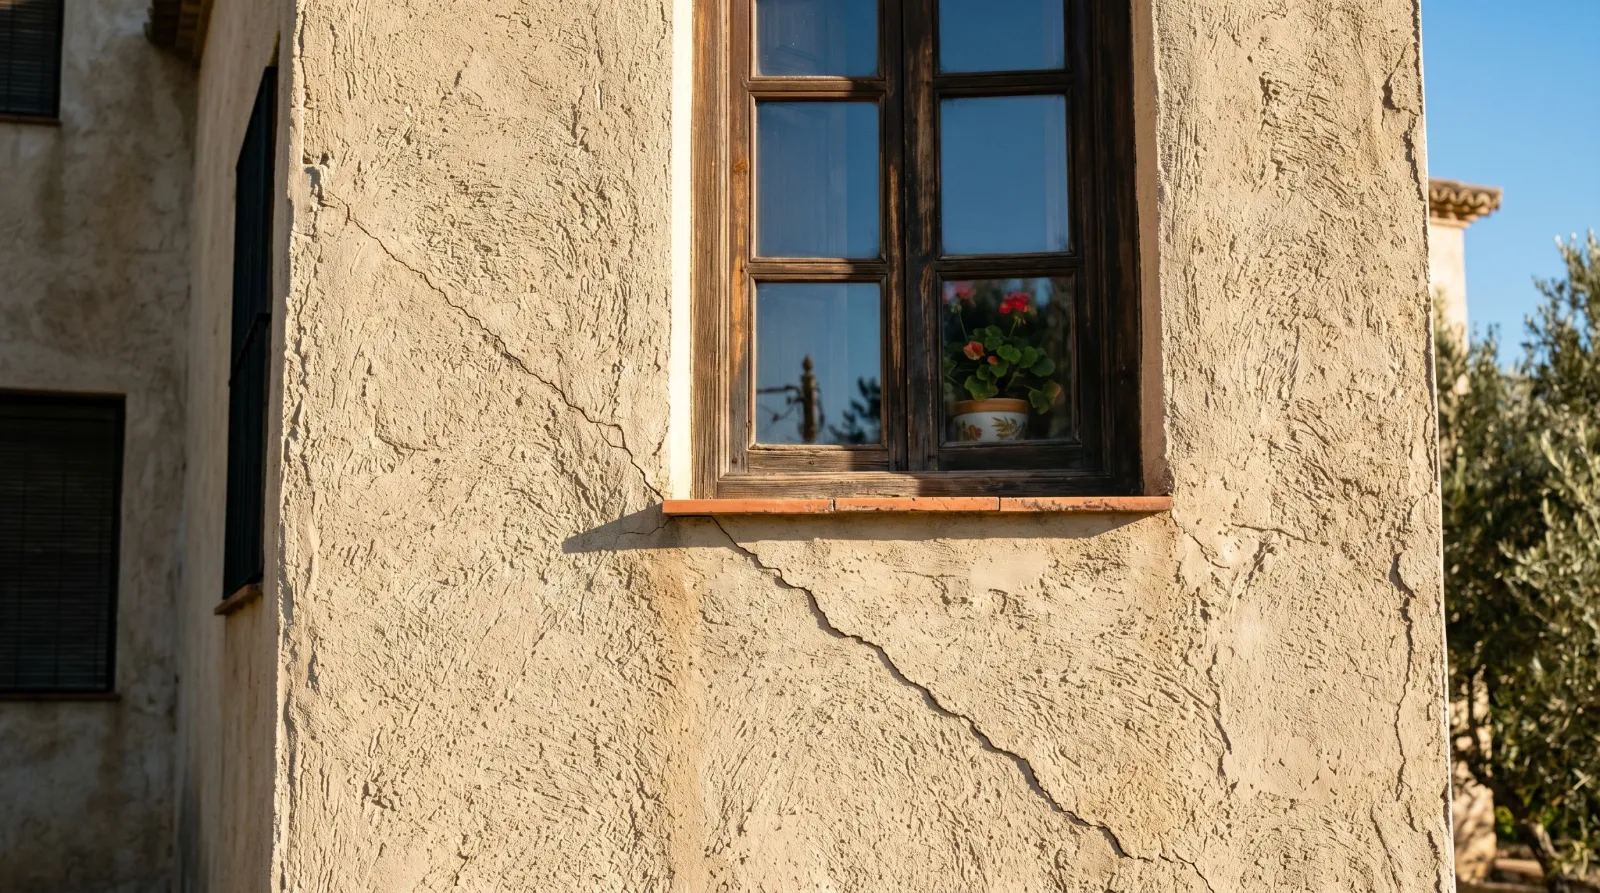
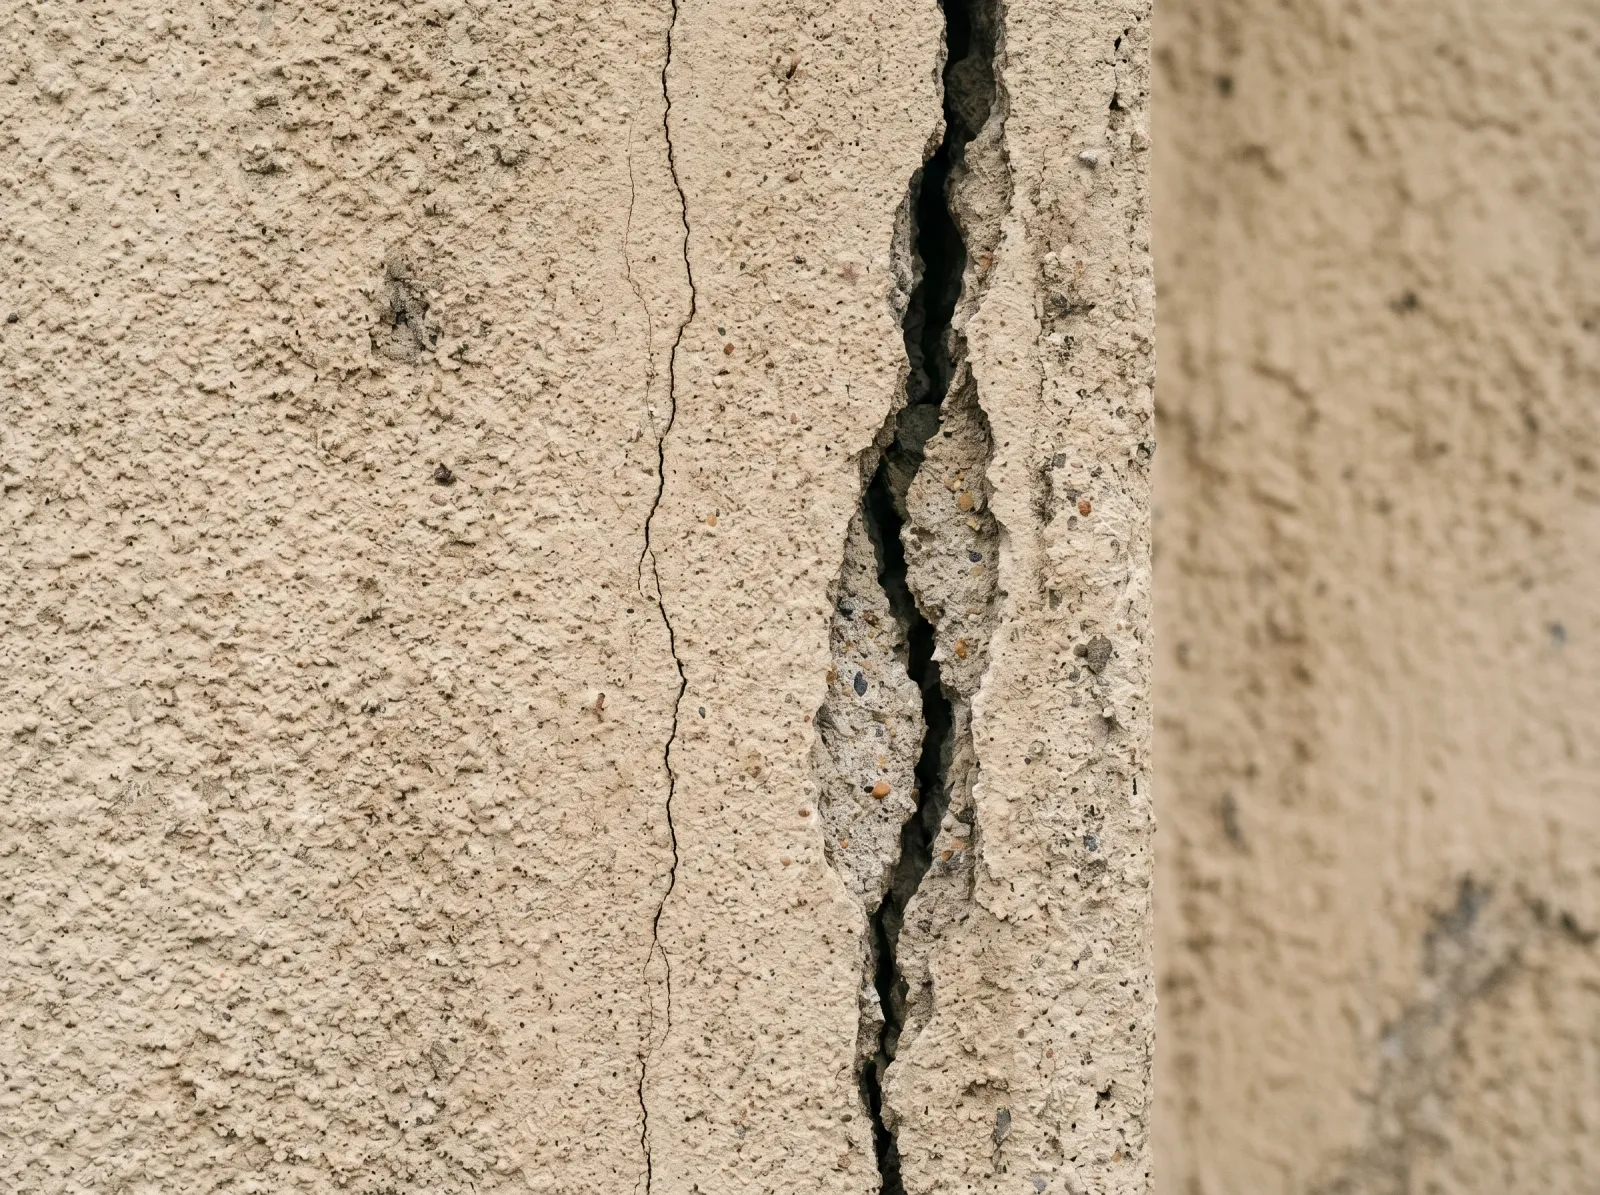 Hairline shrinkage on the left, a wider working crack on the right. Same wall, two different fixes.
The width and the pattern tell you almost everything. Look before you reach for a tube of caulk.
- Fine spider-web pattern over a whole panel: map cracking. Surface shrinkage as the stucco cured. Cosmetic, almost always.
- Single hairline you can barely catch a fingernail in: shrinkage or thermal movement. Cosmetic.
- Crack running straight off a window or door corner: stress crack. The opening concentrates wall movement at the corner. Usually fine, sometimes an early sign of settling.
- Diagonal crack wider than 1/4-inch, or a stair-step pattern: possible structural movement. Gets an engineer, not a caulk gun.
- Crack with one side proud of the other (a lip you can feel): the wall has shifted. Structural until proven otherwise.
- Brown or rust staining bleeding out of the crack: the metal lath behind the stucco is rusting. Water’s getting in. Fix the water first.
- White powder around the crack: efflorescence, not a crack problem on its own. See how to fix efflorescence on brick; the cause and cure are the same on stucco.
If the pattern doesn’t match cleanly, measure the widest point. Width is the single best clue you have.
How Serious Is This?
Most stucco cracks are a same-weekend cosmetic fix. Three things push the job to high severity and out of DIY range.
- Width over 1/4-inch on a diagonal. Wide enough to suggest the wall is moving, not just shrinking.
- A crack that keeps growing. Mark each end with a pencil and a date. Longer in a month means something underneath is still moving.
- Rust staining or soft, bulging stucco. Water is behind the wall and the lath is corroding. Patching the face traps it and the damage spreads.
A hairline on a stable wall is the easiest exterior repair there is. A widening diagonal off the corner of your house is a phone call to an engineer. Know which one you’ve got before you spend a dollar.
Why This Is Happening (root Cause)
Stucco cracks for four reasons, and they stack.
Shrinkage. Traditional three-coat stucco is portland cement. As it cures over the first year, it shrinks, and shrinkage cracks. Most common cause, least concerning. New stucco that develops fine cracking in its first season is doing what cement does.
Building movement. Houses move. Framing swells with humidity, the structure settles, the ground heaves in a freeze. Stucco is rigid and bonded to that moving frame, so it cracks at the weak points: window corners, door corners, floor lines, and panel joints. I see these every spring on the sun-and-shade corners of a house.
Water and rust. Behind the stucco is metal lath. If water gets in through a failed crack, bad flashing, or a clogged weep screed, the lath rusts. Rust expands, and expanding rust cracks the stucco from behind. That’s the staining-crack you don’t ignore. The water is the disease; the crack is the symptom.
Bad original work. Stucco mixed too wet, troweled too thin, or installed without control joints cracks early and often. You can’t fix the mix after the fact. You can only manage the cracks it produces.
Press a fingernail into the crack and run it along the length. Same width end to end is usually shrinkage. One that tapers, or has a lip, is movement.
The Fix
Step 1. Clean and Open the Crack
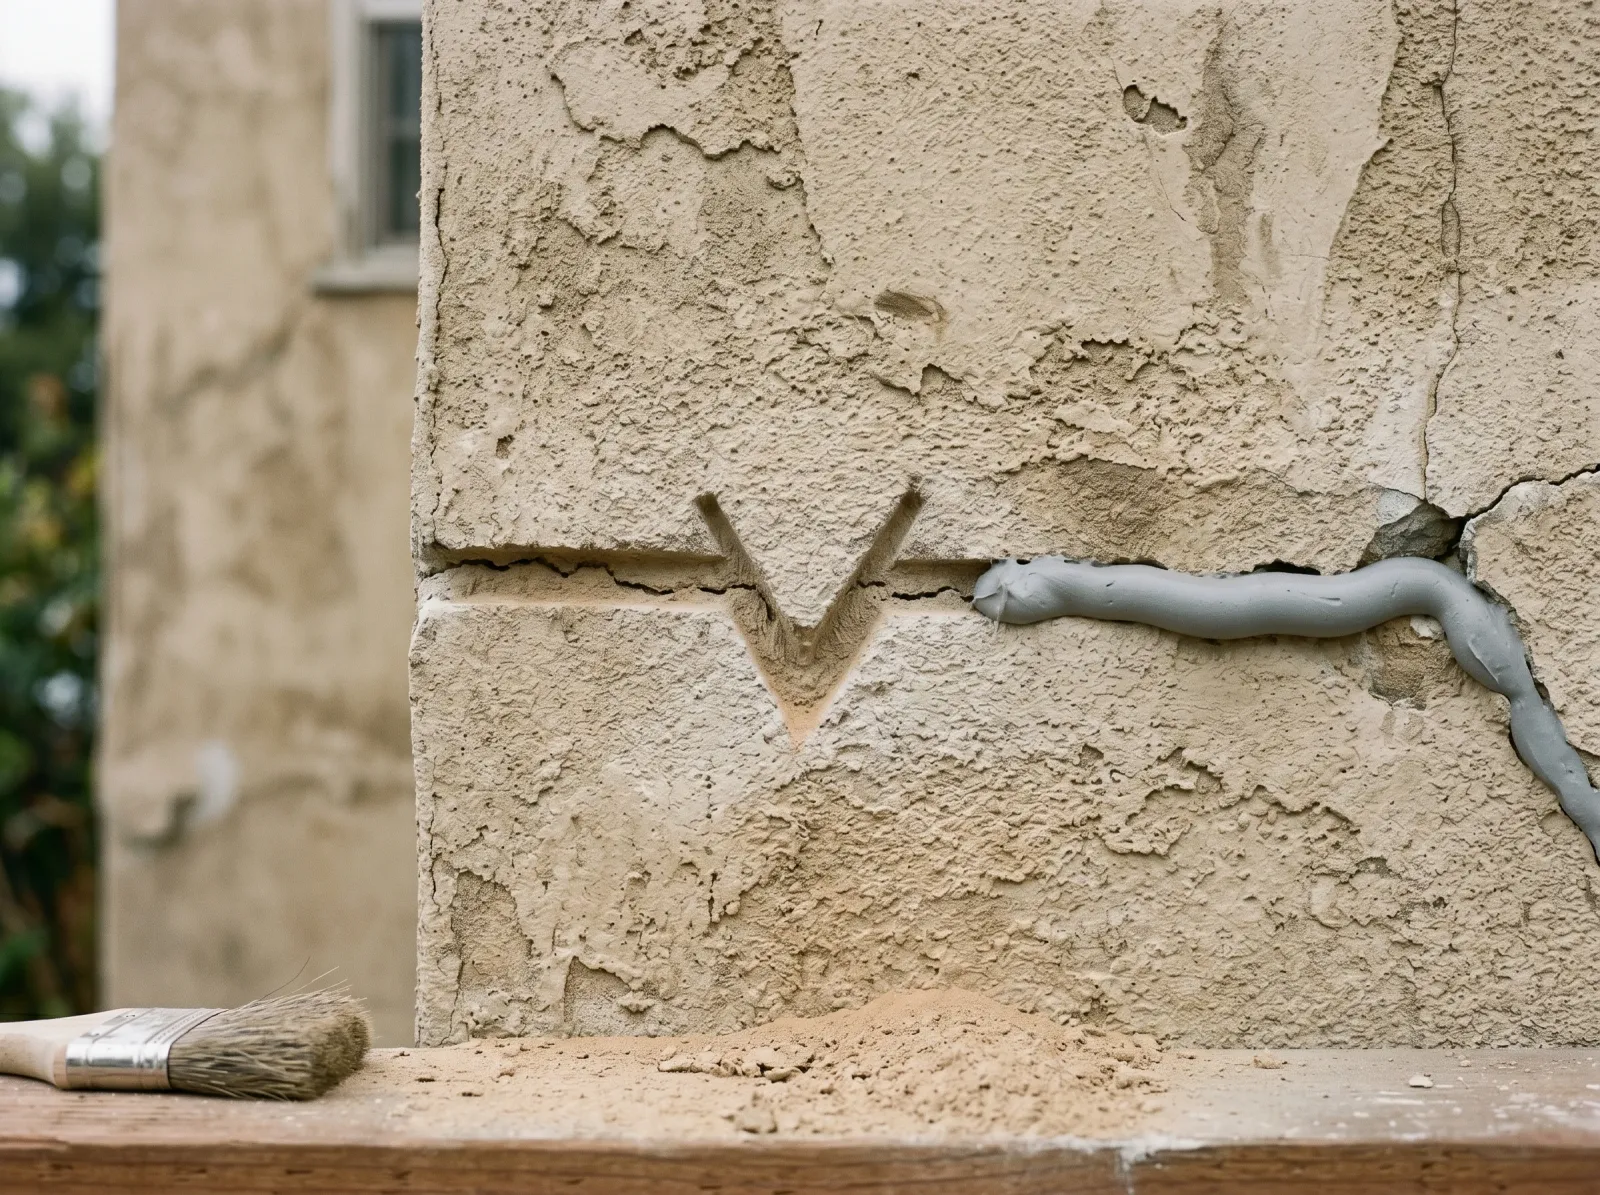 Hairlines get brushed clean. Working cracks get widened into a V so the filler has something to grab.
Brush the crack out with a stiff nylon or wire brush, then blow or vacuum the dust. Filler won’t bond to loose grit.
For anything wider than a hairline, widen it. Run a cold chisel, a 5-in-1, or an angle grinder with a masonry wheel down the crack to cut a small V-groove, maybe 1/4-inch wide. That gives the filler a body to grab instead of a thin line it can’t grip. Brush the dust out again when you’re done.
Wear a P100 respirator and eye protection for this. Cutting cured stucco releases crystalline silica dust, a serious lung hazard. Wet-cut if you can, and never dry-grind silica without a respirator rated for it.
Step 2. Match the Filler to the Crack
This is the step people get wrong.
- Hairlines under a business card’s thickness: skip filler or use a brushable elastomeric crack filler that soaks in. A high-build elastomeric topcoat bridges these on its own.
- Cracks up to 1/4-inch: a flexible sealant. A paintable urethane or elastomeric crack sealant like Quikrete Polyurethane Concrete Crack Sealant, or a textured masonry caulk. Tool it flush, leave it slightly recessed for the texture coat.
- Wider gaps and broken-away chunks: premixed acrylic stucco patch for small areas, cement-based repair mix for larger ones. This dries hard, so only use it where the crack is stable.
The rule: flexible filler in cracks that move, rigid patch in holes that don’t. Put rigid patch over a moving crack and it splits down the middle by next winter. The exterior brick painting guide covers the same logic for masonry.
Step 3. Texture to Match
A filled crack reads as a smooth scar across a textured wall unless you blend it. While the patch is workable, stipple it to match: dab with a sponge for heavy texture, flick with a brush for a sand finish, knock it down with a trowel for a smoother coat. Spray-on stucco patch in a can works for small spots.
Get this close while it’s wet. You can’t add texture once it’s hard without sanding the whole area back.
Step 4. Cure, Then Prime
Cure time is where rushed jobs fail. A premixed acrylic patch is usually paint-ready in 24 to 48 hours. A cement-based repair needs to cure fully, and fresh cement is high-alkaline. Paint it too soon and the alkalinity burns through the binder. Blotchy, peeling patch within a year. Classic alkali burn.
Give cement-based repairs 28 days, or prime with a masonry primer rated for high-pH surfaces, like Sherwin-Williams Loxon Concrete & Masonry Primer. The primer also seals the patch so it doesn’t flash a different sheen than the wall around it.
Step 5. Topcoat With Elastomeric Paint
 Filled, textured to match, and coated. From three feet away the repair disappears.
Two coats. Always two coats. On a wall that has cracked once, use an elastomeric masonry coating, not ordinary flat exterior paint. Elastomeric goes on thick, builds a flexible film many times the thickness of regular paint, and stretches over hairline movement instead of cracking with it. Sherwin-Williams ConFlex, Behr Premium Masonry, and Loxon XP all do this. See the best masonry paint round-up for how they compare on stretch and dirt pickup.
Spot-prime any bare patch, then coat the entire wall plane corner to corner. Coating just the repair leaves a visible rectangle where new meets old.
Common Mistakes
- Rigid patch over a moving crack. Splits down the middle the first cold snap. Flexible sealant in anything that opens and closes.
- Painting cement patch before it cures. Alkali burn, blotching, peeling. Wait 28 days or prime for high pH.
- Skipping the texture match. A smooth filled line on a textured wall catches every bit of side light. Match the finish while the filler is wet.
- Regular flat paint over a cracked wall. Dries rigid, cracks again, telegraphs through. Elastomeric bridges and stretches.
- Patching the face over a rust-stained crack. Traps the water that’s rusting the lath. Find and stop the water first.
- Touching up just the repair zone. Leaves a visible rectangle. Coat the whole wall plane.
Prevention
Most of prevention is keeping water out and giving the wall somewhere to move.
- Keep cracks sealed. A hairline you ignore is the path water takes to rust the lath. Walk the walls every spring and seal new cracks while they’re small.
- Clear the weep screed. The metal flashing at the bottom of the stucco lets the wall drain. Don’t bury it in soil, mulch, or a new patio. A buried weep screed traps water in the wall.
- Direct water away. Downspouts that dump against the foundation soak the base of the stucco and feed cracking and efflorescence. Extend them.
- Re-caulk at penetrations. Around windows, doors, and hose bibs, the caulk backs up your flashing. Renew it yearly with a urethane sealant, not painter’s caulk.
- Recoat with elastomeric on schedule. A good elastomeric coat lasts 7 to 10 years. Recoat before it chalks out and the wall stays sealed.
When to Call a Pro
- Cracks wider than 1/4-inch on a diagonal, or stair-stepping. Possible foundation settlement. Get a structural engineer, not a painter.
- A crack with one side higher than the other. The wall has moved. Structural until proven otherwise.
- A crack that keeps lengthening month to month. Active movement underneath. Patching hides it; the cause keeps working.
- Rust staining plus soft or bulging stucco. The lath is rusting and water is behind the wall. A remediation job, not a caulk job.
- Pre-1978 home with cracked, painted stucco you’d be grinding. That paint may be lead. Test before any grinder touches it and follow EPA RRP practices. See how to fix peeling paint for the lead rules and the right sandpaper for hand prep.
What’ll Bite You in Two Years
Seal a moving crack with rigid patch and it splits again by the second winter, same spot, sometimes wider. Coat a cracked wall with flat paint instead of elastomeric and you’ll see the line ghost through within a season. Stucco is a system. The crack is the wall telling you it moved or that water got in. Fill it flexible, coat it elastomeric, keep the weep screed clear, or you’ll be standing at the same corner with the same caulk gun two springs from now.