How to Fix Wrinkled Paint Film
Wrinkled paint film puckers because the surface skinned over before the coat underneath dried. Diagnose the cause, sand it flat, and recoat thin so it stays smooth.

Wrinkled paint isn’t a bad can of paint. It’s a coat that dried out of order. The surface skinned over while the layer underneath stayed soft, the wet body kept moving, and the dried skin puckered into ridges. Find why it skinned first, or your recoat wrinkles the same way.
Does This Match What You’re Seeing?
Look at the film under side light. The texture tells you which problem you have.
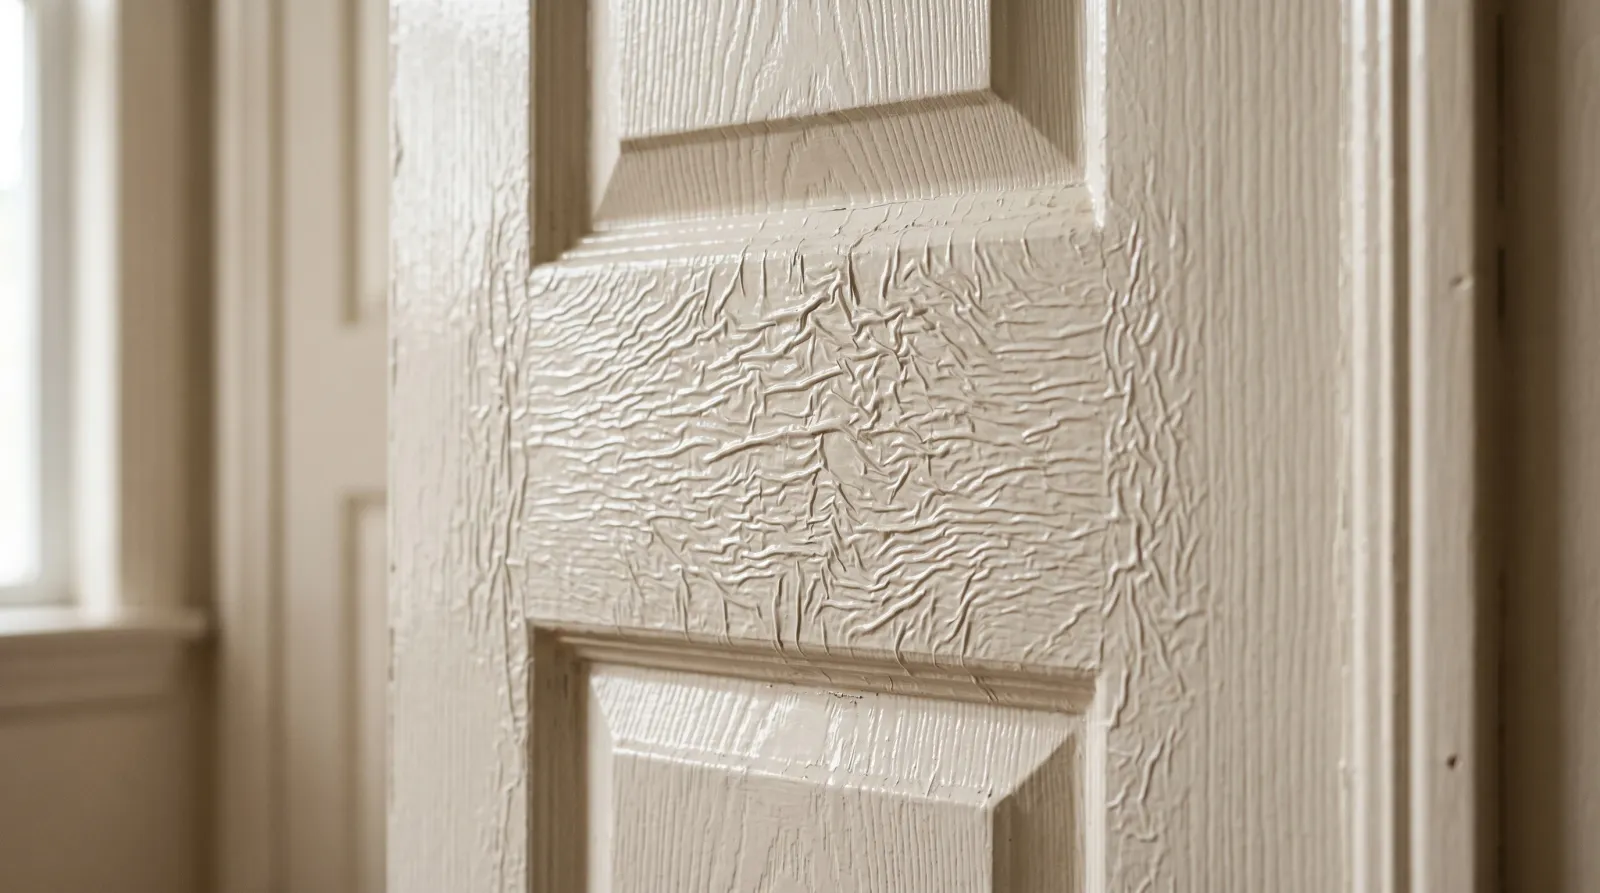
- Fine ridges like dried skin or an orange rind: classic wrinkling. A thick coat skinned over a wet body. Most common on trim, doors, and enamel.
- Deeper folds that feel gummy when you press them: the coat is still curing underneath. It’s not done. Don’t touch it yet.
- Puckering only in the corners and panel recesses of a door: paint pooled thick where the brush dragged it. The flats are fine; the recesses skinned over a puddle.
- A cracked grid with no pucker (alligatoring): old, hard, sun-baked film losing flexibility. Different problem, different page.
- Tiny pinholes or craters, not ridges: solvent popping or contamination, not wrinkling.
If the surface feels hard and the ridges are sharp, the film already cured wrong and you sand it. If it’s soft and tacky, walk away and let it finish.
 Wrinkling on trim: the surface skinned over a coat that was laid on too heavy.
How Serious Is This?
Cosmetic, almost always. The film is bonded and sealing the surface. Nothing bad happens behind a wrinkle the way it does behind peeling or moisture damage.
What makes it a same-weekend fix or a strip job is the depth.
- Shallow ridges on a hard, stuck-down film: sand flat, recoat. Couple of hours per door.
- Deep, soft, lifting wrinkles over most of a panel: strip it. Sanding a gummy coat just gums the paper.
- Wrinkle that comes back after a proper recoat: you painted too thick again, or recoated before the first coat cured. The fix is technique, not product.
Why This Is Happening (root Cause)
Three things cause almost every wrinkle, and they all do the same thing: dry the surface before the body.
Too thick a coat. This is the big one. A heavy load of paint skins over on top while the paint underneath is still full of solvent. The skin sets, the wet layer keeps shrinking and off-gassing, and the dried surface has nowhere to go but up into ridges. Oil and alkyd enamels do this worst because they cure top-down by reacting with air. Lay an enamel on heavy and you’ve built a lid over a liquid.
Recoating too soon. You put the second coat on before the first was dry. Solvent from the fresh coat softens the skin on the old one, the trapped layer moves, and both coats pucker together. The can’s recoat time is a minimum at 70°F and average humidity. In a cold or humid room, double it.
Heat or direct sun. Paint a door in a hot garage or a sunny window and the surface flashes off in minutes while the body stays soft. Same result as a thick coat. The skin sets early over a wet layer.
A fourth cause shows up on trim: an incompatible coating. Fast-drying solvent paint or spray lacquer sprayed over a soft oil enamel will wrinkle the enamel underneath as it bites in. If you’re putting a different paint over an old finish you don’t know, prime first. See the breakdown of how the two systems behave in oil-based vs water-based paint.
Press a fingernail into the film at the edge of the wrinkle. If it dents, the coat is still soft and you’re early. Wait.
The Fix
Step 1. Let It Cure Hard
You can’t sand a soft film. Give it time. A wrinkled oil enamel can take a week or more to cure hard enough to sand, longer in a cold or humid room. Water-based paint moves faster, usually a few days. Resist the urge to scrape it now. Soft paint loads the sandpaper, smears, and tears.
No heat guns, no hair dryers, no box fans on high. Forcing the surface makes the skin worse. The only heat that helps is the heat gun you’d use to strip the film off entirely.
Step 2. Decide: Sand or Strip
Run your hand over the dry wrinkle. Shallow ridges on a film that’s stuck down get sanded. Deep folds, a coat that’s lifting, or wrinkling across most of a panel gets stripped.
For stripping, a heat gun and a carbide scraper clears it, or a paste stripper like Citristrip for areas you can’t get a scraper into. Strip back to the previous sound coat or to bare wood, then treat it like a fresh surface.
Step 3. Sand Flat
For the sand-and-recoat path, start at 120 grit on a sanding block or sponge to knock the ridges down, then step to 220 to smooth. The goal is a flat surface your fingertip can’t feel a ridge across. Don’t gouge into sound paint around the repair; feather the edge so the transition disappears.
Power sanders cut fast and dish out the surface on trim. Hand-sand panels and profiles. A sanding sponge follows a curved door rail better than a flat block. The right paper makes this fast; see the sandpaper rundown for grit and backing.
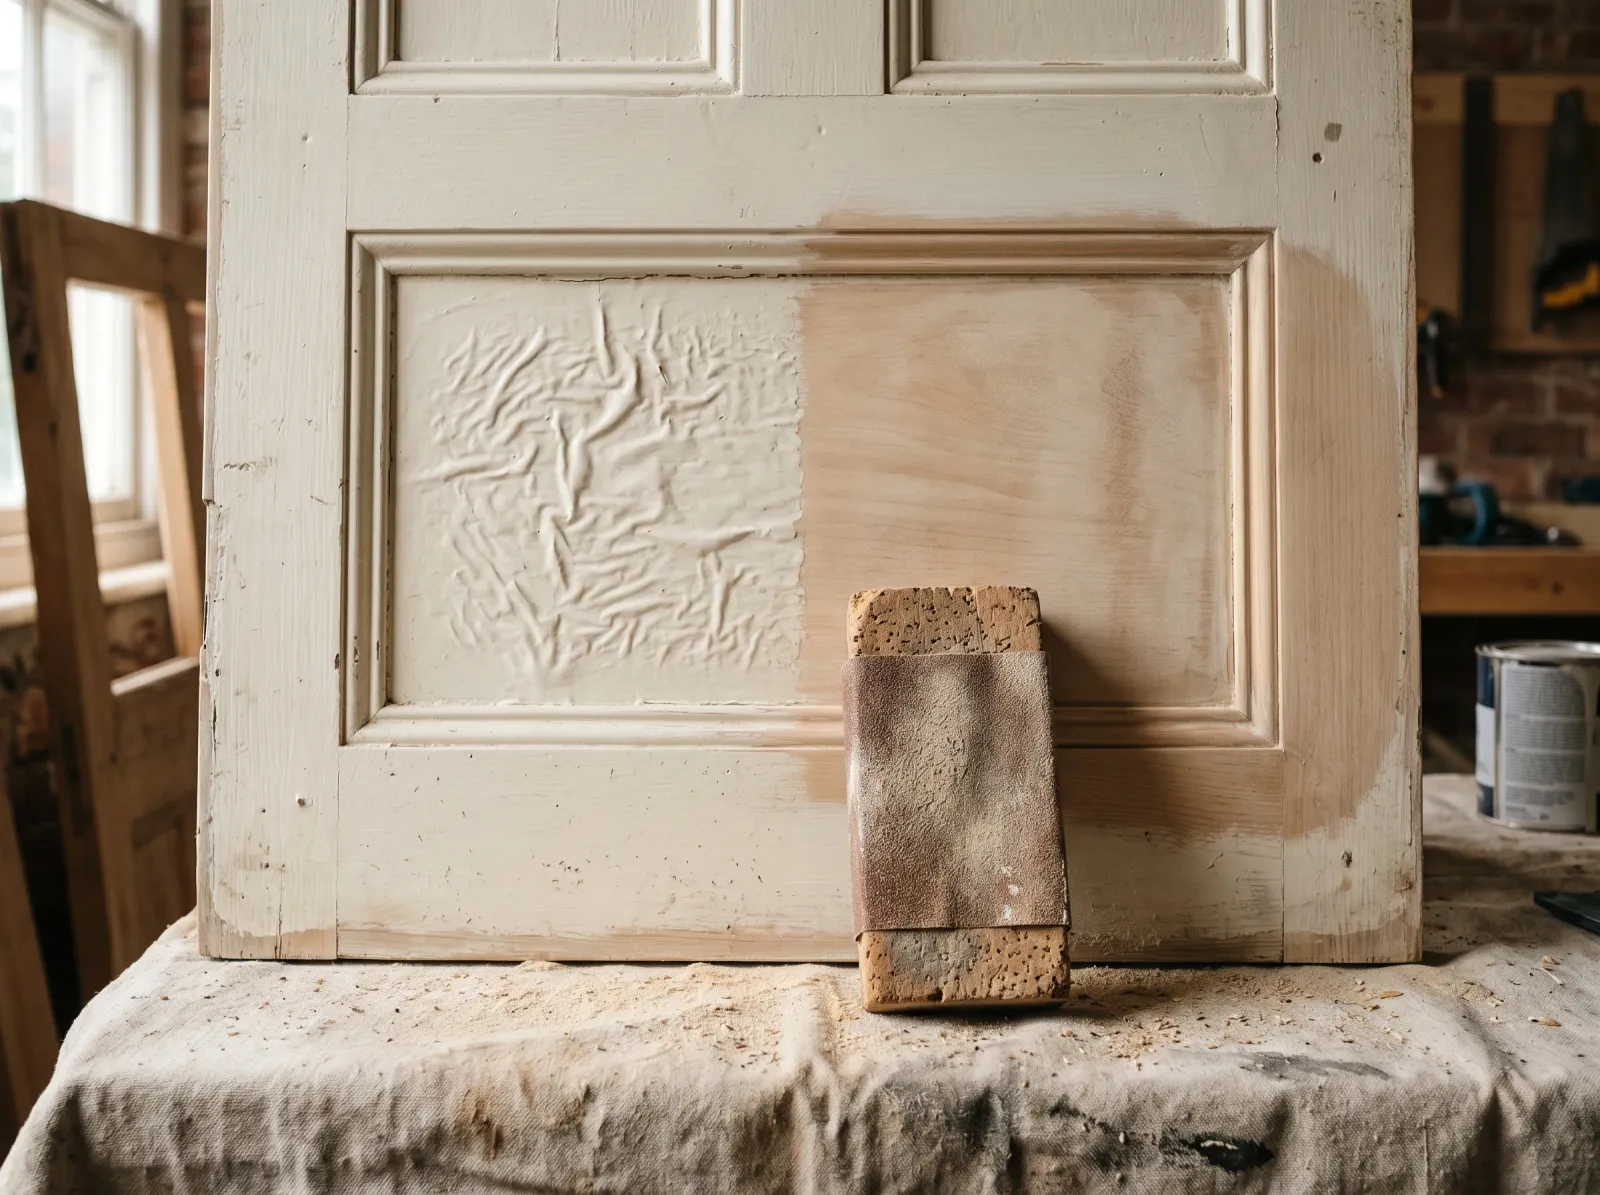 Knock the ridges flat at 120, smooth at 220, until the surface reads flat under raking light.
Step 4. Spot-Prime Bare Spots
Anywhere you sanded down to bare wood or to a different coat, prime it. A bare patch in the middle of painted trim drinks the topcoat into a flat dead spot and you’ll see it. Use a fast-dry bonding primer like Zinsser Bulls Eye 1-2-3 or INSL-X STIX, or Zinsser BIN where you cut down to bare wood with knots or tannin. One thin coat, 20 to 60 minutes dry, then sand lightly at 220.
Step 5. Recoat Thin
This is where you don’t repeat the mistake. Thin coats, not one heavy one. Two thin coats beat one thick coat every time, and they cure in order instead of skinning over a wet body.
On enamels, load the brush light and tip off in one direction. Don’t go back over a setting film to fix a spot; you’ll drag the skin and start a wrinkle. On a roller, a full but not overloaded 1/4-inch or 3/8-inch nap lays a thin even film. Let the first coat dry to the can’s recoat time, and in a cold or humid room give it longer than the label says.
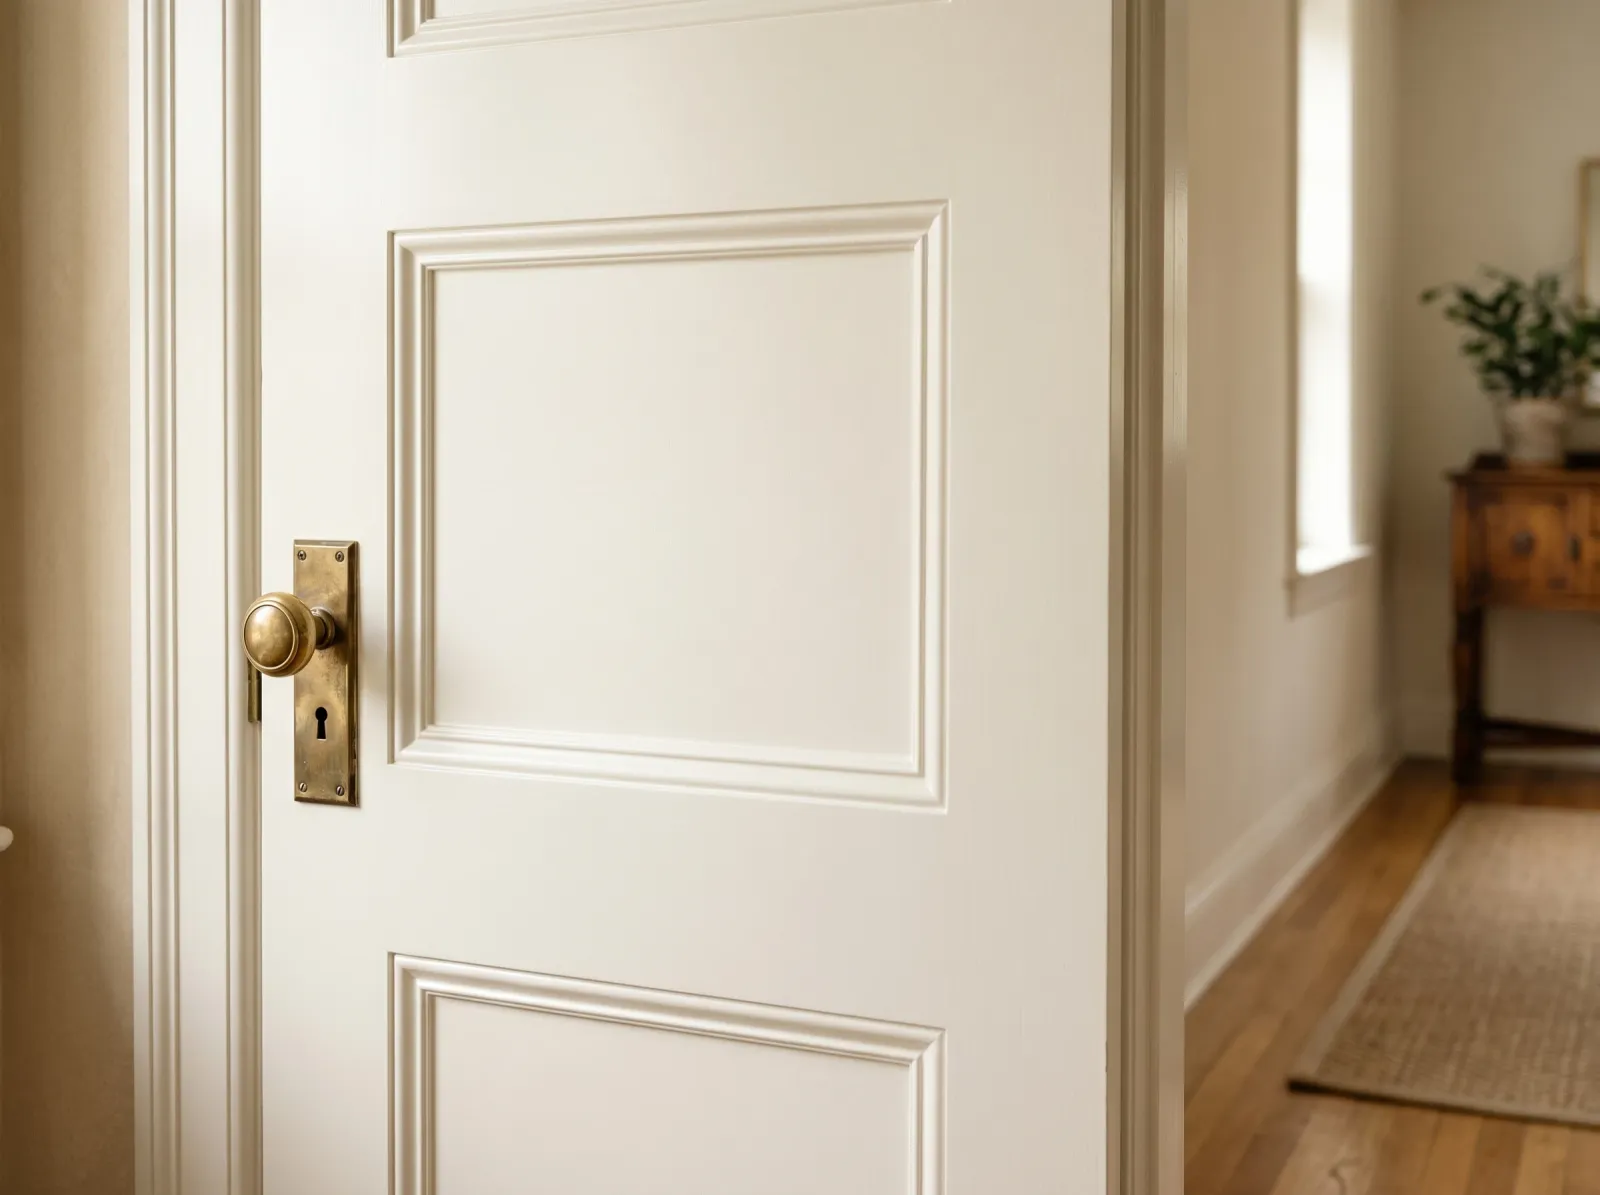 Two thin coats, cured in order, leave the flat finish the heavy coat couldn’t.
Safety
Wear an N95 while sanding cured paint. If the piece predates 1978, the paint underneath may be lead; test with 3M LeadCheck swabs before any sandpaper touches it, and wet-sand under containment if it’s positive. Cross-ventilate while priming and painting, especially with shellac primers and oil enamels. If you’re stripping with a chemical stripper, gloves and eye protection, and never mix a stripper with bleach or ammonia.
Thick Coat vs Other Causes
| What you see | Likely cause | Fix |
|---|---|---|
| Even wrinkle across a flat area | Coat laid on too thick | Sand flat, recoat thin |
| Pucker only in recesses and corners | Paint pooled where the brush dragged | Sand the pooled spots, brush out future coats |
| Both coats wrinkled together | Recoated before first coat dried | Strip or sand, respect recoat time |
| Wrinkle on a hot or sunny day | Surface flashed before body dried | Paint in shade, 50 to 85°F |
| Old enamel puckered under a new finish | Incompatible coating bit in | Strip to sound paint, prime, recoat |
Common Mistakes
- Recoating to “cover” the wrinkle. A coat over a wrinkle copies it and adds another. Sand first, always.
- Sanding too soon. Soft paint smears and clogs the paper. Let it cure hard.
- One thick coat to save time. The thick coat is what wrinkled in the first place. Two thin coats cure in order.
- Heat-gunning a wet wrinkle. Heat skins the surface faster and deepens the pucker. Heat only strips.
- Brushing back over a setting enamel. Dragging a tipped-off film that’s started to skin starts a fresh wrinkle. One pass, then leave it.
Prevention
- Lay it thin. Two thin coats, not one heavy one. The single rule that prevents most wrinkling.
- Respect the recoat time. It’s a minimum at 70°F. Cold or humid room, give it longer than the label says.
- Paint between 50 and 85°F, out of direct sun. A hot garage or a sunny window flashes the surface before the body dries.
- Brush enamels with a light load and tip off once. Don’t flood the brush and don’t keep working a setting film.
- Prime before switching coatings. Fast solvent paint over an unknown old finish wrinkles it. A bonding primer breaks that up. See the best interior trim paint for enamels that level thin without you having to overload the brush.
- Stir, don’t shake, oil enamels. Folded-in air and a heavy hand both push toward a thick, uneven film.
If your wrinkle came with a stippled or tracked surface from the brush or roller, fix that at the same time. The repair paths overlap; see how to fix brush strokes and how to fix roller marks.
When to Call a Pro
- Wrinkling over a large area of trim or cabinetry you’d rather not strip yourself
- A pre-1978 piece that tests positive for lead, where sanding needs containment
- Wrinkling that keeps returning after two careful recoats, which points to a substrate or contamination problem
- A sprayed factory finish on cabinets or furniture that wrinkled and needs to be stripped to bare and refinished
What’ll Bite You in Two Years
If you sand the ridges flat but recoat thick again, you’ve bought yourself the same wrinkle in a different month. The wrinkle was never the paint. It was the order it dried in. Lay it thin, give it time, and the finish stays flat.