How to Repair Chipped Paint on Walls, Trim, and Doors
Feather-sand the chip edge flat, spot-prime the bare spot, fill anything deeper than a fingernail catch, then blend the touch-up. Skip the sanding and you get a raised ring that shows in every sidelight.

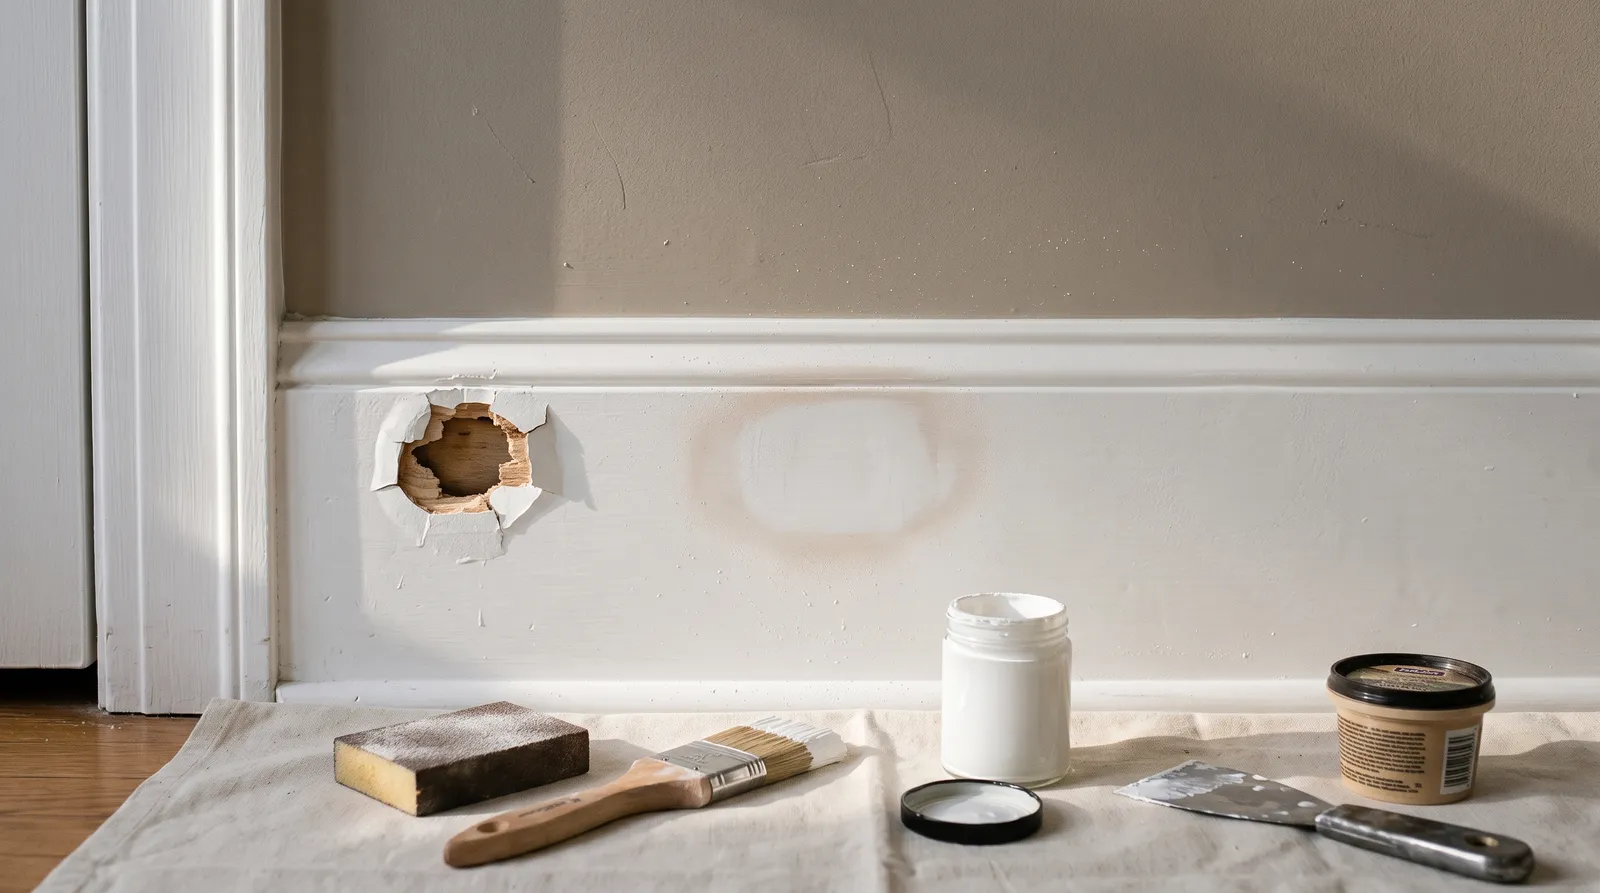
A chip is two problems at once: a hard paint edge sticking up, and a bare spot underneath it. Sand the edge flat, seal the bare spot, then blend the color in. Do it in that order and the repair disappears. Do it out of order and you get a raised ring that shows up every time the afternoon sun hits the wall.
Does This Match What You’re Seeing?
Four patterns cover almost every chipped-paint call. The fix changes depending on which one you have.
- Impact chip. A clean divot with a sharp edge, usually below 3 feet on a wall or on a door casing, stair skirt, or furniture corner. Something hit it. The paint around it is still stuck tight.
- Edge chip. Paint missing from the arris of a door, drawer front, table edge, or window stool. The face is fine; only the corner is losing paint. Film is too thin on the edge to survive contact.
- Flaking chip field. Not one chip — dozens, with lifted edges you can pick with a fingernail. That is not chipping, that is adhesion failure. Different article, different fix.
- Chip with a shadow. A chip that shows a second color underneath, often a glossy oil enamel under latex. The latex never bonded to the gloss. It will keep coming off in sheets.
If you can slide a putty knife under the paint next to the chip and lift more, stop. You are looking at peeling paint, not a chip, and spot-patching it wastes an afternoon. Chips have sound paint all around them. Peeling does not.
How Serious Is This?
Cosmetic in almost every case. A chip on a wall or trim board is a finish problem, not a structure problem.
Two situations are worth taking seriously. First, a chip that exposes bare wood on an exterior door, sill, or window stool. Water gets in through that opening, the wood swells, and by next spring you are dealing with rot instead of a chip. Seal it within a couple of weeks.
Second, a chip in a house built before 1978. Any paint from that era might be lead-based. Do not dry-sand it, do not scrape it dry, and do not let a kid near the dust. Test it first. A $12 swab kit answers the question in three minutes.
Everything else can wait until Saturday.
Why This Is Happening (Root Cause)
Paint chips for one of four reasons. Figure out which one and you will know whether the repair holds.
Impact. The most common and the least interesting. Chair backs, vacuums, door handles, a laundry basket cornering too hard. The paint was fine. Something hit it harder than the film could take.
Thin film on an edge. Paint self-levels away from a sharp corner as it dries. Surface tension pulls it toward the flat. That leaves the very edge of a door, drawer, or table maybe half the mil thickness of the face. Half the thickness, a fraction of the toughness. Every knock takes a chip out. This is why painted furniture chips on edges before it chips anywhere else.
No bond. Latex over unsanded oil enamel. Paint over a wall someone cleaned with a wax-based product. Trim painted over hand oil and dust. The film sits on the surface instead of gripping it. One knock and a chip the size of a quarter lifts clean off with a mirror-smooth back. If the back of the chip is shiny, it never bonded.
Brittle or under-cured film. Cheap flat wall paint has a lot of filler and not much binder. It chips like a cracker. So does any latex applied below 50 degrees, or a hard enamel that was recoated before the first coat cured. Alkyd trim paints keep hardening for weeks; a coat applied over a soft one chips at the first door slam.
Impact you cannot prevent. The other three you can. That matters more than the repair itself.
The Fix
Step 1 — Knock the Edge Down
This is the step people skip and it is the whole job. A chip has a hard, vertical shoulder where the intact film ends. If you paint over that shoulder, the shoulder is still there under the paint, and raking light will find it.
Fold a 220-grit sanding sponge or a scrap of 180-grit paper. Sand across the chip edge in a light circular motion, working outward maybe an inch past the chip in every direction. You want to feather the edge — take the shoulder from a step down to a ramp you cannot feel with a fingertip. Close your eyes and run a finger over it. If you catch anything, keep sanding.
On drywall, go easy. Too much pressure fuzzes the paper face and you have created a bigger patch than the chip was. Light passes, check often.
On high-gloss trim and doors, scuff-sand wider than you think you need. Six inches out in every direction. That gives the touch-up something to grip and softens the sheen ring.
Vacuum the dust, wipe with a barely-damp microfiber, let it dry. Not a wet rag on drywall.
Step 2 — Fill Anything a Fingernail Catches
Shallow chips (paint only, substrate intact) need no filler. Move to step 3.
If your nail drops into the chip, fill it.
On drywall, lightweight spackle for a divot under 1/8 inch, joint compound for anything wider or shallower and dished. Press it in with the corner of a putty knife, drag flush, and let the shrinkage tell you whether you need a second pass. Two thin coats beat one thick coat every time.
On wood trim, doors, and furniture, skip the vinyl spackle. It has no toughness and pops out of a door edge inside a year. Use a solvent-based wood filler such as Minwax High Performance Wood Filler, or a two-part polyester auto-body-style filler for a corner that takes real abuse. Both harden in 20 to 30 minutes and sand like wood instead of like chalk.
For a deep chip on a door edge or a table corner, overfill slightly and sand back flush. Filler shrinks a hair. Fill it flush and you get a dish.
Sand the cured filler with 220-grit until it is level with the surrounding paint, then feather that edge too. Same test — fingertip, eyes closed.
Step 3 — Spot-Prime the Bare Spot
Every bare spot gets primer. Bare wood, bare drywall paper, and bare filler are all thirsty. Topcoat sinks into them, dries duller, and the repair reads as a flat shadow against the wall even when the color is perfect.
Which primer depends on what is showing:
- Bare drywall or spackle: any fast PVA or all-purpose latex primer. Zinsser Bulls Eye 1-2-3 works and dries in an hour.
- Bare wood on trim or a door: a stain-blocking primer. If the wood is pine, fir, or anything with knots, use shellac-based Zinsser B-I-N or an oil-based enamel undercoater. Water-based primer over a knot lets tannin bleed through in about three weeks and you get a yellow halo in your white trim.
- Chip that exposed old glossy enamel: a bonding primer like Stix or an adhesion-grade acrylic. This is the case where the paint chipped because it never gripped.
Apply it with a small artist’s brush or the corner of a 1-inch sash brush. Keep the primer inside the sanded zone. Do not paint a 4-inch primer circle around a pea-sized chip — you have just made a bigger thing to hide.
One coat. Let it dry the full label time, not the time you feel like waiting.
Step 4 — Blend the Touch-Up
Now the color, and this is where most repairs get worse instead of better.
Use the original paint if you still have it. Stir it properly — three minutes, scraping the bottom of the can, not ten seconds of swirling. Settled paint reads a shade off even when it is the exact same product.
Thin it about 10 percent with water (latex) or the label’s recommended solvent. Thinned paint feathers out at the edge instead of stopping in a hard line. That soft edge is what tricks the eye.
Apply it the way the original was applied:
- Rolled wall: use a small 4-inch foam or 3/8-inch nap microfiber roller. Load light, roll the spot, then roll a few inches past it with an almost-dry roller. Matching the stipple texture matters more than matching the color.
- Brushed trim or door: a good 1-inch angled sash brush. Lay it on, tip it off in the direction of the grain, and stop touching it. Overworking a touch-up leaves brush marks that are more visible than the chip was.
- Sprayed cabinet or furniture: you will not blend a sprayed finish with a brush. Touch it up, accept it, or respray the door.
Two thin coats. Let the first one dry fully. A single thick coat sits proud of the surface and shows in sidelight for the life of the paint job.
If the wall paint is more than about two years old, expect the touch-up to read slightly brighter. UV and washing shift wall color. The reliable fix is to cut in and roll the whole wall corner to corner. Annoying but honest — a spot repair on old paint never fully vanishes.
Wall, Trim, Door, or Furniture — What Changes
| Surface | Sand with | Fill with | Prime with | Apply with |
|---|---|---|---|---|
| Drywall wall (flat/matte) | 220-grit, light pressure | Lightweight spackle or joint compound | PVA or all-purpose latex primer | Small foam or microfiber roller |
| Painted trim and casing | 180 then 220-grit | Solvent-based wood filler | Shellac or oil enamel undercoater | 1-inch angled sash brush |
| Interior door face | 220-grit, feather wide | Two-part filler on edges, wood filler on faces | Bonding primer over old gloss | Foam roller, tip off with brush |
| Exterior door or sill | 150 then 220-grit | Two-part polyester filler | Exterior oil or bonding primer | Brush, two coats, seal edges |
| Painted furniture edges | 220-grit by hand only | Two-part filler for corners | Bonding primer (Stix, BIN) | Small brush, then a clear topcoat |
The pattern is simple. The harder the surface gets hit, the tougher the filler and primer have to be. A wall chip and a table-corner chip are the same shape and not remotely the same repair.
Safety and Dust
N95 mask for any sanding, even a small spot. Fine paint and gypsum dust is the kind of thing you notice two hours later.
Pre-1978 building: test before you sand or scrape. If it comes back positive, wet-sand or wet-scrape only, contain the debris on plastic, and follow RRP practice. Dry-sanding lead paint over a hallway carpet is how a small chip repair turns into a real problem.
Shellac primer is alcohol-based. Ventilate, and keep it away from anything with a pilot light. Two-part fillers give off styrene while curing; open a window and do not do a whole door’s worth in a closed bathroom.
Rags with oil-based primer or alkyd paint on them can self-heat. Spread them flat outside to dry, or drop them in a water-filled can with a lid. Do not wad them in a trash bag in the garage.
Recommended Products
Zinsser B-I-N shellac primer for any chip on trim or a door where bare wood is showing. Dries in 20 minutes, blocks knots and tannin cold, and sticks to old glossy enamel better than almost anything else in a quart can. It smells terrible for an hour. Worth it.
Minwax High Performance Wood Filler for chips deeper than a nickel on trim, doors, and furniture edges. Two-part, hardens in about 20 minutes, sands cleanly, and does not shrink out of a deep fill the way lightweight spackle does.
DAP DryDex or 3M Patch Plus for shallow drywall chips. Goes on pink, turns white when it is ready to sand, which takes the guessing out of it.
For the topcoat, use whatever the wall or trim already is. Matching product line matters more than matching brand — an eggshell touch-up on a satin wall shows even at the correct color.
Prevention
Build film thickness on edges. When you paint a door, drawer front, or table, hit the edges first with a light pass, let it set, then do the faces. Two passes on the arris gives you the mil thickness the surface tension keeps stealing.
Scuff-sand old gloss before you recoat it. Every time. A 220-grit pass plus a degreaser wipe is 15 minutes and it is the difference between paint that grips and paint that chips off in sheets. If you would rather not sand a carved profile, a liquid deglosser plus a bonding primer gets you most of the way there — see painting over a glossy finish.
Let enamel cure before it takes abuse. Alkyd and waterborne enamel are dry to touch in hours and fully hard in 7 to 30 days. Reinstall door hardware early or stack chairs against fresh trim and you are pressing dents into soft film.
Choose the right sheen for high-traffic areas. Flat paint in a hallway with kids and a dog will chip and scuff no matter how well you applied it. Eggshell or satin costs the same and takes ten times the punishment.
Keep 1/2 pint of every color in a sealed jar, labeled with the room and the sheen. Not the gallon — a nearly-empty gallon skins over and rusts. A small full jar stays good for years and turns a chip repair into a ten-minute job instead of a color-matching expedition.
Add door stops. Two dollars each. Most wall chips at handle height are one missing door stop.
When to Call a Pro
- Chips that keep coming back in the same spot after a clean, primed repair — the bond failure is under the paint and that section needs stripping.
- Any chipping paint in a pre-1978 home that tests positive for lead, especially on windows and doors where friction keeps generating dust.
- Chips on a sprayed cabinet or furniture finish where the whole door needs a refinish to look right.
- Large fields of chipping on exterior siding or trim — that is coating failure, not chips, and spot-repair is a treadmill.
- Chips exposing wood that is soft, dark, or spongy when you probe it with a screwdriver. That is rot, and filler over rot is just hiding it.
Here is what will bite you in two years. If you fill a deep chip with lightweight spackle on a door edge or a chair rail, it will look perfect on Sunday and it will be a crumbling white crater by the second winter. Vinyl spackle has no toughness. It was built for nail holes. Use real filler on anything that gets touched, and the repair outlives the paint job around it.
Ask a Question