Cracking and Alligatoring — Why Old Paint Looks Like Reptile Skin and How to Fix It
Alligatored paint is a network of cracks, not a peel and not a bubble. Diagnose the cause — paint mismatch, trapped solvent, or age — then scrape, encapsulate, or strip and rebuild so the next coat actually holds.

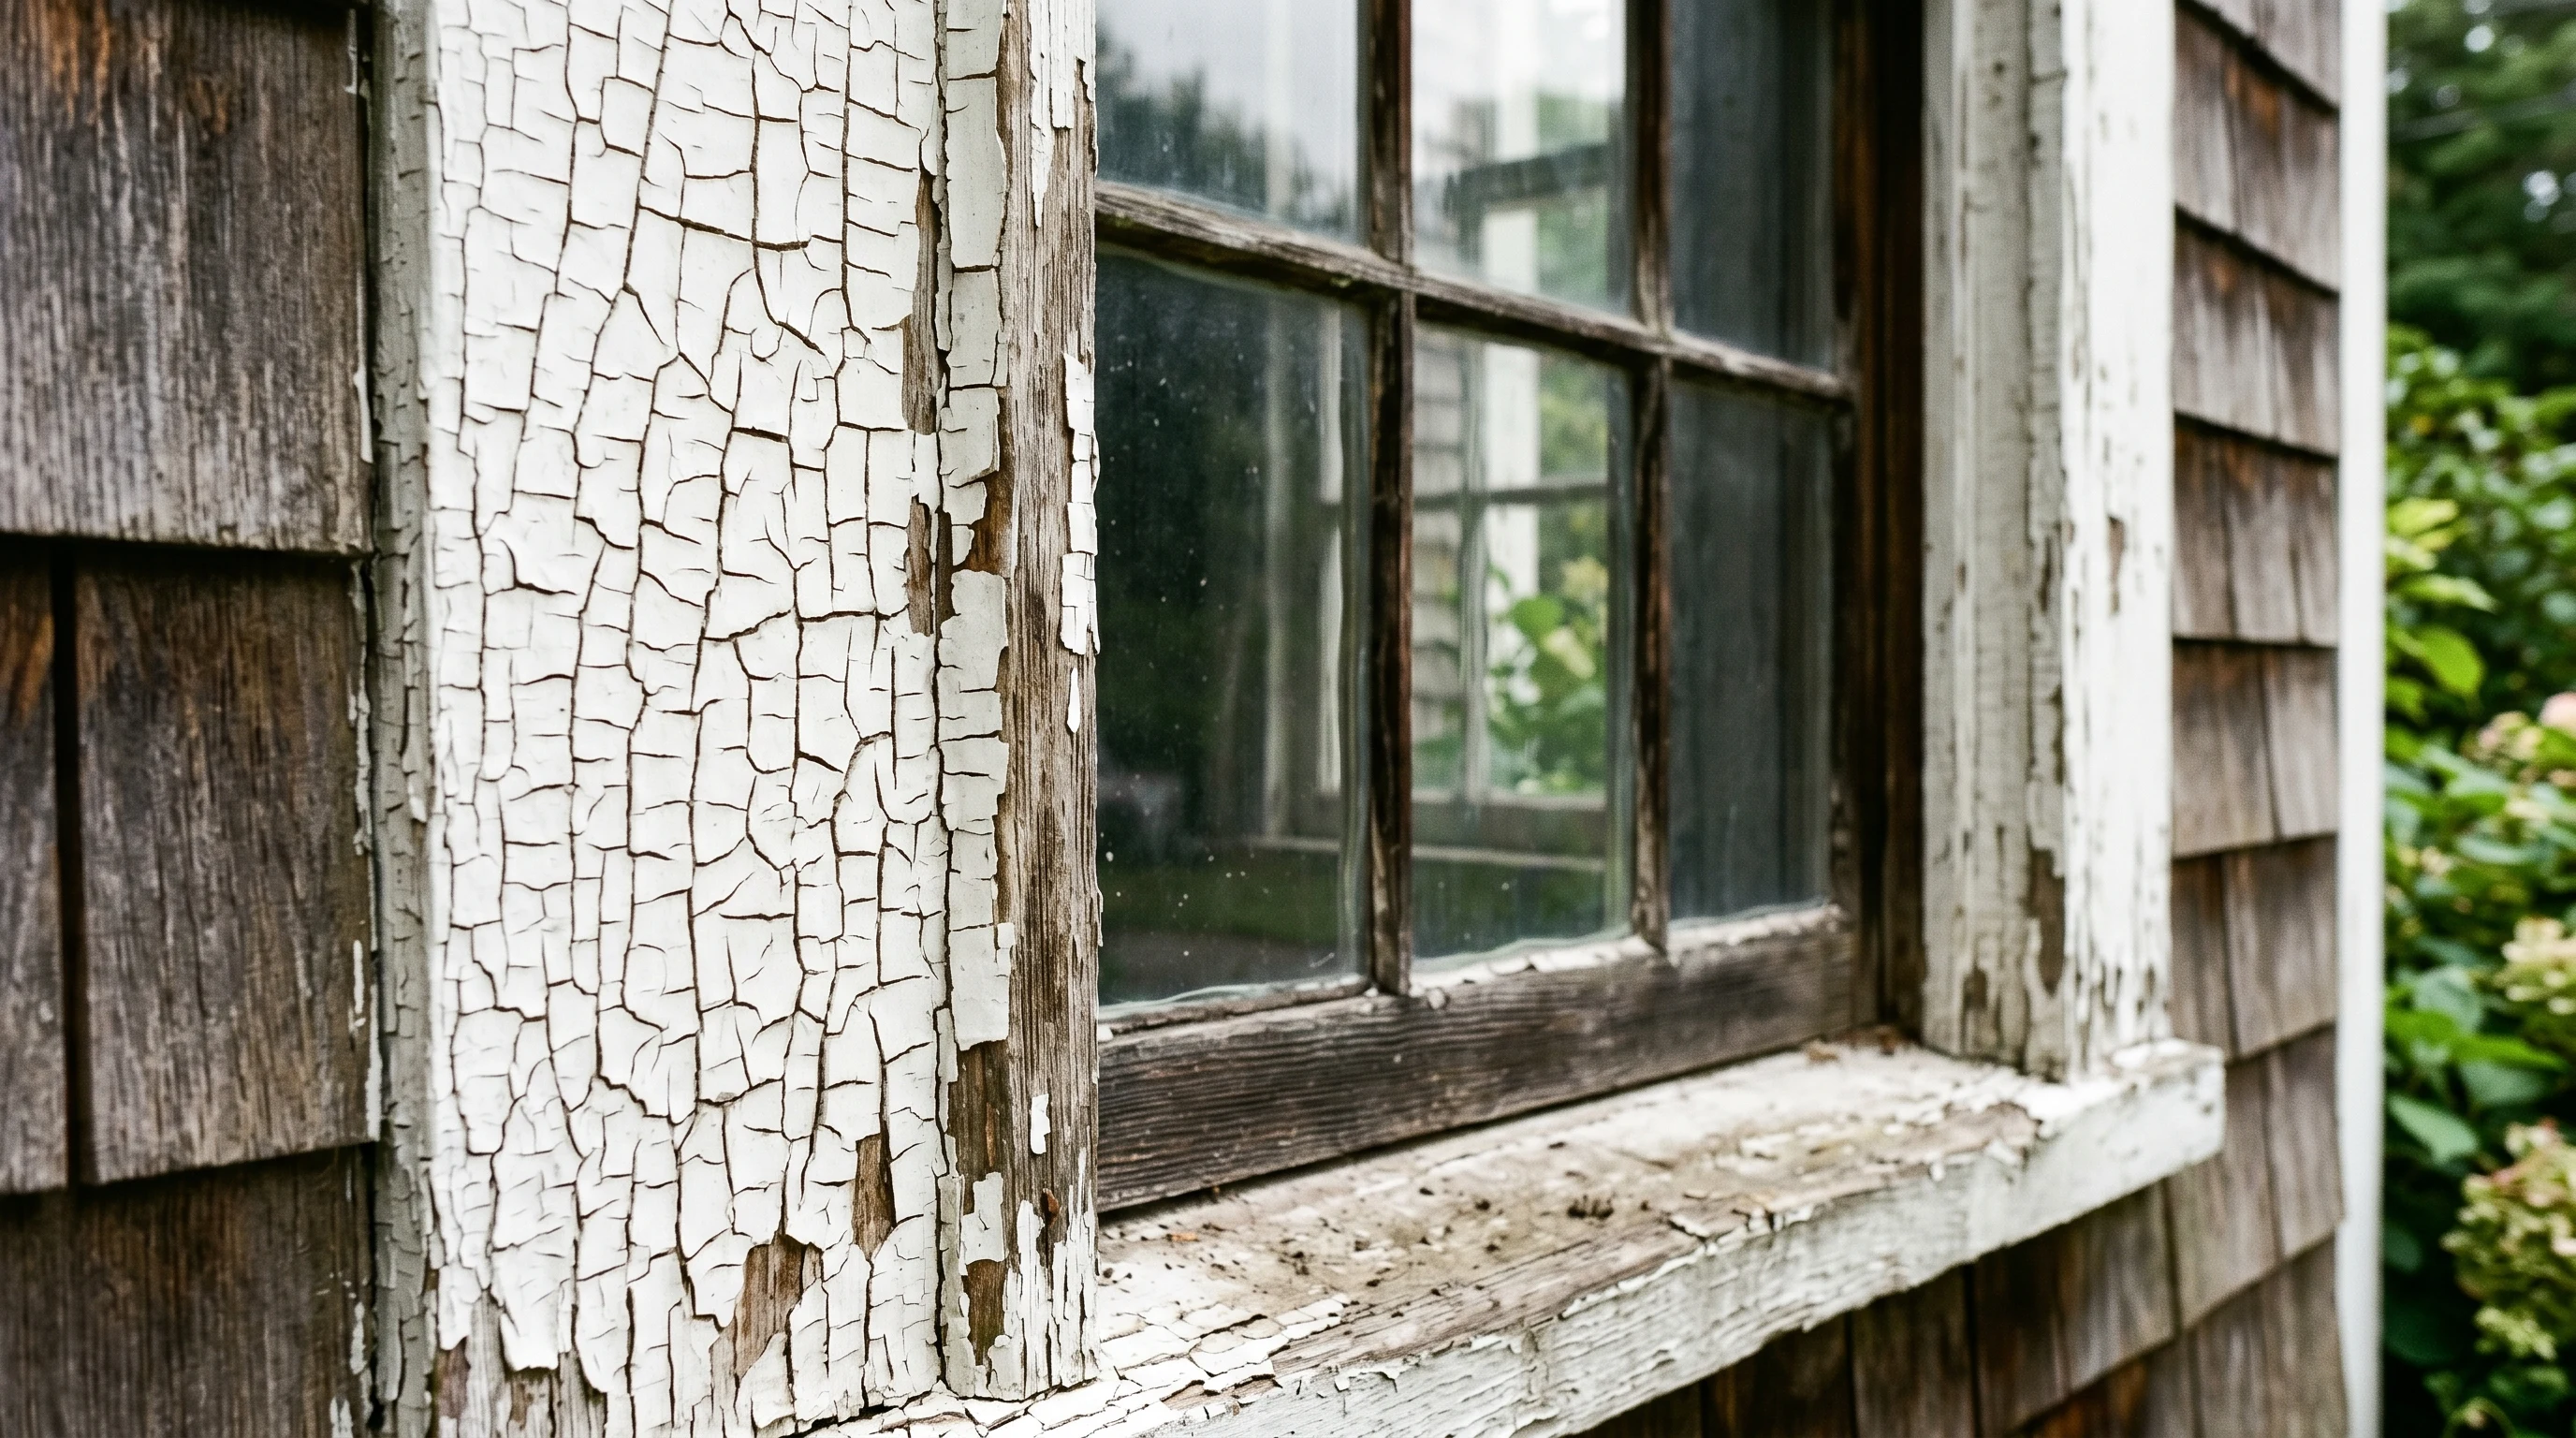
Alligatoring is the film running out of flex. The surface cracked into a grid because the layers underneath stopped moving together. Not peeling yet. The stage before peeling, and what you do here decides whether you fix it once or fix it three times.
Does This Match What You’re Seeing?
The pattern is the diagnosis. Look before you scrape.
- Tight network of cracks across a flat surface, like reptile skin. Classic alligatoring. Old film, lost flexibility.
- Wider, dried-mud map pattern with bigger islands of paint between cracks. Same family, usually a thicker film or more layers stacked.
- Single straight cracks running with the grain or along a seam. Substrate movement, not alligatoring. Caulk and repaint.
- Cracks plus lifted edges curling away. You waited too long. This is alligatoring that’s progressed to peel. See peeling paint.
- Round domes and blisters mixed in. Different failure. Heat or moisture. See paint bubbling.
If the pattern is a network and the film is still bonded flat, you’re in the right article.
How Serious Is This
Cosmetic until it isn’t. A small alligatored area on a fascia is a same-weekend repair. A whole side of a house is a real project. Three triggers push severity up fast.
- Pre-1978 home. Lead until tested. RRP rules apply, scraping creates dust, dust is the hazard.
- Cracks deep enough to expose bare substrate. Water gets in next rain. Wood rots and you’re replacing siding instead of repainting it.
- Heritage trim with hand-routed profiles. Strip-to-bare destroys the detail. Encapsulation is often the right call here even when it’s not the longest-lasting one.
Why Paint Alligators (root Cause)
Three causes account for almost all of it. Ranked by how often they show up on jobsites I’ve worked.
1. Paint over paint mismatch. A rigid old oil film topcoated with a flexible new acrylic. The substrate paint sits still while the topcoat moves on every thermal cycle. The flexible layer pulls against the rigid one until cracks form in the grid pattern. Most common on pre-1990 trim someone freshened up in modern acrylic without stripping.
2. Solvent trap from a rushed recoat. Topcoat went on before the primer cured all the way through. Trapped solvent vaporizes over the following weeks and cracks the surface as it leaves. Mostly a pro-job problem where the painter pushed the recoat window in cool weather. Shows up within months of the repaint, not years.
3. Age plus UV. The film loses flexibility over decades. Resin gets brittle, every thermal cycle stresses what’s left. By year 15 to 20 on a south-facing exterior, the film is glass with paint pigment in it. Universal on south-facing trim, fascia, and door casings on older homes.
The chip test sorts the three. Pop a flake with a putty knife and look at the back under a hand magnifier. Two or more visible layers (often different colors) means mismatch. A single uniform layer with cracks through it means solvent trap or age. The age question answers itself if you know when the paint went on.
Lead-Safe Rule (read This Before Step 1)
Pre-1978 home with cracking paint? Stop. Lead test before you grab the scraper.
3M LeadCheck swabs are sold at any home center for $15. Cut a notch through every layer, swab each one. Positive result means EPA RRP applies: wet-scrape only, plastic containment, P100 respirator, HEPA cleanup, no kids or pregnant women on site, no shop-vac (it spreads dust instead of capturing it). No dry-scraping, no power-sanding without a HEPA-rated tool, no heat guns (heat volatilizes lead). If you’re paying a contractor on a pre-1978 home, federal law says they have to be RRP-certified. Verify the certificate before they pop a can.
Not optional. The rule.
The Fix (by Cause)
The procedure changes with the diagnosis. Don’t run the same one for all three.
If the Cause Is Paint Mismatch
The right answer is to scrape down to bare substrate and rebuild. Anything else is buying yourself another crack pattern in 2 to 4 years.
- Wet-scrape the alligatored area with a 2-inch carbide scraper, 30-degree angle, two-handed. Pre-1978 means plastic on the ground and a HEPA vacuum running.
- Feather the perimeter with 80 grit, then 120, until the edges feel flush under your fingertip.
- Wash with TSP, rinse twice with clean water, dry 24 hours.
- Spot-prime bare wood with Zinsser Cover Stain (oil-based) to lock tannin and seal the substrate. On glossy or chalky surrounding paint, switch to Insl-X Stix as a bonding primer.
- Topcoat in two coats of a modern flexible acrylic exterior. Benjamin Moore Aura Exterior, Sherwin-Williams Duration, or Behr Marquee Exterior. The resin chemistry these use has the flexibility old oil-based didn’t.
The wrong answer is encapsulating mismatch with another flexible coat. The crack pattern returns along the same grid because the rigid layer underneath hasn’t moved.
If the Cause Is Solvent Trap
Smaller fix. The film underneath is bonded and probably sound; only the surface cracked.
- Scrape the affected area to remove the cracked top layer. Don’t chase down to bare; stop when you hit film that won’t lift under tape.
- Sand smooth with 120, then 180.
- Prime with Zinsser B-I-N (shellac). Dries fast, takes any topcoat in 45 minutes, doesn’t trap solvent because shellac doesn’t have any to trap.
- Repaint with the same topcoat. Respect the recoat window on the can in cool weather, double the dry time below 60°F.
If the Cause Is Age
Your goal is to remove the old brittle film and rebuild on a flexible substrate.
- Wet-scrape and sand to bare substrate. Heat guns are out (lead risk on anything pre-1978, and they damage wood). Chemical strippers like Smart Strip work on heritage profiles where scraping would chew the detail.
- Prime bare wood with Zinsser Cover Stain for tannin block. On weathered cedar or chalky surfaces, Zinsser Peel Stop binds the chalk first, then Cover Stain.
- Two coats of a flexible 100% acrylic exterior. BM Aura Exterior, SW Duration, or Behr Marquee Exterior. The new generation of acrylic resins flex through 25 years of thermal cycles where 1980s alkyd cracked at year 12.
If You Have to Encapsulate (heritage or Lead)
When stripping isn’t safe or wrecks the detail, encapsulation is the realistic answer. It’s a 10-year repair, not a 25-year one.
- Scuff-sand with 120 grit using a HEPA-rated sander. Pre-1978 means full RRP containment.
- Spot-prime any bare or chipped areas with Zinsser B-I-N (shellac). B-I-N bonds to brittle aged film and seals the layer underneath.
- Topcoat with a flexible elastomeric. Sherwin-Williams Conflex Elastomeric is the system pick on exteriors; it bridges hairline cracks up to 1/16 inch and stays flexible. Two coats minimum, brushed and back-rolled to work the film into the cracked grid.
Elastomerics aren’t a free pass. They lock moisture in if your wall has a vapor problem, and they need a sound base to bridge over. Not the right call when the substrate is wet or rotting.
Safety
P100 respirator on any pre-1978 surface, N95 minimum on newer. Eye protection during scraping (chips travel). Plastic on the ground and a HEPA vacuum, not a shop vac. Never mix bleach with vinegar, ammonia, or hydrogen peroxide. Toxic chlorine gas. No kids or pregnant women on site during lead-paint work. Wash work clothes separately from the family laundry; lead dust survives a normal wash cycle.
Common DIY Mistakes
- Encapsulating mismatch with another flexible coat. Crack returns along the same grid in 2 to 4 years. Strip and rebuild, or accept you’re in a maintenance loop.
- Skipping the dry window on a primer-topcoat sandwich. New solvent trap, new alligator pattern in months. Cool weather doubles every recoat number on the can.
- Dry-scraping a 1950s window frame. Lead-dust hazard that survives years. Wet-scrape only or hire RRP.
- Heat gun on lead paint. Volatilizes lead, gets in lungs. Heat guns are out on anything pre-1978.
- Cheap acrylic exterior on a stripped fascia. The whole point of stripping was to put a flexible film back. Don’t go bargain-bin on the topcoat.
Recommended Product
Zinsser B-I-N Shellac-Base Primer is the encapsulation primer when stripping isn’t the right call. Bonds to brittle aged film, seals tannin and stain, takes any topcoat in 45 minutes. For mismatch jobs where you’ve stripped to bare wood, Zinsser Cover Stain is the better pick — oil-based, more aggressive bond on bare exterior wood, locks tannin. Match the primer to what’s underneath.
Prevention
- Don’t topcoat oil with acrylic without stripping. Mismatch waiting to crack. If full strip isn’t possible, sand to dull, prime with Insl-X Stix, accept a 5-to-10-year window.
- Respect recoat windows in cool weather. Label number is a floor in warm conditions, not a guarantee at 50°F. Solvent traps form below 60.
- Use modern flexible acrylic on exteriors. BM Aura, SW Duration, Behr Marquee. The resin chemistry has moved past 1980s alkyd.
- Plan a strip on south-facing trim by year 15 to 20. It’s coming. Schedule it instead of chasing crack patches every spring.
When to Call a Pro
- Pre-1978 home with widespread alligatoring. RRP-certified contractor only.
- Whole-house exterior where age is the cause and you don’t own scaffolding.
- Heritage trim with hand-routed profiles where stripping requires chemical work and a steady hand.
- Mold area >10 sq ft alongside the cracking (EPA threshold for professional remediation).
- Cracks deep enough that water is reaching the substrate. Get the rot assessed before any can opens.
What’ll Bite You in Two Years
Encapsulating mismatch is the trap. You roll a flexible coat over a rigid old film, the wall reads good for a season, and 24 to 36 months later the same crack grid shows up through the new paint. I’ve watched homeowners do this twice on the same fascia before they admitted the only fix was a full strip. Three weekends to strip, prime, and repaint properly. One weekend twice to do it the wrong way. Math runs the same direction every time.